# AI Assistant Overview
Source: https://docs.atomcommerce.io/ai-assistant/overview
AI-powered assistant that helps you create, test, and optimize promotions using your store data and business context.
# AI Assistant
Create, test, and optimize promotions with an AI assistant that knows your store. Use everyday language to get help with promotion tasks, test discount scenarios, and make better business decisions.
The AI Assistant understands your products and business data. It suggests options for you to review and approve before making any changes to your store.
## In this section
* [Getting started](#getting-started)
* [What the AI Assistant can do](#what-it-can-do)
* [How it helps](#how-it-helps)
* [Getting the best results](#best-results)
* [Ready to get started](#ready-to-get-started)
## Getting started
Look for the chat icon in your Atom dashboard. The AI Assistant is available 24/7.
## What it can do
Search products, find items by ID, and get pricing details
Create offers, learn discount types, and track performance
Test active discounts and validate conditions
The AI Assistant knows your store inside and out. It can search through all your products by name, type, or collection, find specific items by ID or search terms, and show how your products are organized and grouped. The AI Assistant also gets pricing, descriptions, and availability information, plus converts product names to IDs for promotion setup.
When it comes to promotions, the AI Assistant helps you create and manage offers by showing all your active, scheduled, and expired promotions. It teaches you about different offer types like volume discounts, bundles, and gift-with-purchase campaigns. The AI Assistant reviews what products and rules each promotion uses, checks which promotions are working and which need attention, and tracks your promotion performance and activity over time.
The AI Assistant connects to your Shopify store for testing by accessing your storefront and creating secure testing environments. It can test your active discounts to see exactly how they work with real customer interactions. The AI Assistant also provides contextual guidance by understanding what you're working on right now and remembering where you are in your onboarding journey. It learns your communication style and needs, then provides guidance based on your business type and goals.
## How it helps
New to Atom and overwhelmed by options
Need product names or IDs for promotion setup
Choose the right discount type for your business
If you're new to Atom and overwhelmed by all the options, the AI Assistant guides you through the welcome survey, explains different discount types, and helps you create your first promotion. Simply ask "I'm new to Atom - what should I do first?" or "Help me understand the different types of discounts" to get started.
When you need to create a discount but don't know the exact product names or IDs, the AI Assistant searches through your products, finds items by name or collection, and converts names to the IDs you need. Try asking "Find products with 'coffee' in the name" or "Show me all products in my electronics collection" to locate what you need.
The AI Assistant helps you create compelling promotions by choosing the right promotion type for your business. It can set up volume discounts with "buy more, save more" strategies, create bundle offers that package products together for better value, design gift-with-purchase campaigns that surprise customers with free items, and configure shipping discounts to reduce friction at checkout. The AI Assistant also helps with classic promotional strategies like "Buy X Get Y" campaigns with modern twists.
When your discount isn't working as expected, the AI Assistant tests your promotion conditions, identifies issues, and suggests fixes. It can troubleshoot problems by asking "Why isn't my discount working?" or "Test my promotion and tell me what's wrong." The AI Assistant also shows you advanced discount types, teaches optimization strategies for increasing average order value, and helps you understand which promotions drive the most sales through analytics insights.
## Best results
Ask for exactly what you want with clear details
}>
Request data-driven insights and trends
To get the best results from the AI Assistant, be specific about what you want instead of asking vague questions. Instead of "Help me with discounts," try "Help me create a volume discount for my electronics collection that encourages customers to buy 3+ items." The more specific you are, the better the AI Assistant can help you.
Always ask about your actual products and collections rather than asking general questions. Instead of "What products should I discount?" try "Find products in my 'Winter Sale' collection" or "Show me my most expensive products." This gives the AI Assistant context about your specific store and inventory.
Test your active promotions to make sure they work correctly. Instead of "Is this discount good?" try "Test this promotion" or "Show me how this discount will work with my actual products." This helps you verify your active discounts are working as expected.
## Ready to get started?
Your AI Assistant is already active and ready to help! Simply:
1. **Open the chat** - Look for the chat icon in your Atom dashboard
2. **Ask your first question** - Try "Help me create my first promotion"
3. **Follow the guidance** - The AI Assistant will walk you through everything
4. **Test and verify** - Use the testing features to confirm your active promotions work correctly
5. **Launch with confidence** - Knowing your promotions are properly configured
## Important notes
Your AI Assistant provides helpful guidance and suggestions, but like all AI systems, it can make mistakes. Always verify important information before implementing changes to your store.
Use the testing features to verify your active promotions work as expected. Double-check critical settings like discount amounts, dates, and product selections. Verify product information including names, IDs, and pricing are correct. If something doesn't seem right, reach out to [support@atomcommerce.io](mailto:support@atomcommerce.io) for help.
# Exporting Data
Source: https://docs.atomcommerce.io/analytics/exporting
Learn how to export data from Atom Commerce for external analysis, reporting, and integration with other business systems.
# Exporting Data
This guide explains how to export data from Atom Commerce for external analysis, reporting, and integration with other business systems.
## Data Export Overview
Atom Commerce allows you to export various types of data including:
* Offer performance data
* Customer information
* Campaign results
* Sales and revenue metrics
* Product performance data
## Export Methods
### Standard Export
The standard export feature is available throughout the platform:
1. Navigate to the section containing the data you want to export
2. Look for the "Export" or "Download" button (usually in the top right corner)
3. Select your preferred export format
4. Configure any export options
5. Initiate the export
### Bulk Data Export
For larger datasets or scheduled exports:
1. Go to "Analytics" in the main menu
2. Select "Data Export" from the submenu
3. Choose the data category to export
4. Configure export settings
5. Download the export or set up a scheduled delivery
## Export Formats
Atom Commerce supports multiple export formats to suit your needs:
* **CSV**: Simple tabular format compatible with most applications
* **Excel**: Native Microsoft Excel format with formatting preserved
* **PDF**: Formatted documents ideal for sharing and printing
* **JSON**: Structured data format for technical integrations
## Exporting Specific Data Types
### Offer Data Export
To export offer performance data:
1. Go to "Offers" in the main menu
2. Use filters to select the offers you want to include
3. Click "Export" in the top right
4. Select the metrics to include in your export
5. Choose your export format and download
### Customer Data Export
To export customer information:
1. Navigate to "Customers" in the main menu
2. Filter customers by segment or other criteria if needed
3. Click "Export" in the top right
4. Select the customer data fields to include
5. Choose your export format and download
### Campaign Data Export
To export campaign performance data:
1. Go to "Campaigns" in the main menu
2. Select the campaigns to include
3. Click "Export" in the top right
4. Configure the export settings
5. Download the campaign data
## Advanced Export Options
### Scheduled Exports
For recurring data needs, set up automated exports:
1. Configure your export as usual
2. Click "Schedule this Export"
3. Set the frequency (daily, weekly, monthly)
4. Enter email addresses to receive the export
5. Choose delivery format options
### Custom Data Selection
For more granular control over exported data:
1. Start a new export
2. Click "Advanced Options"
3. Select specific fields and metrics to include
4. Set filtering conditions
5. Choose aggregation and grouping options
### Large Dataset Handling
When exporting very large datasets:
1. Use date range filters to limit the data size
2. Consider using segmented exports
3. Schedule exports during off-peak hours
4. Use compression options for large files
## Data Security Considerations
* Exports may contain sensitive business or customer data
* Ensure exports are stored securely
* Consider anonymizing customer data when appropriate
* Review who has access to exported data
* Check your data handling against privacy regulations
## Integrating with Other Systems
Exported data can be used with:
* Business intelligence tools
* Spreadsheet applications
* External databases
* Marketing platforms
* Custom analysis scripts
## Next Steps
* Learn about [Performance Reports](/analytics/performance) for pre-configured analysis
* Explore [Key Metrics](/analytics/key-metrics) to understand what data to export
# Key Metrics
Source: https://docs.atomcommerce.io/analytics/key-metrics
Understand the key metrics available in Atom Commerce analytics to measure the performance of your promotions and marketing activities.
# Key Metrics
Atom Commerce provides comprehensive analytics to help you understand the performance of your promotions. This page explains the key metrics available on your dashboard.
## Performance Overview
The dashboard provides at-a-glance performance metrics:
* **Active Offers**: Number of currently running promotions
* **Revenue Impact**: Estimated additional revenue generated by your offers
* **Conversion Rate**: Percentage of visitors who make a purchase with an offer
* **Average Order Value (AOV)**: Average amount spent by customers using promotions
## Offer-Specific Metrics
For each offer, you can view:
* **Usage Count**: Number of times the offer has been applied
* **Revenue Generated**: Total revenue from orders using this offer
* **Discount Amount**: Total discount value provided by this offer
* **ROI**: Return on investment for this promotional activity
## Reading Your Analytics Dashboard
The main dashboard provides visualizations of:
1. **Daily Performance**: Charts showing offer usage and revenue impact over time
2. **Offer Comparison**: Visual comparison of different offers' performance
3. **Customer Behavior**: Insights into how customers interact with your offers
## Using Metrics for Decision Making
These metrics can help you:
* Identify your most effective promotions
* Determine optimal discount levels
* Understand customer preferences
* Plan future marketing strategies
## Next Steps
To dive deeper into analytics:
* Explore [Performance Reports](/analytics/performance) for detailed analysis
* Learn about [Exporting Data](/analytics/exporting) for further processing
# Performance Reports
Source: https://docs.atomcommerce.io/analytics/performance
Explore performance reporting capabilities in Atom Commerce to analyze the effectiveness of your promotions and marketing activities.
# Performance Reports
This guide explores the performance reporting capabilities in Atom Commerce, helping you analyze the effectiveness of your promotions and marketing activities.
## Overview of Performance Reports
Atom Commerce provides comprehensive performance reports that help you understand:
* How your offers are performing
* Which customer segments respond best
* The revenue impact of your promotions
* How to optimize future marketing efforts
## Accessing Performance Reports
To access performance reports:
1. Navigate to "Analytics" in the main menu
2. Select "Performance Reports" from the submenu
3. Choose the report type you want to view
## Types of Reports
### Offer Performance Report
This report provides detailed metrics for each offer:
* Usage count
* Revenue generated
* Average order value
* Conversion rate
* Cost of promotion
* ROI (Return on Investment)
To access the Offer Performance Report:
1. Go to Analytics > Performance Reports
2. Select "Offer Performance" from the report options
3. Choose the date range for your analysis
4. Filter by offer type, status, or campaign (optional)
### Campaign Performance Report
This report aggregates data across all offers within a campaign:
* Overall campaign revenue
* Campaign ROI
* Customer acquisition metrics
* Goal completion rates
To access the Campaign Performance Report:
1. Go to Analytics > Performance Reports
2. Select "Campaign Performance" from the report options
3. Choose a specific campaign to analyze
4. Select your preferred metrics and date range
### Customer Segment Performance
This report shows how different customer segments respond to your offers:
* Segment engagement rates
* Revenue by segment
* Offer effectiveness by segment
* Segment growth metrics
To access the Segment Performance Report:
1. Go to Analytics > Performance Reports
2. Select "Segment Performance" from the report options
3. Choose the segments to analyze
4. Compare metrics across different segments
## Customizing Reports
All reports can be customized to show the data most relevant to your needs:
1. Use the "Customize" button at the top of any report
2. Select the metrics you want to include
3. Choose your preferred visualization type
4. Set comparison parameters (e.g., compare to previous period)
5. Save your custom report configuration for future use
## Data Visualization Options
Performance data can be viewed in various formats:
* Line charts (for trends over time)
* Bar charts (for comparisons)
* Pie charts (for proportional analysis)
* Data tables (for detailed figures)
* Heat maps (for segment analysis)
## Exporting Report Data
To export report data for further analysis:
1. Navigate to the report you want to export
2. Click the "Export" button in the top right corner
3. Select your preferred format (CSV, Excel, PDF)
4. Choose to export all data or just the visible portion
5. Download the exported file
## Scheduled Reports
You can set up automated report delivery:
1. Configure a report with your preferred settings
2. Click "Schedule" at the top of the report
3. Set the frequency (daily, weekly, monthly)
4. Enter the email addresses to receive the report
5. Choose the delivery format
## Next Steps
* Learn about [Exporting Data](/analytics/exporting) for more advanced analysis
* Explore [Key Metrics](/analytics/key-metrics) to understand specific performance indicators
# Create Plant
Source: https://docs.atomcommerce.io/api-reference/endpoint/create
POST /plants
Creates a new plant in the store
# Delete Plant
Source: https://docs.atomcommerce.io/api-reference/endpoint/delete
DELETE /plants/{id}
Deletes a single plant based on the ID supplied
# Get Plants
Source: https://docs.atomcommerce.io/api-reference/endpoint/get
GET /plants
Returns all plants from the system that the user has access to
# New Plant
Source: https://docs.atomcommerce.io/api-reference/endpoint/webhook
WEBHOOK /plant/webhook
Information about a new plant added to the store
# Introduction
Source: https://docs.atomcommerce.io/api-reference/introduction
Example section for showcasing API endpoints
If you're not looking to build API reference documentation, you can delete
this section by removing the api-reference folder.
## Welcome
There are two ways to build API documentation: [OpenAPI](https://mintlify.com/docs/api-playground/openapi/setup) and [MDX components](https://mintlify.com/docs/api-playground/mdx/configuration). For the starter kit, we are using the following OpenAPI specification.
View the OpenAPI specification file
## Authentication
All API endpoints are authenticated using Bearer tokens and picked up from the specification file.
```json theme={null}
"security": [
{
"bearerAuth": []
}
]
```
# Budgets
Source: https://docs.atomcommerce.io/budgets/overview
How to set spending limits for your discounts and campaigns.
# Budgets Overview
Budgets in Atom Commerce help you control how much you spend on discounts and promotions. By setting a budget, you can make sure your total discount spend does not go over a set amount.
## What is a Budget?
A budget is a spending limit you assign to one or more offers or campaigns. When the total value of discounts given out reaches the budget limit, Atom Commerce will automatically stop applying those discounts. This helps you avoid overspending and gives you more control over your promotional costs.
## Why Use Budgets?
* **Prevent overspending:** Make sure you never give out more discounts than you planned.
* **Limit fraud risk:** Stop abuse by capping the total value of discounts.
* **Stay on track:** Keep your campaigns within your marketing or finance team's guidelines.
## How Budgets Work
* You can create a budget with a name, description, and a spending limit (daily or lifetime).
* Assign one or more offers to a budget.
* As customers use your offers, Atom Commerce tracks the total value of discounts given out.
* When the budget limit is reached, the assigned offers will automatically stop applying discounts.
## Setting Up a Budget
1. Go to the **Budgets** section in the Atom Commerce dashboard.
2. Click **New Budget**.
3. Enter a name and (optionally) a description for your budget.
4. Set your budget limit (for example, \$10,000).
5. Choose whether the limit is for a specific period (like daily) or for the lifetime of the budget.
6. Assign offers to the budget.
7. Save your budget.
You can view and edit your budgets at any time. The dashboard shows how much of each budget has been used and how much is left.
## Example
If you set a budget of $10,000 for your "Spring Sale" offers, Atom Commerce will keep track of all discounts given out by those offers. Once the total reaches $10,000, the discounts will stop being applied until you increase the budget or reset it.
## Best Practices
* Review your budgets regularly to make sure you’re staying within your planned spend.
* Use budgets for high-value or high-risk campaigns to avoid surprises.
* Adjust your budget limits as your marketing goals or business needs change.
# Creating Campaigns
Source: https://docs.atomcommerce.io/campaigns/creating
Learn how to create and organize marketing campaigns in Atom Commerce to group related offers and track collective performance.
# Creating Campaigns
Campaigns in Atom Commerce help you organize related promotional offers and track their collective performance. This guide walks you through creating and managing marketing campaigns.
## What is a Campaign?
A campaign is a strategic marketing initiative that groups multiple offers together for a specific purpose or time period. Examples include seasonal sales, product launches, or holiday promotions.
## Campaign Creation Process
1. From your dashboard, navigate to "Campaigns" in the main menu
2. Click the "Create New Campaign" button
3. Fill in the campaign details:
* Name and description
* Start and end dates
* Campaign goals and targets
* Budget allocation (if applicable)
4. Click "Create Campaign" to save
## Setting Campaign Goals
When creating a campaign, you can define specific performance goals:
* Revenue targets
* Customer acquisition goals
* Conversion rate objectives
* Average order value targets
These goals will be tracked against actual performance in your campaign analytics.
## Campaign Organization
Campaigns can be organized in several ways:
* **Seasonal Campaigns**: Group offers for specific seasons or holidays
* **Product-Specific Campaigns**: Focus on promoting particular products or categories
* **Customer Segment Campaigns**: Target specific customer groups
* **Promotional Initiatives**: Special events or limited-time offers
## Next Steps
After creating your campaign:
* [Link Offers](/campaigns/linking-offers) to add promotions to your campaign
* Monitor your campaign budget from the campaign details page
* Track performance using the campaign analytics dashboard
# Linking Offers to Campaigns
Source: https://docs.atomcommerce.io/campaigns/linking-offers
Learn how to connect promotional offers to marketing campaigns in Atom Commerce to create cohesive promotional strategies and track collective performance.
# Linking Offers to Campaigns
This guide explains how to connect your promotional offers to marketing campaigns in Atom Commerce, creating a cohesive promotional strategy.
## Benefits of Linking Offers to Campaigns
Connecting offers to campaigns provides several advantages:
* Organize related promotions under a single strategy
* Track the collective performance of multiple offers
* Create themed promotional experiences
* Simplify reporting and analysis
* Ensure consistent messaging across multiple offers
## Ways to Link Offers to Campaigns
You can link offers to campaigns in two ways:
### Linking During Offer Creation
To link an offer while creating it:
1. Start creating a new offer following the standard process
2. In the "Campaign" section, click "Link to Campaign"
3. Select an existing campaign from the dropdown menu
4. If needed, click "Create New Campaign" to make a new one
5. Complete the offer creation process
6. The offer will automatically be associated with the selected campaign
### Linking Existing Offers
To link offers that have already been created:
1. Navigate to "Campaigns" in the main menu
2. Select the campaign you want to add offers to
3. Click the "Linked Offers" tab
4. Click "Add Offers"
5. Select the offers you want to link from the list
6. Click "Add Selected" to link them to the campaign
## Managing Linked Offers
Once offers are linked to a campaign, you can manage them collectively:
### Viewing Linked Offers
To see all offers associated with a campaign:
1. Go to "Campaigns" in the main menu
2. Select the campaign you want to view
3. Click the "Linked Offers" tab
4. View the complete list of offers with key metrics
### Removing Offers from Campaigns
To unlink an offer from a campaign:
1. Navigate to the campaign's "Linked Offers" tab
2. Find the offer you want to remove
3. Click the "Unlink" button next to the offer
4. Confirm the removal
## Campaign-Level Actions
When offers are linked to a campaign, you can perform actions at the campaign level:
### Activating/Deactivating All Offers
To change the status of all offers in a campaign:
1. Go to the campaign details page
2. Click "Actions" in the top right
3. Select "Activate All Offers" or "Deactivate All Offers"
4. Confirm your action
### Scheduling Campaign Offers
To set consistent timing for campaign offers:
1. Go to the campaign details page
2. Click "Schedule Campaign"
3. Set the start and end dates for the entire campaign
4. Choose to apply these dates to all linked offers
5. Save your changes
## Performance Analysis
Linking offers to campaigns enables comprehensive performance analysis:
1. Navigate to the campaign details page
2. View the "Performance" tab for aggregated metrics
3. Compare individual offer performance within the campaign
4. See how offers work together to achieve campaign goals
## Best Practices
* Group related offers that support a common goal
* Ensure consistent messaging across all campaign offers
* Stagger offer start/end times to maintain campaign momentum
* Use a mix of offer types within each campaign
* Review campaign performance holistically
## Next Steps
* Monitor campaign effectiveness using the Performance dashboard
* Review campaign budget allocation and spending in the campaign details
# Channel Integration
Source: https://docs.atomcommerce.io/channels/integration
Learn how to integrate Atom Commerce offers with different marketing and sales channels including Shopify, email platforms, and mobile.
# Channel Integration
This guide explains how to integrate Atom Commerce offers with different marketing and sales channels.
## Shopify Integration
Connect your offers to your Shopify storefront:
### Automatic Integration
By default, Atom Commerce automatically integrates with your Shopify store:
1. Offers appear on product pages based on your configured rules
2. Cart offers display when qualifying conditions are met
3. Checkout promotions activate automatically
### Theme Customization
For advanced Shopify theme integration:
1. Navigate to "Channels" > "Shopify Integration"
2. Select your active theme
3. Choose placement options for offers
4. Save your settings
## Email Platform Integration
Connect your offers to email marketing platforms:
1. Go to "Channels" > "Email Integration"
2. Select your email marketing platform
3. Configure the connection settings
4. Choose which offers can be included in emails
5. Save your settings
## Mobile Integration
Set up your offers for mobile experiences:
1. Navigate to "Channels" > "Mobile Integration"
2. Configure mobile-specific display settings
3. Set up notification rules
4. Save your settings
## Custom Channel Integration
For advanced users, create custom channel integrations:
1. Go to "Channels" > "Custom Integration"
2. Get your API keys and endpoint URLs
3. Follow the developer documentation to implement the custom integration
4. Test the integration before going live
## Next Steps
* Return to [Channel Overview](/channels/overview)
* Learn about [Managing Channels](/channels/managing)
# Managing Channels
Source: https://docs.atomcommerce.io/channels/managing
Learn how to configure and manage promotional channels in Atom Commerce, including storefront and POS channel settings.
# Managing Channels
This guide covers how to configure and manage your promotional channels in Atom Commerce.
## Channel Configuration
Each channel can be configured with specific settings:
1. Navigate to "Channels" in the main menu
2. Select a channel from the list
3. Click "Edit Settings"
4. Configure the channel-specific options:
* Display priority
* Default messaging
* Offer eligibility rules
* Visual presentation options
## Default Channel Types
Atom Commerce supports online and point of sale channel types:
### Storefront
Settings for promotional offers displayed directly in your Shopify store:
* Product page placement
* Cart page offers
* Checkout offers
* Collection page promotions
### POS
Settings for offers that only apply to point of sale locations. You may enable offers
to run only for all POS locations, specific POS locations, or none at all.
# Sales Channels Overview
Source: https://docs.atomcommerce.io/channels/overview
Understand how Atom Commerce channel management controls how offers are distributed across different marketing and sales channels.
# Channel Overview
Atom Commerce's channel management allows you to control how your offers are distributed across different marketing and sales channels.
## What Are Channels?
Channels represent the different platforms and touchpoints where your offers can be presented to customers:
* Store checkout page
* Product pages
* Cart page
* Email marketing
* Mobile app
## Channel Benefits
Managing your offers through channels helps you:
* Create a consistent promotional strategy across platforms
* Track which channels drive the most engagement
* Customize offers for specific customer touchpoints
* Control where and when offers are displayed
## Getting Started with Channels
To start managing your offer channels:
1. Navigate to the Channels section in the main menu
2. Review your existing channel setup
3. Configure channel settings
4. Link offers to appropriate channels
# Creating Coupon Batches
Source: https://docs.atomcommerce.io/coupons/creating
Learn how to create and configure coupon batches in Atom Commerce to generate multiple unique coupon codes for your offers.
# Creating Coupon Batches
This guide explains how to create and configure coupon batches in Atom Commerce.
## What Are Coupon Batches?
Coupon batches allow you to generate multiple unique coupon codes for your offers:
* Share codes through different marketing channels
* Create limited-use coupons for specific campaigns
* Track redemption rates and performance
* Control distribution and expiration
## Creating a New Coupon Batch
### Step 1: Navigate to Coupon Batches
1. Click "Coupon Batches" in the main navigation
2. Select "Create New Batch"
### Step 2: Configure Basic Settings
Fill in the batch details:
1. **Batch Name**: Choose a descriptive name (e.g., "Summer Sale 2023")
2. **Number of Codes**: Specify how many unique codes to generate
3. **Code Format**: Select a format (e.g., alphanumeric, custom prefix)
4. **Code Length**: Choose how long each code should be
### Step 3: Link to an Offer
Connect the coupon batch to a specific offer:
1. Select an existing offer from the dropdown menu
2. Or create a new offer specifically for this coupon batch
### Step 4: Set Distribution Rules
Configure how the coupons can be used:
1. **Usage Limit**: Set how many times each code can be redeemed
2. **Batch Limit**: Set a total redemption limit for the entire batch
3. **Customer Limit**: Restrict to one-per-customer or allow multiple uses
4. **Expiration Date**: Set when the coupons will expire
### Step 5: Generate Codes
1. Review your settings
2. Click "Generate Codes"
3. Wait for the system to create your unique coupon codes
## Coupon Batch Management
After creating your coupon batch:
1. View the list of generated codes
2. Export codes for distribution (CSV or Excel format)
3. Monitor usage statistics
4. Adjust settings if needed
# Coupon Distribution Strategies
Source: https://docs.atomcommerce.io/coupons/distribution
Learn effective ways to distribute coupon codes across email, social media, and in-store channels to maximize impact.
# Distribution Strategies
This guide covers effective ways to distribute your coupon codes to maximize their impact.
## Exporting Coupon Codes
Before distribution, you need to export your coupon codes:
1. Navigate to "Coupon Batches" in the main menu
2. Select the batch you want to distribute
3. Click "Export Codes"
4. Choose your preferred format (CSV or Excel)
5. Download the file containing your codes
## Email Distribution
Send coupon codes directly to customers via email:
### Manual Email Export
1. Export your coupon codes as described above
2. Import the codes into your email marketing platform
3. Create an email campaign with personalized coupon codes
4. Schedule and send the campaign
### Best Practices for Email Distribution
* Craft a compelling subject line mentioning the discount
* Create a sense of urgency with clear expiration dates
* Include simple redemption instructions
* Design a mobile-friendly email template
* Test your emails before sending to your full list
## Social Media Distribution
Share coupon codes on social platforms:
1. Create engaging social media posts highlighting your offer
2. Include redemption instructions
3. Consider using unique tracking codes for each platform
4. Schedule posts at optimal times for your audience
## In-Store Distribution
For businesses with physical locations:
1. Create printed cards or flyers with coupon codes
2. Train staff to distribute codes to customers
3. Include codes on receipts for future purchases
4. Use QR codes that customers can scan
## Strategic Distribution Timing
Maximize impact with strategic timing:
* **Welcome Offers**: Send codes to new subscribers or customers
* **Abandoned Cart Recovery**: Send codes to customers who didn't complete checkout
* **Win-Back Campaigns**: Send codes to previously active customers who haven't purchased recently
* **Holiday Promotions**: Distribute codes before major shopping holidays
* **Birthday Offers**: Send personalized codes on customer birthdays
## Measuring Distribution Success
Track the effectiveness of your distribution channels:
1. Create unique coupon batches for each distribution channel
2. Monitor redemption rates by channel
3. Compare performance metrics
4. Adjust your strategy based on the data
# Managing Coupon Batches
Source: https://docs.atomcommerce.io/coupons/managing
Learn how to effectively manage coupon batches in Atom Commerce, including editing, activating, and tracking redemption history.
# Managing Coupons
This guide explains how to effectively manage your coupon batches in Atom Commerce.
## Coupon Batch Dashboard
The Coupon Batches dashboard provides an overview of all your coupon batches:
1. Navigate to "Coupon Batches" in the main menu
2. View all your coupon batches in one place
3. Sort by name, creation date, or status
4. Filter by active, expired, or pending batches
## Viewing Coupon Details
To view detailed information about a specific batch:
1. Click on the batch name from the dashboard
2. View the batch details page with:
* Usage statistics
* Individual coupon codes
* Distribution history
* Performance metrics
## Editing Coupon Batches
To modify an existing coupon batch:
1. Navigate to the batch details page
2. Click "Edit Batch"
3. Update the available settings:
* Batch name
* Usage limits
* Expiration date
* Linked offer
4. Save your changes
Note: Some settings cannot be changed after coupon codes have been generated.
## Activating and Deactivating Batches
Control whether coupon batches are usable:
1. From the Coupon Batches dashboard, find the batch
2. Toggle the "Active" switch
3. Confirm your action
Deactivated batches will have all codes temporarily disabled until reactivated.
## Extending Expiration Dates
To extend the validity of coupons:
1. Navigate to the batch details page
2. Click "Edit Batch"
3. Update the expiration date
4. Save your changes
## Viewing Redemption History
Track how your coupons are being used:
1. Go to the batch details page
2. View the "Redemption History" tab
3. See detailed information on each code:
* When it was used
* Customer who used it
* Order value
* Applied discount
## Deleting Coupon Batches
To permanently remove a coupon batch:
1. Navigate to the batch details page
2. Click "Delete Batch"
3. Confirm your action
Warning: This action cannot be undone and will invalidate all codes in the batch.
# Customer Data Overview
Source: https://docs.atomcommerce.io/customers/overview
Introduction to customer data management in Atom Commerce and how to leverage customer information for better marketing decisions.
# Customer Data Overview
This guide provides an introduction to customer data management in Atom Commerce and how to leverage this information for better marketing decisions.
## Customer Data Dashboard
The Customer Data dashboard gives you a comprehensive view of your customer base:
1. Navigate to "Customers" in the main menu
2. The overview page displays:
* Total customer count
* New customers (last 30 days)
* Average customer lifetime value
* Customer retention rate
* Customer acquisition trends
## Customer Profile Information
For each customer, Atom Commerce stores and displays:
* Basic information (name, email, phone)
* Order history and value
* Product preferences
* Campaign and offer engagement
* Communication preferences
* Segment memberships
## Viewing Individual Customer Profiles
To access detailed information about a specific customer:
1. Go to the "Customers" section
2. Use the search function to find a customer by name or email
3. Click on a customer to view their complete profile
4. Navigate between tabs to see different aspects of their data:
* **Overview**: Key customer metrics and summary
* **Orders**: Complete order history
* **Engagement**: Offer usage and campaign interaction
* **Preferences**: Product interests and communication settings
## Customer Insights
Atom Commerce automatically generates insights about your customers:
* **Purchasing Patterns**: Frequency, average value, and timing
* **Product Affinities**: Categories and products frequently purchased
* **Offer Response**: Which types of promotions drive purchases
* **Churn Risk**: Identification of at-risk customers
## Data Privacy Compliance
Atom Commerce helps you maintain compliance with privacy regulations:
* Customer data is securely stored
* Privacy preferences are tracked and honored
* Data export and deletion requests can be processed
* Consent management is built into the platform
## Data Integration
Customer data is synchronized from various sources:
* Shopify customer profiles
* Order history
* Marketing campaign interaction
* Website behavior (if tracking is enabled)
## Data Export
You can export customer data for external analysis:
1. Go to the "Customers" section
2. Click "Export" in the top right
3. Select the data fields to include
4. Choose your export format (CSV, Excel)
5. Export the data file
## Next Steps
* Learn about [Customer Segmentation](/customers/segmentation) to target specific groups
* Explore how to [Target Offers](/customers/targeting) to different customer segments
# Customer Segmentation
Source: https://docs.atomcommerce.io/customers/segmentation
Learn how to effectively segment your customer base in Atom Commerce to create targeted marketing campaigns and offers.
# Customer Segmentation
This guide explains how to effectively segment your customer base in Atom Commerce to create targeted marketing campaigns and offers.
## Understanding Customer Segmentation
Customer segmentation is the process of dividing your customers into groups based on common characteristics. This allows you to:
* Create more relevant marketing messages
* Design targeted promotions
* Improve customer experience
* Allocate marketing resources more efficiently
* Increase conversion rates and ROI
## Pre-Built Segments
Atom Commerce provides several pre-built customer segments:
* **New Customers**: Customers who made their first purchase within the last 30 days
* **VIP Customers**: High-value customers based on total spend
* **At-Risk Customers**: Previously active customers who haven't purchased recently
* **One-Time Buyers**: Customers who have made only one purchase
* **Frequent Shoppers**: Customers who purchase regularly
* **Discount-Driven**: Customers who primarily purchase during promotions
## Creating Custom Segments
To create your own customer segments:
1. Navigate to "Customers" in the main menu
2. Select the "Segments" tab
3. Click "Create New Segment"
4. Define your segment criteria using the following options:
### Available Segmentation Criteria
* **Purchase Behavior**:
* Order count
* Total spend
* Average order value
* Last order date
* First order date
* **Product Preferences**:
* Product categories purchased
* Specific products purchased
* Brand preferences
* **Demographics** (if available):
* Location
* Age range
* Gender
* **Marketing Engagement**:
* Offer usage
* Campaign interaction
* Email engagement
## Segment Building Interface
The segment builder allows you to:
1. Combine multiple criteria using AND/OR logic
2. Set specific threshold values
3. Create exclusion rules
4. Preview the segment size as you build
5. Save and name your segment for future use
## Analyzing Segments
Once created, you can analyze each segment:
1. Select a segment from the Segments list
2. View the "Segment Analytics" dashboard
3. Compare key metrics between segments
4. Track segment growth or decline over time
## Using Segments for Marketing
Customer segments can be used in several ways:
* **Targeted Offers**: Create promotions for specific segments
* **Marketing Campaigns**: Tailor campaign messaging to different segments
* **Personalized Content**: Customize the shopping experience
* **Customer Journey**: Design segment-specific customer journeys
## Best Practices
* Start with a clear business objective for each segment
* Keep segment definitions clear and actionable
* Regularly review and update segments as customer behavior changes
* Test marketing approaches with different segments
* Use data-driven insights to refine your segmentation strategy
## Next Steps
* Learn how to [Target Offers](/customers/targeting) to your customer segments
* Explore [Campaign Management](/campaigns/creating) to create segment-specific campaigns
# Targeting Offers to Customer Segments
Source: https://docs.atomcommerce.io/customers/targeting
Learn how to create targeted offers for specific customer segments in Atom Commerce to make promotions more relevant and effective.
# Targeting Offers
This guide explains how to create targeted offers for specific customer segments in Atom Commerce, making your promotions more relevant and effective.
## Benefits of Targeted Offers
Targeting specific customer segments with tailored offers provides several advantages:
* Higher conversion rates
* Improved customer loyalty
* More efficient marketing spend
* Better customer experience
* Increased average order value
* Stronger relationships with different customer types
## Types of Targeted Offers
Atom Commerce supports several targeting approaches:
### Segment-Based Targeting
Apply offers to specific customer segments, such as:
* VIP customers
* First-time buyers
* At-risk customers
* Frequent shoppers
* Location-based segments
### Behavior-Based Targeting
Create offers based on customer behavior patterns:
* Cart abandonment
* Browse history
* Previous purchase categories
* Average order value
* Purchase frequency
### Personalized Offers
Provide individualized offers based on:
* Purchase history
* Product preferences
* Past offer engagement
* Customer lifetime value
## Creating a Targeted Offer
To create an offer targeted to specific customers:
1. Start creating a new offer following the standard process
2. In the "Targeting" section, select "Specific Customers"
3. Choose your targeting method:
* **Segment Selection**: Choose from your saved customer segments
* **Customer List**: Upload or select specific customers
* **Targeting Rules**: Build custom targeting criteria
## Setting Targeting Rules
When creating custom targeting rules:
1. Select the criteria for your target audience
2. Combine multiple conditions using AND/OR logic
3. Set exclusion rules if needed
4. Preview the estimated audience size
5. Save your targeting configuration
## Testing Targeted Offers
Before fully launching a targeted offer:
1. Create a test version with a limited audience
2. Monitor initial performance metrics
3. Gather feedback from the target segment
4. Adjust offer parameters based on early results
5. Scale up to the full target audience
## Measuring Target Offer Performance
To evaluate the effectiveness of your targeted offers:
1. Compare conversion rates to non-targeted offers
2. Analyze segment-specific engagement
3. Track incremental sales generated
4. Measure impact on customer lifetime value
5. Monitor changes in customer behavior
## Best Practices
* Start with well-defined customer segments
* Ensure offers are relevant to each segment's needs and preferences
* Create clear, personalized messaging that resonates with each group
* Set appropriate offer values based on segment value
* A/B test different offers for the same segment
* Continuously refine targeting criteria based on performance data
## Next Steps
* Explore [Analytics & Reporting](../analytics/key-metrics.md) to measure your targeted offers
* Learn about [Campaign Management](../campaigns/creating.md) to organize multiple targeted offers
# Allow Multiple Users Per Order
Source: https://docs.atomcommerce.io/discount-limits/multiple-users-per-order
Control whether the same discount can be applied multiple times within a single order
Quick Summary
Purpose: Controls if the same discount can be used multiple times in one order
Default: Disabled (one discount per order)
Use Case: Managing discount behavior for multiple customers or scenarios
Location: Discount Limits section of offer configuration
## What This Setting Does
The "Allow Multiple Users Per Order" setting controls whether a single discount can be applied multiple times within the same order.
This feature is controlled by the **"Allow Multiple Users Per Order"** checkbox in the Discount Limits section. By default, this checkbox is **unchecked**, meaning each offer can only be applied once per order.
## How It Works
### When Disabled (Default)
* The **"Allow Multiple Users Per Order"** checkbox is **unchecked**
* Each discount can only be applied **once per order**
* Prevents the same discount from being used multiple times
* Helps control discount costs and prevent abuse
### When Enabled
* The **"Allow Multiple Users Per Order"** checkbox is **checked**
* The same discount can be applied **multiple times per order**
* Useful for scenarios where multiple customers should benefit from the same promotion
## Real-World Examples
### Example 1: Family Shopping Scenario
**Scenario:** A parent is shopping for multiple family members and wants to use the same discount for each person.
**Discount:** "20% off any item" (code: FAMILY20)
**With Setting Disabled:**
* Parent adds 3 items to cart
* Discount applies to 1 item only
* **Result:** 20% off 1 item, full price for other 2 items
**With Setting Enabled:**
* Parent adds 3 items to cart
* Discount applies to all 3 items
* **Result:** 20% off all 3 items
### Example 2: Free Gift with Each Purchase
**Scenario:** A customer wants to buy multiple pairs of jeans and get a free gift with each pair.
**Discount:** "Get a free gift with each pair of jeans" (automatic)
**Customer Action:** Buys 3 pairs of jeans (\$150 each)
**With Setting Disabled:**
* Customer adds 3 pairs of jeans to cart
* Discount applies once (1 free gift total)
* **Result:** Customer gets 1 free gift for the entire order
**With Setting Enabled:**
* Customer adds 3 pairs of jeans to cart
* Discount applies 3 times (1 free gift per pair)
* **Result:** Customer gets 3 free gifts (one for each pair of jeans)
### Example 3: Bulk Purchase Scenario
**Scenario:** A customer wants to buy multiple quantities of the same product with a quantity-based discount.
**Discount:** "Buy 2, Get 1 Free" (automatic)
**With Setting Disabled:**
* Customer adds 6 items to cart
* Discount applies once (buy 2, get 1 free)
* **Result:** Customer pays for 4 items, gets 2 free
**With Setting Enabled:**
* Customer adds 6 items to cart
* Discount applies twice (buy 2 get 1 free, then buy 2 more get 1 free)
* **Result:** Customer pays for 4 items, gets 2 free (same result in this case)
## When to Enable This Setting
When one person is shopping for multiple people and each should get the discount benefit
When customers are buying large quantities and should receive multiple discount applications
When you want to maximize customer value for special campaigns
When groups or families are placing orders together
## When to Keep It Disabled
When you need to control discount costs and protect profit margins
When you want to prevent customers from exploiting the same discount multiple times
When you're running straightforward, one-discount-per-order promotions
When you have strict promotional budgets to maintain
## How to Configure
### Step 1: Navigate to Your Offer
1. Go to the Atom admin interface
2. Find the offer you want to configure
3. Click to edit the offer
### Step 2: Locate Discount Limits
1. Scroll down to the **Discount Limits** section
2. Look for the **"Allow Multiple Users Per Order"** setting
### Step 3: Configure the Setting
1. **Check the box** to enable multiple uses per order
2. **Leave unchecked** to limit to one use per order (default)
3. Save your changes
This setting is available for both automatic and code-based offers. The behavior applies regardless of how the discount is triggered.
## Business Impact
### Positive Impacts
* **Higher Customer Satisfaction:** Customers get more value from their purchases
* **Increased Average Order Value:** Customers may buy more to take advantage of multiple discounts
* **Better Customer Experience:** More generous discount policies can improve loyalty
### Potential Risks
* **Higher Discount Costs:** Multiple applications can significantly increase promotional expenses
* **Margin Erosion:** Excessive discounting can impact profitability
* **Budget Overruns:** May exceed planned promotional budgets
## Best Practices
### Testing Your Configuration
1. **Test with small orders** first to verify behavior
2. **Monitor discount costs** after enabling the setting
3. **Track customer behavior** to ensure the setting achieves your goals
### Monitoring Performance
* **Track discount usage** to understand how customers are using the feature
* **Monitor profit margins** to ensure the setting doesn't negatively impact profitability
* **Analyze customer satisfaction** to measure the impact on customer experience
### Strategic Considerations
* **Start conservative:** Begin with the setting disabled and enable only when needed
* **Set clear budgets:** Establish limits on total discount exposure
* **Regular reviews:** Periodically assess whether the setting is meeting your business goals
## Troubleshooting
### Common Issues
**Issue:** Discount isn't applying multiple times even when enabled
* **Solution:** Check that the offer is eligible for multiple applications and that all conditions are met
**Issue:** Unexpected high discount costs after enabling
* **Solution:** Review your discount configuration and consider adding additional limits or conditions
**Issue:** Customers reporting they can't use the discount multiple times
* **Solution:** Verify the setting is properly enabled and communicate the policy clearly to customers
## Related Topics
* [Allow Items to Qualify for Multiple Offers](/discount-limits/qualifier-reuse) - Control qualifier reuse behavior
* [Offer Priority and Stacking](/offers/priority-and-stacking) - How offers are evaluated
* [Creating Offers](/offers/creating-offers) - Learn to create effective offers
* [Discount Limits Overview](/discount-limits/overview) - Complete guide to discount limits
# Discount Limits
Source: https://docs.atomcommerce.io/discount-limits/overview
Control how discounts interact with each other and prevent excessive discount stacking
TL;DR
Multiple Users Per Order: Control whether the same discount can be applied multiple times in a single order
Qualifier Reuse: Control whether items can qualify for multiple different offers
Margin Protection: Prevent excessive discount stacking that could erode profits
Customer Experience: Balance generous promotions with business sustainability
## What are Discount Limits?
Discount limits control how discounts interact with each other in your store. These settings help you balance customer satisfaction with business profitability.
## Key Concepts
### Multiple Users Per Order
Controls whether the same discount can be applied multiple times within a single order.
### Qualifier Reuse
Controls whether items that have already qualified for one offer can also qualify for other offers.
## Why Use Discount Limits?
Prevent excessive discount stacking that could erode your profit margins
Maintain predictable discount costs and avoid unexpected promotional expenses
Balance generous promotions with sustainable business practices
Fine-tune discount behavior for different business scenarios
## When to Use Each Setting
### Enable Multiple Users Per Order When:
* You want the same discount to apply multiple times in one order
* Multiple customers or use cases should benefit from the same promotion
### Enable Qualifier Reuse When:
* You want customers to receive multiple gifts from the same qualifying items
* You're running generous holiday campaigns or special promotions
### Keep Limits Disabled When:
* You need to protect profit margins from excessive discounting
* You want to maintain predictable promotional costs
## Getting Started
1. **Navigate to your offer** in the Atom admin interface
2. **Locate the Discount Limits section** on the offer configuration page
3. **Configure your desired settings** based on your business needs
4. **Test your configuration** to ensure it behaves as expected
## Related Topics
* [Allow Multiple Users Per Order](/discount-limits/multiple-users-per-order) - Detailed guide on managing multiple discount applications
* [Allow Items to Qualify for Multiple Offers](/discount-limits/qualifier-reuse) - Complete guide on qualifier reuse behavior
* [Offer Priority and Stacking](/offers/priority-and-stacking) - How offers are evaluated and applied
* [Creating Offers](/offers/creating-offers) - Learn how to create effective discount offers
## Best Practices
Start with conservative settings (limits enabled) and gradually relax them based on your business performance and customer feedback.
* **Test thoroughly** before launching new discount configurations
* **Monitor performance** to ensure limits are achieving your business goals
* **Consider your margins** when enabling more generous discount behaviors
* **Use analytics** to track the impact of your discount limit settings
# Allow Items to Qualify for Multiple Offers
Source: https://docs.atomcommerce.io/discount-limits/qualifier-reuse
Control whether items that qualified for one offer can also qualify for other offers
Quick Summary
Purpose: Controls if items can qualify for multiple different offers
Default: Disabled (items can only qualify for one offer)
Business Impact: Balances customer satisfaction with margin protection
## What This Feature Does
This feature controls whether items that have already acted as **qualifiers** for one offer can also act as qualifiers for other offers.
This feature is controlled by the **"Allow items to qualify for multiple offers"** checkbox in the Discount Limits section. By default, this checkbox is **unchecked**, meaning items can only qualify for one offer at a time.
### Key Concepts
* **Qualifier**: Items that trigger/activate a discount (e.g., items that meet the "buy X" requirement)
* **Target**: Items that receive the discount (e.g., the free gift or discounted item)
* **Qualifier Reuse**: Allowing the same item to qualify for multiple different offers
## How It Works
### When Unchecked (Default)
* The **"Allow items to qualify for multiple offers"** checkbox is **unchecked**
* Items that qualified for Offer A **cannot** qualify for Offer B
* Only the highest priority offer will apply to qualifying items
* Prevents "double qualifying" scenarios
### When Checked
* The **"Allow items to qualify for multiple offers"** checkbox is **checked**
* Items that qualified for Offer A **can also** qualify for Offer B
* Multiple offers can apply to the same qualifying items
## Real-World Examples
### Example 1: Fashion GWP Offers
**Scenario:** Two Gift With Purchase offers
* **Offer A:** "Buy any dress, get free jewelry" (Priority 1)
* **Offer B:** "Buy any dress, get free handbag" (Priority 2)
**Customer Action:** Buys 1 dress (\$50)
* Dress qualifies for Offer A → Customer gets free jewelry
* Dress cannot qualify for Offer B → Customer does NOT get free handbag
* **Result:** Customer gets 1 gift
* Dress qualifies for Offer A → Customer gets free jewelry
* Dress also qualifies for Offer B → Customer gets free handbag
* **Result:** Customer gets 2 gifts
### Example 2: Beauty Product GWP Offers
**Scenario:** Multiple beauty gift with purchase offers
* **Offer A:** "Buy any skincare product, get free cleanser"
* **Offer B:** "Buy any skincare product, get free moisturizer"
**Customer Action:** Buys 1 skincare product (\$30)
* Skincare product qualifies for Offer A → Customer gets free cleanser
* Skincare product cannot qualify for Offer B → Customer does NOT get free moisturizer
* **Result:** Customer gets 1 free product
* Skincare product qualifies for Offer A → Customer gets free cleanser
* Skincare product also qualifies for Offer B → Customer gets free moisturizer
* **Result:** Customer gets 2 free products
### Example 3: Beauty Product Bundle Offers
**Scenario:** Multiple beauty GWP offers requiring multiple items
* **Offer A:** "Buy 2 skincare products, get free cleanser"
* **Offer B:** "Buy 2 skincare products, get free moisturizer"
**Customer Action:** Buys 2 skincare products
* Only highest priority offer applies
* Customer gets 1 free product
* Both offers apply
* Customer gets both free products
## When to Enable This Feature
When you want customers to receive multiple benefits from the same qualifying items
Special occasions where extra gifts increase customer satisfaction
Competitive advantage through better value propositions
Move multiple product categories simultaneously
## When to Keep It Disabled
Prevent excessive discount stacking that could erode profits
Maintain predictable discount costs and avoid surprises
Avoid complex qualifying scenarios for straightforward promotions
Limit total discount exposure to stay within promotional budgets
## How to Configure
### Step 1: Navigate to Your Offer
1. Go to the Atom admin interface
2. Find the offer you want to configure
3. Click to edit the offer
### Step 2: Locate Discount Limits
1. Scroll down to the **Discount Limits** section
2. Look for the **"Allow items to qualify for multiple offers"** setting
### Step 3: Configure the Setting
1. **Check the box** to allow qualifier reuse (items can qualify for multiple offers)
2. **Leave unchecked** to prevent qualifier reuse (default behavior)
3. Save your changes
This setting works with all offer types including BXGY, BMSM, GWP, Order Discount, and more. The priority system still applies - higher priority offers are evaluated first.
## Business Impact Analysis
### Positive Impacts
* **Higher Customer Satisfaction:** Customers receive more gifts and benefits
* **Increased Average Order Value:** Better value propositions encourage larger purchases
* **Inventory Movement:** Can help clear multiple product categories simultaneously
### Potential Risks
* **Higher Discount Costs:** Multiple offers applying to the same items increases promotional expenses
* **Margin Erosion:** Excessive discounting can impact profitability
* **Budget Overruns:** May exceed planned promotional budgets
## Best Practices
### Testing Your Configuration
1. **Test with simple scenarios** first to verify behavior
2. **Create test orders** with multiple qualifying items
3. **Verify expected outcomes** match your business goals
### Monitoring Performance
* **Track discount costs** after enabling the feature
* **Monitor checkout performance** for any slowdowns
* **Analyze customer behavior** to ensure the feature achieves your goals
### Strategic Planning
* **Start with conservative settings** and gradually enable more generous behavior
* **Set clear budgets** for total discount exposure
* **Regular reviews** to assess whether the feature is meeting business objectives
## Common Use Cases
### Fashion Retail
* Multiple GWP offers on the same qualifying items
* "Buy any dress" promotions that can stack with other dress offers
* Seasonal campaigns with overlapping qualifying criteria
### Beauty & Cosmetics
* Skincare product bundles with multiple free gifts
* Makeup offers that can combine with skincare promotions
* Holiday gift sets with multiple qualifying scenarios
### Electronics
* Accessory bundles with multiple free items
* Device offers that can stack with accessory promotions
* Seasonal sales with overlapping product categories
## Troubleshooting
### Common Issues
**Issue:** Items aren't qualifying for multiple offers even when enabled
* **Solution:** Check that all offers are eligible and that qualifying conditions are met for each offer
**Issue:** Unexpected high discount costs after enabling
* **Solution:** Review your offer configurations and consider adding additional limits or conditions
**Issue:** Performance issues during checkout
* **Solution:** Monitor system performance and consider the complexity of your offer configurations
### Debugging Steps
1. **Verify the setting** is properly enabled in the admin interface
2. **Check offer priorities** to ensure they're configured correctly
3. **Test with simple scenarios** to isolate the issue
4. **Review offer conditions** to ensure they're compatible with qualifier reuse
## Related Topics
* [Allow Multiple Users Per Order](/discount-limits/multiple-users-per-order) - Control multiple discount applications per order
* [Offer Priority and Stacking](/offers/priority-and-stacking) - How offers are evaluated and applied
* [Creating Offers](/offers/creating-offers) - Learn to create effective offers
* [Discount Limits Overview](/discount-limits/overview) - Complete guide to discount limits
## FAQ
**Q: Does this feature affect all offer types?**
A: Yes, this feature works with all offer types including BXGY, BMSM, GWP, Order Discount, and more.
**Q: How does priority work with qualifier reuse?**
A: Priority still applies - higher priority offers are evaluated first. The feature only affects whether items can qualify for multiple offers after the priority evaluation.
**Q: Can I enable this for some offers but not others?**
A: Yes, this setting is configured per offer, so you can have different qualifier reuse policies for different offers.
**Q: What's the performance impact of enabling this feature?**
A: There may be a slight increase in processing time for complex cart scenarios, but it's generally minimal for most use cases.
**Q: How do I know if this feature is right for my business?**
A: Start with the default setting (disabled) and enable it only if you want to provide more generous promotions while being mindful of the impact on your margins and discount costs.
# Code Blocks
Source: https://docs.atomcommerce.io/essentials/code
Display inline code and code blocks
## Basic
### Inline Code
To denote a `word` or `phrase` as code, enclose it in backticks (\`).
```
To denote a `word` or `phrase` as code, enclose it in backticks (`).
```
### Code Block
Use [fenced code blocks](https://www.markdownguide.org/extended-syntax/#fenced-code-blocks) by enclosing code in three backticks and follow the leading ticks with the programming language of your snippet to get syntax highlighting. Optionally, you can also write the name of your code after the programming language.
```java HelloWorld.java theme={null}
class HelloWorld {
public static void main(String[] args) {
System.out.println("Hello, World!");
}
}
```
````md theme={null}
```java HelloWorld.java
class HelloWorld {
public static void main(String[] args) {
System.out.println("Hello, World!");
}
}
```
````
# Images and Embeds
Source: https://docs.atomcommerce.io/essentials/images
Add image, video, and other HTML elements
## Image
### Using Markdown
The [markdown syntax](https://www.markdownguide.org/basic-syntax/#images) lets you add images using the following code
```md theme={null}

```
Note that the image file size must be less than 5MB. Otherwise, we recommend hosting on a service like [Cloudinary](https://cloudinary.com/) or [S3](https://aws.amazon.com/s3/). You can then use that URL and embed.
### Using Embeds
To get more customizability with images, you can also use embeds to add images
```html theme={null}
```
## Embeds and HTML elements
Mintlify supports [HTML tags in Markdown](https://www.markdownguide.org/basic-syntax/#html). This is helpful if you prefer HTML tags to Markdown syntax, and lets you create documentation with infinite flexibility.
### iFrames
Loads another HTML page within the document. Most commonly used for embedding videos.
```html theme={null}
```
# Markdown Syntax
Source: https://docs.atomcommerce.io/essentials/markdown
Text, title, and styling in standard markdown
## Titles
Best used for section headers.
```md theme={null}
## Titles
```
### Subtitles
Best use to subsection headers.
```md theme={null}
### Subtitles
```
Each **title** and **subtitle** creates an anchor and also shows up on the table of contents on the right.
## Text Formatting
We support most markdown formatting. Simply add `**`, `_`, or `~` around text to format it.
| Style | How to write it | Result |
| ------------- | ----------------- | ----------------- |
| Bold | `**bold**` | **bold** |
| Italic | `_italic_` | *italic* |
| Strikethrough | `~strikethrough~` | ~~strikethrough~~ |
You can combine these. For example, write `**_bold and italic_**` to get ***bold and italic*** text.
You need to use HTML to write superscript and subscript text. That is, add `` or `` around your text.
| Text Size | How to write it | Result |
| ----------- | ------------------------ | ---------------------- |
| Superscript | `superscript` | superscript |
| Subscript | `subscript` | subscript |
## Linking to Pages
You can add a link by wrapping text in `[]()`. You would write `[link to google](https://google.com)` to [link to google](https://google.com).
Links to pages in your docs need to be root-relative. Basically, you should include the entire folder path. For example, `[link to text](/writing-content/text)` links to the page "Text" in our components section.
Relative links like `[link to text](../text)` will open slower because we cannot optimize them as easily.
## Blockquotes
### Singleline
To create a blockquote, add a `>` in front of a paragraph.
> Dorothy followed her through many of the beautiful rooms in her castle.
```md theme={null}
> Dorothy followed her through many of the beautiful rooms in her castle.
```
### Multiline
> Dorothy followed her through many of the beautiful rooms in her castle.
>
> The Witch bade her clean the pots and kettles and sweep the floor and keep the fire fed with wood.
```md theme={null}
> Dorothy followed her through many of the beautiful rooms in her castle.
>
> The Witch bade her clean the pots and kettles and sweep the floor and keep the fire fed with wood.
```
### LaTeX
Mintlify supports [LaTeX](https://www.latex-project.org) through the Latex component.
8 x (vk x H1 - H2) = (0,1)
```md theme={null}
8 x (vk x H1 - H2) = (0,1)
```
# Navigation
Source: https://docs.atomcommerce.io/essentials/navigation
The navigation field in docs.json defines the pages that go in the navigation menu
The navigation menu is the list of links on every website.
You will likely update `docs.json` every time you add a new page. Pages do not show up automatically.
## Navigation syntax
Our navigation syntax is recursive which means you can make nested navigation groups. You don't need to include `.mdx` in page names.
```json Regular Navigation theme={null}
"navigation": {
"tabs": [
{
"tab": "Docs",
"groups": [
{
"group": "Getting Started",
"pages": ["quickstart"]
}
]
}
]
}
```
```json Nested Navigation theme={null}
"navigation": {
"tabs": [
{
"tab": "Docs",
"groups": [
{
"group": "Getting Started",
"pages": [
"quickstart",
{
"group": "Nested Reference Pages",
"pages": ["nested-reference-page"]
}
]
}
]
}
]
}
```
## Folders
Simply put your MDX files in folders and update the paths in `docs.json`.
For example, to have a page at `https://yoursite.com/your-folder/your-page` you would make a folder called `your-folder` containing an MDX file called `your-page.mdx`.
You cannot use `api` for the name of a folder unless you nest it inside another folder. Mintlify uses Next.js which reserves the top-level `api` folder for internal server calls. A folder name such as `api-reference` would be accepted.
```json Navigation With Folder theme={null}
"navigation": {
"tabs": [
{
"tab": "Docs",
"groups": [
{
"group": "Group Name",
"pages": ["your-folder/your-page"]
}
]
}
]
}
```
## Hidden Pages
MDX files not included in `docs.json` will not show up in the sidebar but are accessible through the search bar and by linking directly to them.
# Reusable Snippets
Source: https://docs.atomcommerce.io/essentials/reusable-snippets
Reusable, custom snippets to keep content in sync
One of the core principles of software development is DRY (Don't Repeat
Yourself). This is a principle that apply to documentation as
well. If you find yourself repeating the same content in multiple places, you
should consider creating a custom snippet to keep your content in sync.
## Creating a custom snippet
**Pre-condition**: You must create your snippet file in the `snippets` directory.
Any page in the `snippets` directory will be treated as a snippet and will not
be rendered into a standalone page. If you want to create a standalone page
from the snippet, import the snippet into another file and call it as a
component.
### Default export
1. Add content to your snippet file that you want to re-use across multiple
locations. Optionally, you can add variables that can be filled in via props
when you import the snippet.
```mdx snippets/my-snippet.mdx theme={null}
Hello world! This is my content I want to reuse across pages. My keyword of the
day is {word}.
```
The content that you want to reuse must be inside the `snippets` directory in
order for the import to work.
2. Import the snippet into your destination file.
```mdx destination-file.mdx theme={null}
---
title: My title
description: My Description
---
import MySnippet from '/snippets/path/to/my-snippet.mdx';
## Header
Lorem impsum dolor sit amet.
```
### Reusable variables
1. Export a variable from your snippet file:
```mdx snippets/path/to/custom-variables.mdx theme={null}
export const myName = 'my name';
export const myObject = { fruit: 'strawberries' };
```
2. Import the snippet from your destination file and use the variable:
```mdx destination-file.mdx theme={null}
---
title: My title
description: My Description
---
import { myName, myObject } from '/snippets/path/to/custom-variables.mdx';
Hello, my name is {myName} and I like {myObject.fruit}.
```
### Reusable components
1. Inside your snippet file, create a component that takes in props by exporting
your component in the form of an arrow function.
```mdx snippets/custom-component.mdx theme={null}
export const MyComponent = ({ title }) => (
{title}
... snippet content ...
);
```
MDX does not compile inside the body of an arrow function. Stick to HTML
syntax when you can or use a default export if you need to use MDX.
2. Import the snippet into your destination file and pass in the props
```mdx destination-file.mdx theme={null}
---
title: My title
description: My Description
---
import { MyComponent } from '/snippets/custom-component.mdx';
Lorem ipsum dolor sit amet.
```
# Global Settings
Source: https://docs.atomcommerce.io/essentials/settings
Mintlify gives you complete control over the look and feel of your documentation using the docs.json file
Every Mintlify site needs a `docs.json` file with the core configuration settings. Learn more about the [properties](#properties) below.
## Properties
Name of your project. Used for the global title.
Example: `mintlify`
An array of groups with all the pages within that group
The name of the group.
Example: `Settings`
The relative paths to the markdown files that will serve as pages.
Example: `["customization", "page"]`
Path to logo image or object with path to "light" and "dark" mode logo images
Path to the logo in light mode
Path to the logo in dark mode
Where clicking on the logo links you to
Path to the favicon image
Hex color codes for your global theme
The primary color. Used for most often for highlighted content, section
headers, accents, in light mode
The primary color for dark mode. Used for most often for highlighted
content, section headers, accents, in dark mode
The primary color for important buttons
The color of the background in both light and dark mode
The hex color code of the background in light mode
The hex color code of the background in dark mode
Array of `name`s and `url`s of links you want to include in the topbar
The name of the button.
Example: `Contact us`
The url once you click on the button. Example: `https://mintlify.com/docs`
Link shows a button. GitHub shows the repo information at the url provided including the number of GitHub stars.
If `link`: What the button links to.
If `github`: Link to the repository to load GitHub information from.
Text inside the button. Only required if `type` is a `link`.
Array of version names. Only use this if you want to show different versions
of docs with a dropdown in the navigation bar.
An array of the anchors, includes the `icon`, `color`, and `url`.
The [Font Awesome](https://fontawesome.com/search?q=heart) icon used to feature the anchor.
Example: `comments`
The name of the anchor label.
Example: `Community`
The start of the URL that marks what pages go in the anchor. Generally, this is the name of the folder you put your pages in.
The hex color of the anchor icon background. Can also be a gradient if you pass an object with the properties `from` and `to` that are each a hex color.
Used if you want to hide an anchor until the correct docs version is selected.
Pass `true` if you want to hide the anchor until you directly link someone to docs inside it.
One of: "brands", "duotone", "light", "sharp-solid", "solid", or "thin"
Override the default configurations for the top-most anchor.
The name of the top-most anchor
Font Awesome icon.
One of: "brands", "duotone", "light", "sharp-solid", "solid", or "thin"
An array of navigational tabs.
The name of the tab label.
The start of the URL that marks what pages go in the tab. Generally, this
is the name of the folder you put your pages in.
Configuration for API settings.
The base url for all API endpoints. If `baseUrl` is an array, it will enable for multiple base url
options that the user can toggle.
The authentication strategy used for all API endpoints.
The name of the authentication parameter used in the API playground.
If method is `basic`, the format should be `[usernameName]:[passwordName]`
The default value that's designed to be a prefix for the authentication input field.
E.g. If an `inputPrefix` of `AuthKey` would inherit the default input result of the authentication field as `AuthKey`.
Configurations for the API playground
Whether the playground is showing, hidden, or only displaying the endpoint with no added user interactivity `simple`
Learn more about API configuration
Enabling this flag ensures that key ordering in OpenAPI pages matches the key ordering defined in the OpenAPI file.
This behavior will soon be enabled by default, at which point this field will be deprecated.
A string or an array of strings of URL(s) or relative path(s) pointing to your
OpenAPI file.
Examples:
```json Absolute theme={null}
"openapi": "https://example.com/openapi.json"
```
```json Relative theme={null}
"openapi": "/openapi.json"
```
```json Multiple theme={null}
"openapi": ["https://example.com/openapi1.json", "/openapi2.json", "/openapi3.json"]
```
An object of social media accounts where the key:property pair represents the social media platform and the account url.
Example:
```json theme={null}
{
"x": "https://x.com/mintlify",
"website": "https://mintlify.com"
}
```
One of the following values `website`, `facebook`, `x`, `discord`, `slack`, `github`, `linkedin`, `instagram`, `hacker-news`
Example: `x`
The URL to the social platform.
Example: `https://x.com/mintlify`
Configurations to enable feedback buttons
Enables a button to allow users to suggest edits via pull requests
Enables a button to allow users to raise an issue about the documentation
Customize the dark mode toggle.
Set if you always want to show light or dark mode for new users. When not
set, we default to the same mode as the user's operating system.
Set to true to hide the dark/light mode toggle. You can combine `isHidden` with `default` to force your docs to only use light or dark mode. For example:
```json Only Dark Mode theme={null}
"modeToggle": {
"default": "dark",
"isHidden": true
}
```
```json Only Light Mode theme={null}
"modeToggle": {
"default": "light",
"isHidden": true
}
```
A background image to be displayed behind every page. See example with
[Infisical](https://infisical.com/docs) and [FRPC](https://frpc.io).
# Enable the Shopify Checkout Extension
Source: https://docs.atomcommerce.io/fulfillment/checkout-extension
Learn how to enable the Atom Commerce Checkout Extension so discounts can be limited to specific fulfillment methods (e.g. shipping vs. local pickup).
# Shopify Checkout Extension Setup
The **Atom Checkout Extension** allows you to exclude some **fulfillment methods** from being eligible for discounts.\
For example, you can configure an offer to apply for **standard shipping**, but exclude **local pickup**.
Note: This extension adds no visible UI components to checkout — it only enables Atom Commerce to control when discounts apply based on the customer’s chosen fulfillment method.
## Steps to Enable
1. From your Shopify admin, navigate to **Settings → Checkout**.
2. Click **Customize** to open the checkout customization screen.
3. In the left sidebar, select **Apps**.
4. Make sure the **All** tab is selected to see all available extensions.
5. Locate **atom-checkout-delivery** and click the **(+)** icon to add it to Checkout.
6. The extension will appear at the top of the page. It has **no visible elements**, so its position does not matter.
7. Finally, click the **Save** button in the checkout editor to publish your changes.
## Example Use Case
* **Allowed**: Apply a discount when the customer selects *Standard Shipping*.
* **Not Allowed**: Prevent the same discount from applying when the customer selects *Local Pickup*.
This ensures discounts are only used with the fulfillment methods you intend, protecting margins and keeping promotional rules consistent.
***
## Troubleshooting
Make sure the checkout extension is **installed and saved** in Shopify. Without it, Atom Commerce cannot evaluate fulfillment method conditions.
This is expected. The extension only runs logic behind the scenes and does not render UI in checkout.
Double-check that you clicked **Save** in the checkout editor after enabling the extension. Also, if you just enabled your discount, be sure to make a change to items in your cart to ensure the discount is applied.
# Fulfillment Type Exclusions
Source: https://docs.atomcommerce.io/fulfillment/overview
Exclude specific fulfillment methods from discounts, such as pickup in store or local delivery.
# Fulfillment Type Exclusions
On the right-hand side of every discount configuration page, you’ll find a section called **Fulfillment Types**.
By default, **all fulfillment methods** are supported.\
If you want to **exclude certain fulfillment methods** from receiving discounts, you can configure it here.
*The Fulfillment Types section appears on the right side of every discount configuration page, showing checkboxes for different fulfillment methods.*
***
## Requirements
The **Fulfillment Type Exclusions** feature is only available for merchants on **Shopify Plus**.
To enable this feature, you must also set up the **Atom Checkout Extension** in Shopify.\
Without the extension, exclusions cannot be enforced at checkout.
See [Checkout Extension Setup](/fulfillment/checkout-extension) for full setup instructions.
***
## How It Works
* If **no fulfillment types are selected**, the discount applies to **all methods**.
* If you **deselect a fulfillment type**, the discount will **not apply** to that method.
* This makes it easy to exclude specific channels (like *Pickup in Store*) while keeping others eligible.
Fulfillment Type Exclusions let you fine-tune where discounts apply, ensuring promotions only impact the channels you want.
***
## Example
In this example, **Pickup in Store** is left **unchecked**, while **Shipping** and **Local Delivery** remain selected:
*The fulfillment types selection modal shows checkboxes for Shipping, Local Delivery, Pickup in Store, Shipping to Pickup Points, and None (for digital products).*
* ✅ **Shipping** — discount is valid.
* ✅ **Local Delivery** — discount is valid.
* ❌ **Pickup in Store** — excluded, discount will **not** apply.
***
## Available Fulfillment Types
* **Shipping** — Standard shipping methods.
* **Pickup in Store** — Local pickup at a retail location.
* **Local Delivery** — Hand-delivered by staff or courier.
* **Shipping to Pickup Points** — Delivery to lockers or pickup points.
* **None** — Non-physical items (e.g. digital products).
***
## Common Use Cases
* Exclude **in-store pickup** when a promotion is intended only for shipped orders.
* Encourage adoption of **local delivery** by excluding other fulfillment methods.
* Ensure **digital products** aren’t discounted by offers intended for physical inventory.
***
## Troubleshooting
Double-check that you clicked **Save** after selecting fulfillment types. If no types are saved, the default is "all".
Ensure that the **Checkout Extension** is enabled in Shopify settings. Without it, Atom Commerce cannot enforce fulfillment type exclusions during checkout.
See [Checkout Extension Setup](/fulfillment/checkout-extension) for details.
# Dashboard Overview
Source: https://docs.atomcommerce.io/getting-started/dashboard
Learn about the Atom Commerce dashboard and how to interpret key performance metrics and promotional activity data.
# Dashboard Overview
The Atom Commerce dashboard provides a comprehensive view of your store's performance and promotional activities. This guide explains the key elements of your dashboard and how to interpret them.
## Dashboard Layout
The main dashboard is organized into several sections:
1. **Navigation Bar**: Access all main features of Atom Commerce
2. **Performance Summary**: Key metrics at a glance
3. **Active Offers**: Currently running promotions
4. **Recent Transactions**: Latest orders with promotion usage
5. **Revenue Statistics**: Charts showing sales and discount impact
6. **Scheduled Offers**: Upcoming promotions on a calendar view
## Key Performance Metrics
Your dashboard highlights several important metrics:
* **Revenue Impact**: How your promotions are affecting total revenue
* **Offer Usage**: Number of times your offers have been applied
* **Average Order Value**: Average purchase amount with promotions
* **Conversion Rate**: Percentage of visitors who purchase using offers
## Customizing Your View
You can customize your dashboard view:
1. Click the "Customize" button in the top right corner
2. Drag and drop widgets to rearrange them
3. Add or remove metrics based on your preferences
4. Set your preferred date range for data display
## Dashboard Widgets
Each widget on your dashboard serves a specific purpose:
* **Revenue Chart**: Visual representation of sales over time
* **Offer Performance**: Comparison of different offer types
* **Customer Segments**: Breakdown of which customer groups are using offers
* **Calendar View**: Timeline of scheduled promotional activities
## Next Steps
Now that you understand your dashboard:
* Learn about [Navigating the Interface](/getting-started/navigation) to access all features
* Explore [Creating Offers](/offers/creating-offers) to start driving sales
# LLM-Friendly Documentation
Source: https://docs.atomcommerce.io/getting-started/llm-documentation
Learn how to access Atom Commerce documentation in LLM-friendly formats including MCP server and text formats
## LLM-Friendly Docs
The Atom Commerce documentation is available in multiple LLM-friendly formats:
### MCP Server
The Atom Commerce docs are accessible via MCP! The server URL is `https://docs.atomcommerce.io/mcp`.
You can use the Atom Commerce MCP server to search and query our documentation directly from your LLM applications.
### Text Formats
The docs are also available in [llms.txt format](https://llmstxt.org/):
* [llms.txt](https://docs.atomcommerce.io/llms.txt) - A sitemap listing all documentation pages
* [llms-full.txt](https://docs.atomcommerce.io/llms-full.txt) - The entire documentation in one file (may exceed context windows)
Any page can be accessed as markdown by appending `.md` to the URL. For example, this page becomes `https://docs.atomcommerce.io/getting-started/llm-documentation.md`.
# Navigating the Interface
Source: https://docs.atomcommerce.io/getting-started/navigation
Learn how to navigate the Atom Commerce interface efficiently, including main navigation sections and keyboard shortcuts.
# Navigating the Interface
This guide will help you understand how to navigate the Atom Commerce interface efficiently.
## Interface Overview
The Atom Commerce interface is designed to be intuitive and easy to navigate. Here are the key areas:
1. **Main Navigation**: Located on the left side of the screen, this menu provides access to all major sections of the application
2. **Top Bar**: Contains quick access to account settings, notifications, and help resources
3. **Content Area**: The main workspace where you'll interact with data and tools
4. **Action Bar**: Contains contextual actions relevant to your current view
## Main Navigation Sections
* **Dashboard**: Overview of your store's performance and key metrics
* **Offers**: Create and manage promotional offers
* **Campaigns**: Organize your marketing initiatives
* **Customers**: Access customer data and segmentation tools
* **Products**: View and manage your product catalog
* **Analytics**: In-depth reporting and data analysis
* **Settings**: Configure your account and store preferences
## Keyboard Shortcuts
For power users, Atom Commerce offers several keyboard shortcuts to navigate quickly:
* `D` - Go to Dashboard
* `O` - Go to Offers
* `C` - Go to Campaigns
* `S` - Open Search
* `?` - Show all keyboard shortcuts
## Customizing Your View
You can personalize your experience by:
1. Collapsing the side navigation to increase workspace
2. Adjusting the display density in Settings
3. Setting your default landing page
## Next Steps
Now that you understand the navigation:
* Explore the [Dashboard Overview](/getting-started/dashboard) to understand key metrics
* Start [Creating Offers](/offers/creating-offers) to boost your sales
# null
Source: https://docs.atomcommerce.io/getting-started/setup
# First-Time Setup
This guide will walk you through the initial setup process for your Atom Commerce account.
## Overview
To get started with Atom Commerce on Shopify, follow these steps:
1. **Install the Atom Commerce app for Shopify**
Go to [Atom Commerce Connector on Shopify App Store](https://apps.shopify.com/atom-commerce-connector) and click **Add app**.
2. **Complete the onboarding survey and getting started page**
After installation, you'll be directed to a short survey and a getting started page. You can use our built-in AI chat system if you need help.
3. **Enable the Shopify App Embed**
This is the most important step! Enabling the App Embed allows our discount engine to apply discounts to your store. Follow the prompts on the getting started page to turn this on, or just ask our AI assistant for help!
4. **Accessing Atom Commerce after installation**
Once installed, Atom Commerce will always be available under the **Apps** menu in your Shopify Admin. Click **Atom Commerce Connector** to open your Atom Commerce Dashboard.
## Next Steps
Once your store is connected and basic settings are configured, you're ready to Start [Creating Offers](/offers/creating-offers)
## Accessing Your Dashboard
After signing up for Atom Commerce, you'll receive an email with your login credentials and a link to access your dashboard.
## API Integration
To integrate Atom Commerce with your custom storefront or backend:
1. From your dashboard, navigate to "Settings"
2. Select "API Access"
3. Generate an API key and secret
4. Follow the [API documentation](/api-reference/introduction) to connect your application
## Initial Configuration
After setting up API access, configure your integration:
1. **Application Settings**: Set your environment variables and endpoints
2. **User Preferences**: Set your timezone and notification preferences
3. **Team Access**: Invite team members if needed
## Next Steps
Once your API integration is configured, you're ready to:
* Start [Creating Offers](/offers/creating-offers)
* Explore your [Dashboard Overview](/getting-started/dashboard)
* Review the [API Reference](/api-reference/introduction)
# Glossary
Source: https://docs.atomcommerce.io/glossary
Definitions of key terms used throughout the Atom Commerce platform and documentation.
# Glossary
This glossary defines key terms used throughout the Atom Commerce platform and this user guide.
## A
**Active Offer**\
A promotion that is currently running and available to customers.
**Average Order Value (AOV)**\
The average amount spent each time a customer places an order.
## B
**Bundle**\
A type of offer where multiple products are sold together at a discounted price.
**Buy X Get Y (BXGY)**\
A promotion type where customers receive a free or discounted item Y when they purchase a specific product or quantity X.
## C
**Campaign**\
A group of related offers organized around a specific marketing initiative or time period.
**Conversion Rate**\
The percentage of store visitors who complete a purchase.
**Customer Segment**\
A defined group of customers who share common characteristics or behaviors.
## D
**Discount**\
A reduction in price, which can be a fixed amount or a percentage.
**Dashboard**\
The main control panel of Atom Commerce showing key metrics and performance data.
## G
**Gift With Purchase (GWP)**\
A promotion type where customers receive a free item when certain conditions are met, like a minimum purchase amount.
## O
**Offer**\
A promotional rule that provides discounts or other incentives to customers.
**Order Value**\
The total monetary amount of an individual customer order.
## P
**Promotion**\
A marketing activity designed to increase sales or customer engagement.
## R
**Revenue Impact**\
The effect a promotional offer has on overall sales revenue.
**ROI (Return on Investment)**\
A measure of the profitability of a promotion relative to its cost.
## S
**Scheduled Offer**\
A promotion that is set to begin at a future date.
**Shipping Discount**\
A promotion that reduces or eliminates shipping costs.
## T
**Tiered Pricing**\
A pricing structure where the price per unit decreases as the quantity purchased increases.
## V
**Volume Discount**\
A reduction in price based on the quantity of items purchased.
# How to Create Bundle Discounts on Shopify with Atom Volume & Gift Discounts: Complete Merchant Guide
Source: https://docs.atomcommerce.io/guides/bundle-discounts
Master bundle discounts on Shopify with Atom Volume & Gift Discounts. Learn how to create product bundles, fixed-price offers, and advanced bundle strategies to increase average order value and boost sales.
# Boost Your Shopify Sales: Complete Guide to Bundle Discounts Using Atom Volume & Gift Discounts
## What Are Bundle Discounts & Why They Matter for Your Store
Bundle discounts are one of the most powerful **bundle discount strategies** for ecommerce merchants looking to increase average order value and move inventory faster. A **bundle discount** works by offering customers a discount or fixed price when they purchase a specific set of products together (like "shirt + pants + belt") or a specific quantity of items (like "5 t-shirts"). This **bundle promo** strategy encourages customers to buy more items while providing genuine value through curated product combinations.
**Bundle discounts** can increase your average order value by up to 30% and are particularly effective for introducing customers to new products while moving slower-selling inventory. Whether you're running a **product bundle discount**, **fixed-price bundle**, or **advanced bundle offer**, this comprehensive **bundle discounts guide** will show you exactly how to implement these powerful promotions using Atom Volume & Gift Discounts.
**Install from the Shopify App Store** to begin creating bundle discounts today. Start with our free trial and see how bundle discounts can boost your sales!
## Table of Contents
3 Types of Bundle Discounts (with Examples)
How to Create Bundle Discounts in Atom Commerce
Bundle Discount Strategies & Use Cases
Best Practices for Bundle Discounts
Monitoring, Optimization & Growth
Troubleshooting & FAQs
## Why Bundle Discounts Work
Bundle discounts leverage several psychological principles:
Customers feel they're getting a "deal" when items are bundled together
Pre-selected bundles save customers decision-making time
Help move slower-selling items by pairing them with popular products
Naturally encourage customers to buy more items
## Types of Bundle Discounts: Percentage, Fixed Price & Advanced Templates
Atom Volume & Gift Discounts offers three main **bundle discount templates** to suit different business needs. Learn more about [all offer types](/offers/offer-types) available in Atom Volume & Gift Discounts.
Percentage or fixed amount discounts on product bundles
Offer entire bundles at a single, attractive price
Complex scenarios with exclusions and advanced rules
**How it works**: Customers receive a discount (percentage or dollar amount) when they purchase a specified quantity of items from selected collections.
**Example**: "Buy 3+ items from our Summer Collection to get 15% off"
**Real Scenario**: Customer adds Tank Top (USD 25) + Shorts (USD 35) + Sunglasses (USD 20) = USD 80 total
With 15% bundle discount: USD 68 total (saves USD 12)
Best for encouraging customers to buy more items from the same collection with consistent savings.
**How it works**: Customers pay a flat rate for a bundle of products, regardless of individual item prices.
**Example**: "Complete Workwear Bundle: Shirt + Pants + Belt for USD 89.99 (regularly USD 125)"
**Before & After Breakdown**:
* Individual prices: Dress Shirt (USD 45) + Dress Pants (USD 55) + Belt (USD 25) = USD 125
* Bundle price: USD 89.99
* **Customer saves: USD 35.01 (28% discount)**
Best for creating compelling value propositions with clear savings that customers can easily understand.
**How it works**: Full control over bundle conditions, including exclusions, on-sale item handling, and usage limits.
**Example**: "Buy 3+ items from our Professional Collection to get 20% off with a max use of once per order"
**Real Scenario**: Customer adds Blazer (USD 80) + Dress Pants (USD 60) + Tie (USD 30) = USD 170
With 20% advanced bundle discount: USD 136 (saves USD 34)
Note: Excludes clearance items, limited to once per order
Best for complex scenarios where you need precise control over exclusions, stacking rules, and usage limits.
## Understanding Qualifiers and Targets
Bundle discounts in Atom Commerce work with two key concepts:
The items that trigger your bundle discount (what customers must buy)
The items that actually receive the discount (what gets discounted)
In most bundle offers, the qualifiers and targets are the same items. For example, in "Buy 3 shirts, get 15% off," the 3 shirts are both the qualifiers (triggering the discount) and the targets (receiving the discount).
## Bundle vs Other Offer Types
**Bundles** are different from other Atom Commerce offer types:
Discount the same items you're buying
**Example**: Buy 3 shirts, get 15% off the shirts
Get a different item for free/discounted
**Example**: Buy 2 shirts, get 1 scarf free
About specific product combinations
**Example**: Complete outfit bundle
About quantity thresholds
**Example**: Buy 3+ items, save 10%
About product sets
**Example**: Shirt + Pants + Belt bundle
Adds a free gift to qualifying orders
**Example**: Spend \$100, get free tote bag
## How to Create Bundle Discounts in Atom Commerce: Step-by-Step Setup Guide
For a general overview of creating offers, see our [Creating Offers](/offers/creating-offers) guide.
1. Navigate to your Atom Commerce dashboard
2. Click **Offers** in the left menu
3. Click **Create New Offer** in the top right corner
Select **Bundles** from the offer type options. This will give you access to:
For discount-based bundles
For set-price bundles
For complex scenarios with exclusions
Give your offer a clear, compelling name that customers will see in their cart. This will be the discount name that appears during checkout.
Choose a name that clearly communicates the value, like "Summer Collection Bundle" or "Professional Attire Package"
Set your start date/time and optionally an end date. Your offer will automatically activate and deactivate based on these settings.
The start and end dates follow your browser's time zone. Plan promotions around peak shopping periods for maximum impact.
Decide how customers access the bundle discount:
Applies automatically when conditions are met
Customers enter a code at checkout
Distribute via coupon codes
**Automatic** is recommended for bundles as it provides the smoothest customer experience. Use **Discount Code** for campaigns and **Coupon Batch** for marketing distribution.
Choose which products or collections trigger your bundle discount:
Any products in your store qualify
Choose individual products
Target entire collections
**Recommended for bundles**
Set the quantity requirements for your bundle (e.g., "Buy 3+ items from Summer Collection").
Configure how the discount applies:
Choose **Amount off** and set the discount value
**Example**: \$10 off
Choose **Percent off** and set the discount value
**Example**: 15% off
Set the **Bundle Price** (e.g., USD 89.99) and choose **Fixed Price** mode
Choose whether to allow additional discounting on already on-sale items
Apply to highest priced items first or lowest priced items first
**Allow multiple uses per order**: Let customers use the offer multiple times
**Max Uses Per Order**: Set limit (e.g., 10)
**Once per shopper**: Limit to one use per customer
**Total usage limit**: Set overall usage cap across all customers
Control application order when multiple offers apply
Limit to specific sales channels
Target specific delivery methods
Set spending limits for the offer
Double-check your settings and click **Save Offer**. Your offer will appear in your Offers dashboard where you can activate it when ready.
You can always come back and make changes later if you need to!
## Bundle Discount Strategies & Marketing Use Cases by Industry
**Strategy**: Bundle items that naturally go together
**Example**: "Complete Workwear Bundle: Dress Shirt + Dress Pants + Belt + Dress Shoes for USD 199 (regularly USD 280)"
**Benefit**: Increases perceived value while moving accessories
**Strategy**: Create themed bundles for holidays/seasons
**Example**: "Summer Essentials Bundle: Tank Top + Shorts + Sunglasses + Sun Hat for USD 65"
**Benefit**: Capitalizes on seasonal demand, creates urgency
**Strategy**: Bundle slow-moving items with popular products
**Example**: "Bundle: 2 bestselling dresses + 1 clearance accessory for USD 120"
**Benefit**: Moves old inventory while maintaining margins
## Best Practices for Bundle Discounts
### Bundle Composition
Include both high and low-value items to appeal to different customer segments
Bundle items that make sense together and solve a common need
Use analytics to find optimal bundle mixes that drive the most sales
**Pro Tip**: Use Atom Volume & Gift Discounts' [Offer Optimizations](/optimizations/overview) to automatically test different bundle combinations and find the most effective product mixes for your customers. The system uses AI-driven personalization to show each customer the bundle offer most likely to convert.
### Pricing Strategy
Ensure bundle pricing preserves profitability while offering value
Use limited-time offers to drive immediate action
Make savings obvious to customers with clear before/after pricing
**Example**: Instead of "Save 15%", show "Complete Outfit Bundle: USD 199 (regularly USD 280) - Save USD 81"
### Customer Experience
Explain bundle benefits prominently on product pages and checkout
Ensure bundle application is seamless and automatic
Allow customers to modify bundles when possible
**Best Practice**: Use automatic bundle discounts rather than coupon codes for the smoothest customer experience. Customers don't need to remember codes or apply them manually.
## Monitoring, Optimization & Growth
### Key Metrics to Track
Percentage of customers who choose bundles over individual items
Impact on AOV - measure the lift from bundle offers
How bundles affect stock movement and clearance rates
Feedback on bundle offers and customer experience
**Track These Weekly**: Bundle conversion rate, AOV impact, inventory movement, and customer satisfaction scores to identify optimization opportunities.
### Optimization Strategies
Try different combinations and pricing to find what works best
Modify bundles based on trends and seasonal demand
Use reviews and surveys to improve bundle offerings
Monitor which bundles perform best and optimize accordingly
**Growth Strategy**: Start with simple 2-item bundles, then gradually add complexity as you learn what resonates with your customers. Monitor performance closely and be ready to adjust based on data.
## Common Use Cases
### Fashion Retail
**Items**: Blouse + Pants + Belt + Jewelry
**Pricing**: 20% off when buying 4+ items (saves USD 25-40)
**Benefit**: Increases AOV, reduces decision fatigue
**Items**: Dress Shirt + Dress Pants + Tie + Dress Shoes
**Pricing**: Fixed price of USD 199 (vs USD 280 individual)
**Benefit**: Moves accessories, creates complete professional look
**Items**: Athletic Top + Shorts + Sports Bra + Headband
**Pricing**: Fixed price of USD 75 (vs USD 95 individual)
**Benefit**: Encourages complete workout outfit purchase
**Items**: Sweater + Scarf + Gloves + Beanie
**Pricing**: 25% off bundle (saves USD 20-35)
**Benefit**: Provides complete winter outfit at discounted price
**Fashion Tip**: Bundle complementary colors and styles together. Customers are more likely to buy complete outfits when items are visually coordinated.
### B2B Manufacturing & Industrial
**Items**: Hard Hat + Safety Glasses + Work Gloves + Reflective Vest
**Pricing**: Fixed price of USD 45 (vs USD 65 individual)
**Benefit**: Complete safety compliance package for construction teams
**Items**: Drill + Drill Bits + Screwdriver Set + Tool Bag
**Pricing**: 15% off when buying 3+ items (saves USD 30-50)
**Benefit**: Complete toolkit for contractors and maintenance teams
**Items**: Printer Paper + Ink Cartridges + Stapler + File Folders
**Pricing**: Fixed price of USD 45 (vs USD 60 individual)
**Benefit**: Complete office supply package for businesses
**Items**: Industrial Cleaner + Microfiber Cloths + Spray Bottles + Gloves
**Pricing**: Fixed price of USD 35 (vs USD 50 individual)
**Benefit**: Complete cleaning solution for commercial facilities
**B2B Strategy**: Focus on complete solutions rather than individual products. Businesses prefer buying everything they need in one transaction with clear cost savings.
## Troubleshooting & FAQs
Verify collection selection and quantity requirements are met
Ensure bundle has appropriate priority setting when multiple offers apply
Confirm items meet bundle criteria and are in the correct collections
Ensure correct mode (fixed price vs. percentage) is selected
Review on-sale item settings and exclusion rules
Verify behavior with various cart combinations and quantities
Ensure bundle benefits are obvious and well-communicated
Show bundle options prominently on product pages and checkout
Minimize steps to apply bundle discounts automatically
Yes, bundle discounts can be configured to stack with other discount types. In Atom Commerce, you can control which discount types can combine by setting up stacking rules in the advanced settings. This allows you to create layered promotions while protecting your margins.
If a required item in your bundle is out of stock, customers won't be able to complete the bundle purchase. Consider using flexible bundle rules that allow substitutions or create multiple bundle variations to handle stock fluctuations.
In the advanced settings, you can choose "Do not discount" for on-sale items. This prevents already-discounted items from receiving additional bundle discounts, protecting your margins on clearance or promotional items.
Yes, you can create multiple bundle offers targeting different customer segments. Use customer segmentation features to offer VIP customers premium bundles or create exclusive bundles for new customers.
Bundle discounts can actually improve margins by increasing average order value and moving inventory faster. Use the budget management features to set spending limits and monitor the impact on your overall profitability.
## Advanced Tips
Use customer data to recommend bundles based on purchase history
Create bundles based on browsing history and preferences
Combine items from different product categories for unique value
Create bundles to move slow inventory and clear excess stock
Plan bundles around inventory cycles and seasonal demand
Work with suppliers on bundle pricing and inventory planning
Promote bundles in customer communications and newsletters
Share bundle deals on social platforms to drive traffic
Collaborate on bundle promotions with influencers and partners
Bundle discounts are a powerful tool in your promotions toolkit for increasing sales and improving customer experience. By following this guide and implementing the strategies outlined, you can create compelling bundle offers that drive both immediate sales and long-term customer loyalty.
**Ready to Launch?** Start with one simple bundle offer using the checklist above, monitor its performance for one week, and layer on complexity as you see what resonates with your customers. Head over to the Create Offer page in Atom Volume & Gift Discounts to build your first bundle — and don't forget to test it thoroughly before launching!
## Glossary: Key Bundle Discount Terms
The items or quantity that trigger the bundle discount (what customers must buy)
The items or quantity that receive the discount (what gets discounted)
Determines which offer applies when multiple offer rules overlap
Caps on how many times an offer can be used (per order, per customer, or total)
Sales channels (online, POS, etc.) where the offer is valid
Group of products that can be used together in bundle offers
## Related Resources & Further Reading
Learn how to create volume discounts and tiered pricing strategies
Discover how to add free gifts to qualifying orders
Explore all available promotion types in Atom Volume & Gift Discounts
Master the fundamentals of creating any type of offer
Learn how to manage multiple offers and stacking rules
Set spending limits and track promotional costs
## Bundle Launch Checklist: 5 Steps to Get Started
Select the right template for your needs:
For consistent savings across items
For clear value propositions
For complex rules and exclusions
Choose what triggers your bundle:
* Choose products/collections that trigger the bundle
* Set quantity threshold (e.g., "Buy 3+ items")
* Consider complementary products that work well together
Set your pricing strategy:
* Set discount percentage or fixed bundle price
* Calculate savings to ensure attractive value
* Test pricing to maintain healthy margins
Fine-tune your offer:
* Set usage limits (per order, per customer, total)
* Configure priority if multiple offers exist
* Choose sales channels and fulfillment types
* Set budget limits if needed
Validate before going live:
* Preview with sample cart combinations
* Test edge cases (out of stock, exclusions)
* Activate and monitor performance
* Track metrics after 1 week and optimize
Verify your bundle discount appears correctly in the cart and checkout process before launching to customers.
## Key Takeaways
* **Bundle discounts** increase average order value by up to 30% and help move inventory faster
* Choose between **percentage/amount bundles**, **fixed-price bundles**, or **advanced bundles** based on your needs
* Use concrete examples with real pricing to help customers understand the value
* Monitor **bundle conversion rates**, **AOV impact**, and **inventory turnover** to optimize performance
* Start simple and gradually add complexity as you learn what works for your customers
* Consider **stacking rules** and **exclusions** to protect margins while maximizing customer value
# How to Create Buy More Save More Offers on Shopify with Atom Volume & Gift Discounts: Step-by-Step Guide
Source: https://docs.atomcommerce.io/guides/buy-more-save-more
Master Buy More Save More offers on Shopify with Atom Volume & Gift Discounts. Learn volume discounts, tiered pricing strategies, and proven tactics to increase cart value and boost sales.
# Boost Your Shopify Sales: How to Create Effective Buy More Save More Offers Using Atom Volume & Gift Discounts
***
## Why Buy More Save More Offers Work
Buy More Save More (BMSM) offers can increase average order value by as much as 30%. They're proven to:
Shoppers buy more items to unlock better discounts
Customers stock up on favorites to maximize savings
Move more products with volume-based incentives
Repeat customers learn to maximize their savings with your offers
Higher discounts motivate customers to complete purchases
Volume-based discounts create incentive to add more items to cart
Volume-based discounts create a psychological incentive for customers to add more items to their cart, converting browsers into bulk buyers.
***
## Understanding Buy More Save More Offers
Buy More Save More offers come in two main types:
Customers receive the same discount for all units in an order, based on the total quantity purchased
Customers receive a set discount per unit within each tier, with increasing discounts at higher tiers
**How it works**: Once you reach a quantity threshold, the SAME discount applies to ALL qualifying items in your cart.
**Example**: Buy 3+ items, get 10 percent off ALL items
Cart: 2 shirts (USD 30 each) + 1 pants (USD 50) = USD 110 total
With 10 percent volume discount: USD 99 total (saves USD 11)
**Another Example**: Buy 5+ items, get 15 percent off ALL items
Cart: 3 t-shirts (USD 20 each) + 2 accessories (USD 15 each) = USD 90 total
With 15 percent volume discount: USD 76.50 total (saves USD 13.50)
**Fixed Price Example**: Buy 1 item for USD 59.99, Buy 3+ items for USD 49.99 each
**Scenario 1**: Customer buys 1 premium shirt (USD 79.95)
* Pays: USD 59.99 (saves USD 19.96 = 25% off)
**Scenario 2**: Customer buys 3 premium shirts (USD 79.95 each)
* All 3 shirts: USD 49.99 each
* Total: USD 149.97 instead of USD 239.85
* **Saves: USD 89.88 (37% off)**
**Why it works**: "Pay USD 49.99 each when you buy 3+" is more compelling than "37% off"
**Key Point**: The discount rate is the same for every item once you hit the threshold. Best for encouraging bulk purchases with consistent savings.
**Fixed Price Strategy**: Use psychological price points (USD 49.99, USD 99.99) for premium products where the fixed price is more compelling than a percentage discount.
**How it works**: Different discount rates apply to DIFFERENT quantities within the same cart. Each item gets its own discount based on its position.
**Example**: Buy 2 get 10 percent off, Buy 3 get 20 percent off, Buy 4+ get 30 percent off
Cart: 4 shirts (USD 25 each) = USD 100 total
With tier discount:
* 1st shirt: USD 25 (no discount)
* 2nd shirt: USD 22.50 (10 percent off)
* 3rd shirt: USD 20 (20 percent off)
* 4th shirt: USD 17.50 (30 percent off)
Total: USD 85 (saves USD 15)
**Another Example**: Buy 1 get 0 percent off, Buy 2 get 15 percent off 2nd item, Buy 3+ get 25 percent off 3rd+ items
Cart: 3 dresses (USD 60 each) = USD 180 total
With tier discount:
* 1st dress: USD 60 (no discount)
* 2nd dress: USD 51 (15 percent off)
* 3rd dress: USD 45 (25 percent off)
Total: USD 156 (saves USD 24)
**Fixed Price Example**: 1st item USD 59.99, 2nd item USD 49.99, 3+ items USD 39.99 each
Cart: 4 premium hoodies (USD 85 each) = USD 340 total
With tier fixed pricing:
* 1st hoodie: USD 59.99 (tier 1 price)
* 2nd hoodie: USD 49.99 (tier 2 price)
* 3rd hoodie: USD 39.99 (tier 3 price)
* 4th hoodie: USD 39.99 (tier 3 price)
Total: USD 189.96 instead of USD 340
**Saves: USD 150.04 (44% off)**
**Why it works**: Clear escalating value - "The more you buy, the lower the price per item!"
**Key Point**: Each item gets a different discount rate based on its position in the cart. Best for progressive rewards that increase with quantity.
**Fixed Price Strategy**: Tiered fixed pricing creates even more incentive to buy additional items as each tier position gets a lower fixed price. Great for wholesale scenarios and bulk purchasing.
## Volume vs Tier Discounts: Side-by-Side Comparison
**Same Cart, Different Discount Methods**: Let's see how the same 4-item cart (USD 100 total) gets discounted differently
**Rule**: Buy 3+ items, get 15 percent off ALL items
**Cart**: 4 shirts (USD 25 each) = USD 100
**Discount Applied**:
* All 4 shirts get 15 percent off
* Each shirt: USD 21.25
* **Total: USD 85** (saves USD 15)
**Result**: Same discount rate for every item
**Rule**: Buy 2 get 10 percent off, Buy 3 get 20 percent off, Buy 4+ get 30 percent off
**Cart**: 4 shirts (USD 25 each) = USD 100
**Discount Applied**:
* 1st shirt: USD 25 (no discount)
* 2nd shirt: USD 22.50 (10 percent off)
* 3rd shirt: USD 20 (20 percent off)
* 4th shirt: USD 17.50 (30 percent off)
* **Total: USD 85** (saves USD 15)
**Result**: Different discount rate for each item
**Key Difference**: Volume discounts apply the same rate to all items, while tier discounts apply different rates to different items based on their position in the cart.
***
## When to Use Fixed Price BMSM
Fixed price discounting creates compelling value propositions that can outperform percentage or amount-based discounts in specific scenarios:
**Scenario**: High-end items where "USD 199 each" sounds better than "35% off"
**Why**: Maintains perceived value while offering clear savings
**Example**: Designer apparel, luxury accessories, premium electronics
**Scenario**: Hit key price points like USD 49.99, USD 99.99, USD 199.99
**Why**: These prices convert better than percentages
**Example**: "All items USD 49.99 when you buy 3+" vs "25% off"
**Scenario**: Bulk buyers want simple per-unit pricing
**Why**: "Buy 12+ for USD 15 each" is clearer than "25% off at 12+"
**Example**: B2B sales, bulk orders, restaurant supplies
**Scenario**: Limited-time offers with compelling pricing
**Why**: "USD 39 doorbusters!" is more urgent than "40% off"
**Example**: Black Friday, Cyber Monday, seasonal clearance
**Scenario**: Products with varying original prices in same collection
**Why**: Fixed price simplifies value prop - all items same price
**Example**: "All t-shirts USD 19.99" regardless of original USD 25-45 prices
**Scenario**: Need to move inventory quickly at specific target price
**Why**: Direct control over final selling price
**Example**: "Everything must go - USD 9.99 each!"
### Fixed Price vs Percentage/Amount: Quick Decision Guide
✅ Selling premium products (USD 100+)
✅ Targeting psychological price points
✅ Running flash sales or doorbuster events
✅ Serving wholesale/B2B customers
✅ Simplifying mixed-price collections
✅ Creating urgency with clear pricing
**Example**: "Premium hoodies - 1st for USD 59.99, 2nd for USD 49.99, 3+ for USD 39.99 each"
✅ Maintaining consistent margins
✅ Products with wide price variation
✅ Customers expect % off (Black Friday)
✅ Easy margin calculation needed
✅ Psychological appeal of "% off"
**Example**: "Buy 3+ items, save 20% on all"
✅ Similar price points across products
✅ Simple math for customers
✅ Predictable discount costs
✅ Stacking with other offers
✅ Gift card or voucher style offers
**Example**: "Buy 2+ items, save USD 15 on each"
***
## Why Atom Volume & Gift Discounts Is Ideal for BMSM on Shopify
Atom Volume & Gift Discounts simplifies creating powerful volume promotions without technical hassle:
Set up offers visually—no coding needed
Create volume or tiered discounts with custom breakpoints
Qualify by products, collections, or specific criteria
Exclude specific items from qualifying or being discounted
Choose highest or lowest priced items first for discount application
Plan promotions around specific dates, events, or sales
Track redemption rates and sales performance clearly
Shoppers see their savings in real-time as they add items
Unlike Shopify's built-in discount tools, Atom Volume & Gift Discounts provides deeper control, advanced targeting, and precise volume management.
***
## Buy More Save More Template Types
Atom Volume & Gift Discounts offers three template types to suit different business needs. Learn more about [all offer types](/offers/offer-types) available in Atom Volume & Gift Discounts.
Encouraging bulk purchases with consistent savings
Progressive savings that increase with quantity
Complex promotions with exclusions and advanced targeting
**How it works**: Discount applies when volume breakpoint is reached and applies to all qualifying items.
**Example**: Buy 3 items to get 10% off all three items
Best for when you want customers to buy more of the same or different products with consistent savings.
**How it works**: Discount increases at higher thresholds with different rates for different quantities.
**Example**: Buy 3 and get 10% off two items, then get 20% off the 3rd item
Best for when you want to reward customers more for buying additional items with progressive savings.
**How it works**: Specify exclusions, on sale items, and more for precise control.
**Example**: Buy 4 (exclude new arrivals) to get 10% off
Best for when you need precise control over what qualifies and what gets discounted.
***
## Step-by-Step: Creating a Buy More Save More Offer
For a general overview of creating offers, see our [Creating Offers](/offers/creating-offers) guide.
* Install the **Atom Volume & Gift Discounts** app from the Shopify App Store
* Follow prompts to authorize the app with your Shopify store
* Navigate to your Shopify admin sidebar and select **Apps → Atom Volume & Gift Discounts**
* Choose **Offers** from the sidebar
* Click **Create New Offer** (top right)
* Enter an easy-to-identify name like "Summer Volume Discount"
* Optionally, add a description for internal reference
Select from three template options:
For consistent savings across all items
For progressive savings that increase with quantity
For complex promotions with exclusions
### Step 5: Configure Offer Details
#### Basic Information
* **Name**: The discount name your shoppers will see
* **Badge Text**: Badge label for product page images (max 15 characters)
* **Active Dates**: Set start date/time and optional end date
#### Method Selection
Choose how customers receive the discount:
* **Automatic**: Customers don't need to enter a code at checkout
* **Discount Code**: Customers enter a specific code
* **Coupon Batch**: Use pre-generated coupon codes
### Step 6: Set Customer Purchase Requirements
Define what customers must purchase to qualify:
* **Any Products**: All products in your store qualify
* **Specific Products**: Choose individual products
* **Specific Collections**: Target entire collections
#### Purchase Requirement Options
* **Any Product**: Customer needs to buy any of the selected products
* **All Products**: Customer must buy all selected products
* **Purchase Type**: Choose One Time Purchase, Subscription, or Both
### Step 7: Configure Discount Structure
#### For Volume Discounts:
* **Volume Breakpoints**: Set quantity thresholds and discount amounts
* **Max Quantity**: Choose unlimited or set a maximum
* **Breakpoint Options**:
* Breakpoint quantity based on unique product count
* Select breakpoint titles for better customer communication
#### For Tier Discounts:
* **Discount Tiers**: Set quantity ranges and discount amounts per tier
* **Max Quantity**: Choose unlimited or set a maximum
* **Tier Options**:
* Tier quantity based on unique product count
* Select tier titles for better customer communication
### Step 8: Set Discount Preferences
#### Discount Mode
Choose how the discount is calculated:
Fixed dollar discount per item
**Example**: Save USD 10 per item
Percentage discount per item
**Example**: Save 15% per item
Set a specific price per item
**Example**: Pay USD 49.99 per item
#### When to Use Each Discount Mode
**Best for**: Consistent dollar savings across different price points
**Example**: Buy 3+ items, get USD 10 off each
* USD 50 item becomes USD 40
* USD 30 item becomes USD 20
* Same dollar discount regardless of price
**Use when**: You want predictable discount amounts, simple math for customers, or consistent savings across varied prices.
**Best for**: Maintaining margin ratios across different price points
**Example**: Buy 3+ items, get 20% off each
* USD 50 item becomes USD 40 (saves USD 10)
* USD 30 item becomes USD 24 (saves USD 6)
* Discount scales proportionally with item price
**Use when**: Maintaining consistent margins, scaling with product value, or when percentages are psychologically appealing.
**Best for**: Creating clear value propositions and psychological pricing
**Example**: Buy 3+ items, pay USD 39.99 each (regardless of original price)
* USD 50 item becomes USD 39.99 (saves USD 10.01 = 20% off)
* USD 30 item stays USD 30 (no discount - fixed price is higher)
* USD 45 item becomes USD 39.99 (saves USD 5.01 = 11% off)
**Important**: Fixed pricing only discounts items if the fixed price
is **lower** than the original price. Higher-priced items are excluded automatically.
**Use when**: Premium products where "USD 99 each" is more compelling than "30% off", wholesale scenarios, psychological price points (USD 49.99, USD 99.99), or flash sales with clear pricing.
Fixed pricing is powerful for premium products and creates urgency with
messaging like "Premium items now USD 49.99!" instead of percentage discounts.
#### On Sale Item Discounts
* **Do not discount**: Exclude items already on sale
* **Allow additional discounting**: Apply BMSM discounts to sale items
#### Discount Strategy
* **Highest priced items first**: Apply discounts to most expensive items first
* **Lowest priced items first**: Apply discounts to least expensive items first
### Step 9: Configure Advanced Settings (Optional)
#### Priority
* **Set an offer priority**: Control which offers apply first when multiple are eligible
#### Channels
* **Choose specific channels/stores**: Limit offer to certain sales channels
#### Fulfillment Types
* **Choose fulfillment types**: Limit to shipping, pickup, delivery, etc.
#### Budget
* **Assign a budget**: Set spending limits for the promotion
### Step 10: Review & Activate
* Review the offer summary in the right panel
* Double-check all configuration details
* Click **Save Offer**, then toggle **Activate** to launch
*(Upon activation, your offer immediately goes live and becomes trackable in Atom Commerce.)*
***
## Best Practices for BMSM Offers
Use round numbers (3, 5, 10) for easy customer understanding
Ensure discounts are substantial enough to motivate bulk purchases
Target products that customers naturally buy together
Launch during peak shopping periods for maximum impact
Make higher tiers significantly more attractive
Don't make tier jumps too large (customers won't reach them)
Use tier titles to explain benefits at each level
Ensure you have enough stock for higher tiers
Exclude new arrivals or premium items from qualifying
Exclude specific products from being discounted
Experiment with different exclusion rules
Track which exclusions improve margins
***
## Monitoring & Optimizing Your BMSM Promotions
Consistently track performance in Atom Commerce:
* **Redemption Rate**: Percentage of shoppers reaching volume thresholds
* **Average Order Value Lift**: Revenue boost directly linked to your BMSM offer
* **Tier Distribution**: How many customers reach each discount tier
* **Product Performance**: Which products drive the most volume purchases
Review these metrics weekly, especially in the initial month, to quickly identify areas for improvement:
* Test different volume thresholds or discount amounts
* Adjust product targeting based on customer behavior
* Optimize tier structures for better conversion
***
## Common BMSM Scenarios
Buy 3+ items from Summer Collection, get 15% off all items
Target complementary products in the same collection
Increased AOV and customer satisfaction with bundled savings
Buy 2 get 10% off, buy 4 get 20% off, buy 6 get 30% off
Encourage customers to build complete workout outfits
Higher cart values and reduced return rates
Buy 3+ tools (exclude new releases), get 25% off
Clear older inventory while protecting new product margins
Inventory turnover and maintained profitability
***
## Wrapping Up
Setting up a Buy More Save More offer on Shopify is straightforward with Atom Commerce. Choose the template type that best fits your business goals, configure your volume thresholds or tiers, and set the conditions that work best for your store. Whether you're encouraging bulk purchases with volume discounts or rewarding progressive buying with tier discounts, Atom Commerce gives you the tools to create compelling promotions that boost your bottom line.
If you have questions or run into any issues, check the help resources or reach out to support for assistance.
# How to Create Gift With Purchase Offers on Shopify: Merchant's Guide
Source: https://docs.atomcommerce.io/guides/gift-with-purchase
Learn how to create high-converting Gift With Purchase offers on Shopify. Step-by-step guide with real examples, best practices, and proven strategies to boost AOV and customer loyalty.
# Boost Your Shopify Sales: How to Create Effective Gift With Purchase Offers Using Atom Commerce
***
## Why Gift With Purchase Offers Work
Gift With Purchase (GWP) offers can increase average order value by as much as 20%. They're proven to:
* **Boost Average Order Value (AOV)**: Shoppers spend more to unlock a free or discounted gift.
* **Encourage Customer Loyalty**: Exclusive gifts delight buyers and encourage repeat purchases.
* **Clear Excess Inventory**: Pair slow-moving items as complimentary gifts to manage stock.
* **Differentiate Your Store**: Stand out from competitors with valuable promotions.
A compelling gift often motivates shoppers to add just one more item to their cart, converting browsers into buyers.
***
## Understanding Gift With Purchase Offers
A successful GWP offer has two main components:
1. **Qualifier**: The requirement a customer must meet (e.g., specific product, minimum spend) to unlock the gift.
2. **Gift**: The free or discounted item customers receive once they meet the qualifier.
For example:
* **"Spend \$100 on skincare products, get a travel-sized moisturizer free."**
* **Qualifier**: Spending \$100 on skincare
* **Gift**: Free moisturizer
***
## Why Atom Commerce Is Ideal for GWP on Shopify
Atom Commerce simplifies creating powerful promotions without technical hassle:
* **Easy Visual Builder**: Set up offers visually—no coding needed.
* **Flexible Conditions**: Qualify by products, collections, or minimum spend.
* **Customizable Gifts**: Select gifts easily and determine discounts.
* **Advanced Scheduling**: Plan promotions around specific dates, events, or sales.
* **Exclusion Rules**: Easily exclude specific items from qualifying or being discounted.
* **Real-time Analytics**: Track gift redemption rates and sales performance clearly.
* **Built-in Storefront UI Widgets**: Shoppers can easily select their preferred gift from a list, or have a gift automatically added to their cart—no extra setup required.
Unlike Shopify’s built-in discount tools, Atom Commerce provides deeper control, advanced scheduling, and precise targeting.
***
## Step-by-Step: Creating a Gift With Purchase Offer
### Step 1: Install Atom Commerce on Shopify
* Install the **Atom Commerce** app from the Shopify App Store.
* Follow prompts to authorize the app with your Shopify store.
### Step 2: Open the Offers Dashboard
* Navigate to your Shopify admin sidebar and select **Apps → Atom Commerce**.
* Choose **Offers** from the sidebar.
### Step 3: Create a New Offer
* Click **Create New Offer** (top right).
* Enter an easy-to-identify name like "Spring GWP: Free Tote Bag."
* Optionally, add a description for internal reference.
### Step 4: Choose Gift With Purchase Type
* Select **Gift With Purchase (GWP)** as your offer type.
### Step 5: Set Qualification Conditions
Clearly define the conditions:
* **Minimum Spend** (e.g., Spend \$50)
* **Specific Products or Collections** (e.g., Buy 2 products from the “Summer Collection”)
> **Tip:** Simple conditions like "Spend \$50" tend to have higher conversion rates.
### Step 6: Select Your Gift
* Choose the product or variant to offer as a gift.
* Set the discount level (e.g., 100% off for free).
> **Best Practice:** Ensure your gift complements the qualifier products to maximize appeal.
### Step 7: Configure Exclusions (Optional)
Exclude products, variants, or collections from qualifying criteria if needed:
* Avoid clearance or premium items triggering the promotion unintentionally.
> **Example:** Run a "Spend \$50, get a free gift" offer, excluding "Clearance" products so they don't qualify for the offer.
### Step 8: Schedule Your Promotion
Plan your timing effectively:
* Set clear **Start/End Dates and Times**.
* Confirm your store's time zone in **Settings → General**.
* Schedule around peak shopping seasons (e.g., holidays, weekends).
> **Example:** Schedule GWP promotions during major events like Black Friday to maximize sales impact.
### Step 9: Review & Activate
* Double-check all offer details.
* Click **Save Offer**, then toggle **Activate** to launch.
*(Upon activation, your offer immediately goes live and becomes trackable in Atom Commerce.)*
***
## Best Practices for GWP Offers
* **Relevant Gifts**: Match gifts logically to qualifier products (e.g., skincare products with cosmetic samples).
* **Tiered Gifting**: Offer better gifts for higher spending (e.g., spend $50, get Gift A; spend $100, get Gift A + Gift B).
* **Inventory Limits**: Control quantities to avoid overselling.
* **Seasonal Rotations**: Regularly refresh gifts for different seasons or sales events.
* **Promotion Visibility**: Use banners, emails, and pop-ups featuring relevant keywords like "Shopify GWP" to enhance visibility and SEO.
***
## Monitoring & Optimizing Your GWP Promotions
Consistently track performance in Atom Commerce:
* **Redemption Rate**: Percentage of shoppers redeeming your gift.
* **Average Order Value Lift**: Revenue boost directly linked to your GWP.
* **Total Redemptions**: How often your gifts are claimed.
Review these metrics weekly, especially in the initial month, to quickly identify areas for improvement:
* Test different gift items or spending thresholds.
* Adjust promotional schedules or messaging based on customer response.
***
## Wrapping Up
Setting up a Gift With Purchase offer on Shopify is straightforward with Atom Commerce. Just follow the steps above to create your promotion, choose your gift, and set the conditions that work best for your store. If you have questions or run into any issues, check the help resources or reach out to support for assistance.
# Order Discounts with Exclusions: Complete Guide
Source: https://docs.atomcommerce.io/guides/order-discounts
Learn how to create order-level discounts that exclude specific collections. Understand how exclusions work and see detailed examples.
# Order Discounts with Exclusions: Complete Guide
Order discounts apply savings to the entire cart when customers meet certain conditions. With exclusions, you can prevent specific collections from receiving the discount while still allowing the offer to apply to other items.
***
## Understanding Order Discounts
Discounts that apply to the entire order total, rather than individual products
Protect margins on premium collections while still offering value to customers
Order discounts are powerful tools for driving overall sales volume and increasing average order value. They offer customers savings on their total cart value when they meet defined conditions.
***
## Core Concepts
Before diving into examples, it's important to understand these key terms:
Items in the cart that meet the basic requirements of the offer. For order discounts, this typically means any physical product (not gift cards or virtual products).
Qualifying items that are not in any excluded collections. The discount is only applied to eligible items.
Items that belong to collections you've configured to exclude from the discount. These items do not count toward the discount calculation.
***
## How Exclusions Work for Order Discounts
The exclusion behavior for order discounts is different from item-level discounts:
If all items in the cart are from excluded collections, the discount will not trigger at all.
If some items are excluded and some are not, the discount will trigger and apply only to eligible items.
The discount is calculated based on the total price of all eligible items (items not in excluded collections). Excluded items are not included in the discount calculation.
***
## Example: "Buy 1 Get 10% Off Your Order" with Exclusions
Let's walk through a complete example to see how this works in practice.
### Setup
**Offer Name:** Buy 1 get 10% off your order
**Offer Type:** Order Discount
**Discount:** 10% off entire order
**Exclusion:** "New Snowboards" collection
### Cart Scenarios
#### Scenario 1: Cart with Only Eligible Items
All items in the cart are eligible for the discount.
**Cart Contents:**
* Item 1: Snowboard (Price: \$500, Not in "New Snowboards")
* Item 2: Boots (Price: \$200, Not in "New Snowboards")
**Calculation:**
* Subtotal: \$700
* Discount: 10% of $700 = $70
* **Final Total: \$630**
***
#### Scenario 2: Cart with Only Excluded Items
When all items are excluded, the discount does not apply.
**Cart Contents:**
* Item 1: Snowboard (Price: \$500, In "New Snowboards")
* Item 2: Binding (Price: \$200, In "New Snowboards")
**Calculation:**
* Subtotal: \$700
* Discount: \$0 (No discount applied because all items are excluded)
* **Final Total: \$700**
This is a key difference from item-level discounts. For order discounts, if all items are excluded, the offer doesn't trigger at all.
***
#### Scenario 3: Cart with Both Eligible and Excluded Items
The discount applies only to eligible items.
**Cart Contents:**
* Item 1: Snowboard (Price: \$500, In "New Snowboards" - **excluded**)
* Item 2: Boots (Price: \$200, Not in "New Snowboards" - **eligible**)
**Calculation:**
* Subtotal: \$700
* Eligible items total: \$200 (only the boots)
* Discount: 10% of $200 = $20
* **Final Total: \$680**
The discount applies to the eligible items only, even though excluded items remain in the cart at full price.
***
#### Scenario 4: Multiple Quantities
The discount calculation works the same way with multiple quantities.
**Cart Contents:**
* Item 1: Snowboard (Price: $500, Quantity: 2, In "New Snowboards") - Total $1,000
* Item 2: Boots (Price: $200, Quantity: 3, Not in "New Snowboards") - Total $600
**Calculation:**
* Subtotal: \$1,600
* Eligible items total: \$600 (only the boots)
* Discount: 10% of $600 = $60
* **Final Total: \$1,540**
***
## Real-World Examples
### Example 1: Basic Order Discount (No Exclusions)
**Setup:**
* Offer: "Buy 1 get 10% off your order"
* No exclusions configured
**Customer Cart:**
* Snowboard: \$500
**Result:**
* Discount: 10% of $500 = $50
* Final Total: \$450
***
### Example 2: Excluding Sale Items Collection
**Setup:**
* Offer: "Buy 1 get 10% off your order"
* Excluded Collection: "Sale Items"
**Customer Cart:**
* Jacket (regular price): \$200
* T-shirt (on sale, in "Sale Items" collection): \$50
**Result:**
* Discount applies only to jacket: 10% of $200 = $20
* Final Total: $200 + $50 - $20 = $230
The sale item doesn't receive the discount, but the regular-priced jacket does.
***
### Example 3: No Qualifying Items
**Setup:**
* Offer: "Buy 1 get 10% off your order"
* Active and enabled
**Customer Cart:**
* Gift card: \$100
**Result:**
* Discount: \$0 (Gift cards are not qualifying items)
* Final Total: \$100
Order discounts require at least one qualifying physical product. Gift cards and virtual products don't qualify.
***
## Edge Cases and Special Scenarios
If the cart only contains gift cards, the offer will not apply, even if the gift cards are not in an excluded collection. The offer requires at least one physical product.
If an item's price is zero (e.g., a free gift), it is still considered a qualifying item unless it is in an excluded collection. However, it won't contribute to the discounted amount since it has no price.
If a product is in multiple collections, and any of those collections are excluded, the product is excluded from the discount.
Order discounts apply to the original price of the item before any other discounts. If an item is already on sale, the order discount still applies to its regular price.
Exclusion applies at the collection level. If a product belongs to an excluded collection, it will be excluded from the discount, even if it also belongs to other, non-excluded collections.
***
## How Priority Affects Order Discounts
Order discounts are evaluated after item discounts in the discount evaluation order.
### Evaluation Order
1. **Item Discounts** (Product Discounts, BXGY, BMSM, Bundles)
2. **Order Discounts** (like "Buy 1 get 10% off your order")
3. **Shipping Discounts**
### Interaction with Item Discounts
* If an item has an item discount applied, it can still be considered a qualifying item for order discounts
* The order discount is calculated on the prices after item discounts have been applied
* Order discounts apply to the remaining subtotal after item discounts
### Multiple Order Discounts
If multiple order discounts are active:
* The one with the **highest priority** will be applied first
* Only one order discount typically applies per order (unless configured otherwise)
* Priority helps determine which discount takes precedence
For more information on how priority works, see our [Priority and Stacking Guide](/offers/priority-and-stacking).
***
## Troubleshooting
Check these common issues:
* ✅ Verify that the cart contains at least one qualifying item (physical product)
* ✅ Check if all items in the cart are in excluded collections
* ✅ Confirm that the offer is active (not disabled or scheduled for the future)
* ✅ Verify the offer is assigned to the correct sales channel
* ✅ Check if another order discount with higher priority is taking precedence
Verify these settings:
* ✅ Ensure that the discount is being calculated only on the eligible items (those not in excluded collections)
* ✅ Double-check the prices of the items in the cart
* ✅ Verify that excluded collections are correctly configured
* ✅ Check if item discounts have already been applied (order discounts apply after item discounts)
Possible causes:
* ✅ Verify that the exclusion is correctly configured in the offer settings
* ✅ Check that the product is actually in the excluded collection
* ✅ Ensure the collection exclusion was saved properly
* ✅ Test with a different product to confirm the exclusion is working
This is expected behavior:
For order discounts, if all items in the cart are from excluded collections, the discount will not trigger. This is different from item-level discounts where excluded items simply don't receive the discount.
To fix: Ensure at least one item in the cart is not in an excluded collection.
***
## Best Practices
Always test your offers with different cart combinations to ensure they behave as expected
Clearly communicate to customers which items are excluded from the discount
Use exclusions to protect margins on premium or low-margin collections
Track how exclusions affect conversion rates and average order value
***
## Related Documentation
* [Creating Offers](/offers/creating-offers) - Learn how to set up offers
* [Offer Types](/offers/offer-types) - Explore different offer types
* [Priority and Stacking](/offers/priority-and-stacking) - Understand how discounts interact
* [Condition Exclusions](/offers/creating-offers#choose-condition-exclusions) - Learn more about exclusions
***
Remember: For order discounts, exclusions prevent items from being included in the discount calculation. If all items are excluded, the discount won't trigger at all. If some items are excluded, the discount applies only to eligible items.
# How to Create Product Discounts on Shopify with Atom Volume & Gift Discounts: Complete Guide
Source: https://docs.atomcommerce.io/guides/product-discounts
Master Product Discounts on Shopify with Atom Volume & Gift Discounts. Learn single product and collection-based discounts with maxQuantity control to boost sales and protect margins.
# Boost Your Shopify Sales: Complete Guide to Product Discounts Using Atom Volume & Gift Discounts
***
## Why Product Discounts Work
Product Discounts are one of the most straightforward and effective promotional strategies for Shopify stores. They can increase conversion rates by up to 25% and help you strategically manage inventory while maintaining control over your margins.
Clear, direct discounts on specific products drive purchase decisions
Target specific products or collections that need to move
Control discount limits with maxQuantity per order
Easy to understand - customers see the discount immediately
Perfect for holiday sales, end-of-season clearance, and flash sales
Discount exactly what you want - single products or entire collections
Product Discounts offer the perfect balance of simplicity and control, allowing you to create compelling offers while protecting your bottom line with features like maxQuantity limits.
***
## Understanding Product Discount Types
Atom Commerce offers four types of Product Discounts to match your promotional needs:
Apply discounts to specific individual products with simple setup
Discount all products in a collection with one offer
Single product with exclusions and purchase type restrictions
Collection discounts with exclusions, purchase type restrictions, and maxQuantity control
**How it works**: Apply a discount directly to a specific product. Perfect for promoting individual items, clearing specific SKUs, or running flash sales on featured products.
**Example**: Get 20% off "Premium Wireless Headphones" (regularly USD 199)
Customer adds Premium Wireless Headphones to cart:
* Original price: USD 199
* With 20% discount: USD 159.20
* **Customer saves: USD 39.80**
**Another Example**: Save USD 50 on "Professional Camera Lens"
Customer adds Professional Camera Lens to cart:
* Original price: USD 349
* With USD 50 discount: USD 299
* **Customer saves: USD 50**
**Best for**: Flash sales, featured products, overstocked items, new product launches with introductory pricing.
**How it works**: Apply the same discount to all products within a Shopify collection. Ideal for seasonal sales, category promotions, and clearing entire product lines.
**Example**: Get 15% off all items in "Winter Coats" collection
Cart: 2 winter coats (USD 150 and USD 200) = USD 350 total
With 15% collection discount:
* Coat 1: USD 127.50 (saves USD 22.50)
* Coat 2: USD 170 (saves USD 30)
* Total: USD 297.50
* **Customer saves: USD 52.50**
**Another Example**: Save USD 10 on each "Summer T-Shirts" collection item
Cart: 3 different t-shirts (USD 30, USD 25, USD 35) = USD 90 total
With USD 10 off each:
* T-shirt 1: USD 20 (USD 30 - USD 10)
* T-shirt 2: USD 15 (USD 25 - USD 10)
* T-shirt 3: USD 25 (USD 35 - USD 10)
* Total: USD 60
* **Customer saves: USD 30**
**Best for**: Seasonal clearance, category-wide promotions, brand-specific sales, new collection launches.
**How it works**: Apply discounts to a specific product with advanced conditions like product exclusions or purchase type restrictions (one-time vs subscription).
**Example**: Get USD 50 off "Premium Headphones" - one-time purchases only
**Scenario 1** - Qualifies:
* Cart: 2 Premium Headphones (USD 199 each) as one-time purchase
* Discount: USD 50 off each headphone = USD 100 total discount
* Final total: USD 298
**Scenario 2** - Doesn't qualify:
* Cart: 1 Premium Headphone (USD 199) as subscription purchase
* No discount (subscription purchases excluded)
**Best for**: Purchase-type specific pricing, excluding certain product variants, subscription-only or one-time-only discounts.
**How it works**: Apply discounts to all products in a collection with advanced rules like per-product minimums, exclusions, and maxQuantity limits to protect margins.
**Example**: Get 25% off "Premium Accessories" collection, maxQuantity = 3 items
Customer adds 5 premium accessories (USD 50 each) = USD 250 total
With maxQuantity = 3:
* Items 1-3: USD 37.50 each (25% off applied)
* Items 4-5: USD 50 each (full price - maxQuantity reached)
* Total: USD 212.50
* **Discount limited to 3 items, protecting your margins!**
**Best for**: Collection sales with margin protection, excluding specific products, targeting non-sale items only, controlling discount exposure.
***
## Single Product vs Collection Discounts: Which to Choose?
* Promoting one specific product
* Flash sale on a featured item
* Clearing a specific SKU
* Testing discount effectiveness
* New product launch
* Seasonal category sales
* Clearing entire product lines
* Brand-wide promotions
* Category-specific offers
* Simpler management of many products
**Pro Tip**: Use Collections for scalability. If you add new products to the collection later, they automatically inherit the discount!
***
## Understanding maxQuantity: Control Your Discount Exposure
The **maxQuantity** feature is a powerful margin protection tool that limits how many items can receive a discount in a single order.
**All** qualifying items receive the discount
**Use when**: Clearing inventory, aggressive promotions, high-margin products
**Only first X** qualifying items get discounted
**Use when**: Protecting margins, controlling costs, testing offers, creating urgency
### maxQuantity in Action
**Scenario**: 20% off "Premium T-Shirt" collection, maxQuantity = 3
Customer adds 5 Premium T-Shirts (USD 30 each) to cart:
* Items 1-3: USD 24 each (20% off applied)
* Items 4-5: USD 30 each (full price - maxQuantity limit reached)
**Without maxQuantity**: Total would be USD 120 (USD 30 discount)
**With maxQuantity = 3**: Total is USD 132 (USD 18 discount)
**Your margin is protected by USD 12 while still offering value!**
### When to Use maxQuantity Limits
Prevent excessive discounting on bulk orders while still offering attractive deals.
**Example**: Luxury items with lower margins - limit to 2 discounted items per order.
"First 3 items only!" creates scarcity and drives faster purchase decisions.
**Example**: Flash sale messaging - "Save 30% on your first 3 items!"
Limit exposure while testing new discount strategies before rolling out unlimited offers.
**Example**: Test with maxQuantity = 2 for one week, then increase based on performance.
Cap promotional costs and maintain predictable discount expenses.
**Example**: Campaign budget of USD 5,000 - use maxQuantity to control total discount exposure.
**Strategic Tip**: Use maxQuantity = 3-5 for most product discounts. This allows customers to stock up while protecting you from margin erosion on very large orders.
***
## Step-by-Step: Creating Product Discounts
For a general overview of creating offers, see our [Creating Offers](/offers/creating-offers) guide.
1. Navigate to your Atom Commerce dashboard
2. Click **Offers** in the left menu
3. Click **Create New Offer** in the top right corner
Select the Product Discount type that matches your needs:
For promoting individual products
For category-wide sales
Single product with conditions
Collection with advanced rules
Give your offer a clear, descriptive name:
* **Good examples**: "Winter Coats 25% Off", "Premium Headphones Flash Sale", "Summer Clearance - T-Shirts"
* **Avoid**: "Discount 1", "Test Offer", "New Promo"
Use names that help you identify the offer at a glance in your dashboard and reports.
Applies automatically at checkout
**Best for**: Most product discounts
Requires customer to enter a code
**Best for**: Targeted campaigns, influencer codes
Generate unique codes for distribution
**Best for**: Email campaigns, gift cards
**For Single Product:**
* Click **Select Products**
* Search and select the specific product(s)
* You can select multiple variants of the same product
**For Collection:**
* Click **Select Collections**
* Choose one or more Shopify collections
* All products in selected collections will be discounted
**Pro Tip**: Collections are dynamic - add products to the collection later and they automatically get the discount!
Choose your discount mode and amount:
Fixed dollar discount per item
**Example**: USD 10 off each item
**When to use**: Consistent dollar savings, easy for customers to calculate, works well across similar price points.
Percentage discount per item
**Example**: 20% off each item
**When to use**: Maintaining margin ratios, scaling with product prices, psychological appeal of percentages.
Set a specific price per item
**Example**: Pay USD 49.99 per item
**When to use**: Creating clear value propositions, psychological pricing (USD 49.99, USD 99.99), premium products where "USD 99 each" is more compelling than "30% off".
**Important**: Fixed pricing only discounts items if the fixed price is **lower** than the original price. Higher-priced items are excluded automatically.
Set how many items can be discounted per order:
Enter **-1** to discount all qualifying items
**Use for**: Aggressive clearance, high-margin products
Enter a number (e.g., **3**) to limit discounted items
**Use for**: Margin protection, controlled promotions
**Recommended**: Start with maxQuantity = 3-5 for most offers to balance customer value and margin protection.
For Advanced Product Discounts, configure additional conditions:
Exclude specific products or collections from the discount
**Example**: Exclude already-on-sale items or specific premium products
Limit to one-time purchases, subscriptions, or both
**Example**: Subscription-only discount or one-time purchase only
**On Sale Item Discounts:**
* **Do not discount**: Exclude items already on sale
* **Allow additional discounting**: Stack with existing sales
**Discount Strategy:**
* **Highest priced items first**: Apply to most expensive items first
* **Lowest priced items first**: Apply to least expensive items first
Use "Highest priced items first" when maxQuantity is limited - customers get better perceived value.
Configure when your offer is active:
* **Start Date/Time**: When the offer begins
* **End Date/Time**: When the offer expires (optional)
* **Time Zone**: Automatically uses your store's timezone
Leave end date blank for ongoing offers. Set specific dates for flash sales and seasonal promotions.
**Priority:**
* Set offer priority for stacking with other offers
* Higher numbers = higher priority
**Channels:**
* Choose which sales channels (Online Store, POS, etc.)
**Fulfillment Types:**
* Limit to shipping, pickup, delivery, etc.
**Budget:**
* Assign a budget to cap total discount spending
1. Review the offer summary in the right panel
2. Verify all settings are correct
3. Click **Save Offer**
4. Toggle **Activate** to launch
Upon activation, your offer immediately goes live and becomes trackable in Atom Commerce analytics.
***
## Product Discount Strategies by Industry
**Strategy**: 30% off entire "Winter Collection"
**Type**: Collection Discount
**maxQuantity**: Unlimited
**Goal**: Clear seasonal inventory before new season
**Strategy**: 15% off "Spring Dresses", maxQuantity = 2
**Type**: Advanced Collection
**Goal**: Drive traffic while protecting margins
**Strategy**: USD 50 off "Premium Denim Jacket"
**Type**: Single Product
**Duration**: 24 hours
**Goal**: Create urgency and boost daily sales
**Strategy**: 20% off "Basic Tees" when buying 3+
**Type**: Advanced Collection
**Condition**: Minimum 3 items
**Goal**: Increase units per transaction
**Strategy**: USD 100 off "Last Gen Smartphones"
**Type**: Collection Discount
**Goal**: Move inventory before new model launch
**Strategy**: 25% off "Phone Cases", maxQuantity = 3
**Type**: Advanced Collection
**Goal**: High-volume sales with margin control
**Strategy**: USD 200 off "4K Drone" for first week
**Type**: Single Product
**Schedule**: 7 days only
**Goal**: Generate initial sales momentum
**Strategy**: 15% off "Monitors" when buying 5+, cart USD 2000+
**Type**: Advanced Single Product
**Goal**: Attract business/wholesale customers
**Strategy**: 40% off "Patio Furniture" collection
**Type**: Collection Discount
**Goal**: Clear summer inventory in fall
**Strategy**: 30% off "Christmas Decorations", maxQuantity = 10
**Type**: Advanced Collection
**Goal**: Volume sales with margin protection
**Strategy**: USD 75 off "Premium Garden Hose System"
**Type**: Single Product
**Goal**: Promote high-margin featured item
**Strategy**: 20% off "Gardening Tools" with maxQuantity control
**Type**: Advanced Collection
**maxQuantity**: 5 items per order
**Goal**: Increase category sales while protecting margins
**Strategy**: 20% off "New Skincare Line"
**Type**: Collection Discount
**Duration**: First 30 days
**Goal**: Build awareness and trial
**Strategy**: Use maxQuantity to control bulk discount costs
**Type**: Advanced Collection
**maxQuantity**: Limit to 3 items per order
**Goal**: Encourage purchases while protecting margins
**Strategy**: 15% off "Holiday Gift Sets", maxQuantity = 3
**Type**: Advanced Collection
**Goal**: Control limited inventory discounting
**Strategy**: 25% off for subscription purchases only
**Type**: Advanced Collection
**Condition**: Subscription only
**Goal**: Convert to recurring revenue
**Strategy**: USD 3 off "New Coffee Blend"
**Type**: Single Product
**Duration**: First 2 weeks
**Goal**: Drive trial of new product
**Strategy**: 20% off "Protein Bars" when buying 6+
**Type**: Advanced Single Product
**Condition**: Minimum 6 units
**Goal**: Increase order volume
**Strategy**: 15% off "Summer Beverages" collection
**Type**: Collection Discount
**Schedule**: June-August
**Goal**: Boost seasonal category sales
**Strategy**: 30% off "Sample Packs", maxQuantity = 2
**Type**: Advanced Collection
**Goal**: Let customers try multiple products affordably
***
## Best Practices for Product Discounts
### When to Use Product Discount vs Other Offer Types
* Direct product/collection sales
* Seasonal clearance
* Simple, clear offers
* Inventory management
* Flash sales
* Cross-selling products
* "Buy this, get that" mechanics
* Introducing new products
* Moving slow items with popular ones
* Volume purchasing incentives
* Progressive savings
* Tiered discounts
* Encouraging bulk buys
### maxQuantity Strategy Recommendations
**Use**: Unlimited maxQuantity (-1)
**Why**: You can afford to discount heavily without margin concerns
**Example**: Jewelry, digital products, premium accessories with 60%+ margins
**Use**: maxQuantity = 3-5
**Why**: Allows stocking up while protecting margins on very large orders
**Example**: Apparel, home goods, electronics accessories with 30-60% margins
**Use**: maxQuantity = 1-2
**Why**: Strict control to prevent margin erosion
**Example**: Electronics, wholesale items, commodities with \<30% margins
**Use**: maxQuantity = 2-3 with messaging
**Why**: Creates scarcity and urgency
**Example**: "Limited to 3 per customer - act fast!"
### Collection vs Single Product Selection
✅ Promoting one specific SKU
✅ Testing discount effectiveness on individual items
✅ Flash sale on featured product
✅ Clearing specific overstock
✅ New product launch with introductory pricing
✅ Different discount amounts needed per product
✅ Category-wide seasonal sales
✅ Brand-specific promotions
✅ Managing many products easily
✅ Dynamic inventory (products frequently added/removed)
✅ Consistent discount across related products
✅ Simplifying offer management
### Margin Protection Tips
Set appropriate limits based on product margins
**Rule of thumb**: Lower margin = lower maxQuantity
Prevent double-discounting by excluding items already on sale
**Setting**: "Do not discount on-sale items"
Limit discounts to specific purchase types for strategic targeting
**Example**: "Subscription-only: 20% off" or "One-time purchases only"
Cap total promotional spending with budget limits
**Example**: "USD 5,000 campaign budget"
Track offer performance and adjust based on margin impact
**Tools**: Atom Commerce analytics dashboard
Start with limited maxQuantity, then expand based on results
**Example**: Test maxQuantity = 2 for one week
### A/B Testing Suggestions
**Variant A**: 15% off\
**Variant B**: 20% off\
**Measure**: Conversion rate vs margin impact
**Variant A**: maxQuantity = unlimited\
**Variant B**: maxQuantity = 3\
**Measure**: Units per order vs total margin
**Variant A**: USD 10 off (amount)\
**Variant B**: 20% off (percent)\
**Measure**: Psychological appeal and conversion
**Variant A**: "20% Off Collection"\
**Variant B**: "Flash Sale - 3 Item Limit"\
**Measure**: Urgency impact on conversion
### Common Pitfalls to Avoid
**Problem**: Large orders can turn profitable sales into losses
**Solution**: Always set maxQuantity for products with margins \<40%
**Example**: Set maxQuantity = 3 for electronics accessories
**Problem**: Multiple conflicting offers cause confusion
**Solution**: Set clear priorities and ensure only one item discount applies per line
**Example**: Product Discount (Priority 10) vs BXGY (Priority 5)
**Problem**: Test offers run indefinitely, impacting margins
**Solution**: Always set end dates for promotional tests
**Example**: 7-day flash sale with clear end date
**Problem**: Double discounting erodes margins unnecessarily
**Solution**: Use "Do not discount on-sale items" setting
**Example**: Exclude clearance items from collection discount
**Problem**: Can't quickly identify offers in reporting
**Solution**: Use descriptive names with product and discount info
**Example**: "Winter-Coats-25Off-MaxQty3" vs "Discount1"
**Problem**: Ineffective offers continue running, wasting budget
**Solution**: Weekly review of offer performance metrics
**Example**: Check conversion rate, AOV, and margin impact
***
## Monitoring & Optimization
### Key Metrics to Track
**What**: % of visitors who purchase discounted products
**Target**: 2-5% increase vs non-discounted
**Action**: If low, test deeper discounts or better messaging
**What**: Average total of orders with the discount
**Target**: Should remain profitable after discount
**Action**: If too low, add minimum order requirements
**What**: Average discounted items per order
**Target**: Monitor against maxQuantity limits
**Action**: Adjust maxQuantity based on average
**What**: Profit margin after discounts applied
**Target**: Maintain target margin % for category
**Action**: Reduce discount or lower maxQuantity if needed
**What**: % of eligible customers using the offer
**Target**: 15-30% usage rate
**Action**: If low, improve visibility or offer value
**What**: Incremental revenue from the offer
**Target**: Positive ROI after discount costs
**Action**: Calculate: (Revenue - Discount Cost) vs baseline
### Optimization Strategies
* Launch offer with conservative maxQuantity
* Track daily performance metrics
* Monitor customer feedback
* Watch for margin impact
* Review conversion rates and AOV
* Check if maxQuantity is being hit
* Analyze which products selling best
* Consider adjusting discount depth
* Increase maxQuantity if margins allow
* Adjust discount % based on performance
* Refine product/collection selection
* Test different messaging
* Scale successful offers
* Pause underperforming ones
* Document learnings
* Plan next test
***
## Common Use Cases
**Scenario**: 24-hour flash sale on premium product
**Setup**:
* Type: Single Product Discount
* Product: "Premium Wireless Speaker"
* Discount: 30% off
* maxQuantity: 2
* Schedule: 24 hours
* Method: Automatic
**Expected Results**:
* High urgency drives quick purchases
* Limited maxQuantity protects margins
* Short duration creates FOMO
**Typical Performance**: 3-5x normal daily sales of the product
**Scenario**: End-of-season clearance for entire category
**Setup**:
* Type: Collection Discount
* Collection: "Summer Apparel"
* Discount: 40% off
* maxQuantity: Unlimited (-1)
* Schedule: 30 days
* Method: Automatic
**Expected Results**:
* Clear seasonal inventory
* Make room for new season
* Accept lower margins for inventory turnover
**Typical Performance**: 60-80% inventory clearance
**Scenario**: Introductory pricing for new product with minimum order
**Setup**:
* Type: Advanced Single Product Discount
* Product: "New Smart Watch Model"
* Discount: USD 50 off
* Minimum Quantity: 1
* Minimum Order Total: USD 200
* maxQuantity: 1 per order
* Schedule: First 14 days
* Method: Automatic
**Expected Results**:
* Generate initial sales momentum
* Attract early adopters
* Ensure orders are profitable (USD 200 minimum)
**Typical Performance**: 20-30% of new product awareness converts
**Scenario**: Clear overstocked items with margin protection
**Setup**:
* Type: Advanced Collection Discount
* Collection: "Overstock Items"
* Discount: 35% off
* maxQuantity: 3
* Exclude: Sale items
* On-Sale Items: Do not discount
* Schedule: Until inventory cleared
* Method: Automatic
**Expected Results**:
* Move excess inventory
* Protect margins with maxQuantity limit
* Avoid double-discounting sale items
**Typical Performance**: 50% inventory reduction per month
**Scenario**: Special pricing for subscription customers
**Setup**:
* Type: Advanced Single Product Discount
* Product: "Office Chair - Bulk"
* Discount: 20% off
* Purchase Type: Subscription only
* maxQuantity: Unlimited
* Schedule: Ongoing
* Method: Discount Code "SUBSCRIBE20"
**Expected Results**:
* Incentivize subscription sign-ups
* Recurring revenue stream
* Customer loyalty through subscription perks
**Typical Performance**: 15-20% of customers convert to subscriptions
***
## Troubleshooting & FAQs
**Common causes**:
✅ Check offer is **Activated** (toggle on)
✅ Verify product/collection is correctly selected
✅ Check schedule - offer may not have started or may have ended
✅ Ensure purchase type restrictions are met (one-time vs subscription)
✅ Check if customer has reached maxQuantity limit
✅ Verify sales channel is included in offer settings
✅ Check priority - another offer may be taking precedence
**Possible reasons**:
✅ Check if "Allow multiple uses per order" is enabled
✅ Verify maxQuantity value is saved correctly
✅ Ensure you're testing in the correct sales channel
✅ Check if customer has multiple carts or sessions
**Solution**: Review offer settings and re-save maxQuantity
**Options**:
1. **Use Priority**: Set Product Discount to higher priority than other item discounts
2. **Disable Stacking**: Only one item discount applies per line (default behavior)
3. **Exclude Collections**: Use exclusions to prevent overlap
4. **Different Channels**: Assign offers to different sales channels
**Remember**: Only one item discount can apply per cart line
**Yes!**
When selecting products:
* Expand the product in the selector
* Check only the specific variants you want
* Unchecked variants won't be discounted
**Example**: Discount "Red" and "Blue" t-shirts but not "Green"
**Dynamic Updates**:
✅ **Add products to collection**: They automatically get the discount
✅ **Remove products from collection**: They lose the discount
✅ **No need to edit the offer**: Collection discounts are dynamic
**Best Practice**: Use this for seasonal rotations and inventory management
**Use Advanced Product Discount**:
1. Select Advanced Single Product or Advanced Collection
2. In Conditions section, find "Purchase Type"
3. Select "Subscription" only
4. Discount will only apply to subscription purchases
**Use Case**: Encourage subscription adoption with exclusive pricing
**Yes - Highly Recommended**:
In Discount Preferences:
* Select **"Do not discount on-sale items"**
**Why**: Prevents double-discounting and margin erosion
**How it works**: Checks Shopify's compare-at price vs current price
**maxQuantity**:
* Limits NUMBER of items that can be discounted
* Example: maxQuantity = 3 means first 3 items get discount
**Maximum Discount Per Order**:
* Caps TOTAL DOLLAR AMOUNT of discount
* Example: Max USD 100 means discount stops at USD 100 total savings
**Use Both**: For ultimate control over discount exposure
***
## Product Discount vs Other Offer Types: Quick Comparison
| Feature | Product Discount | BXGY | BMSM | Bundles |
| -------------------------- | ------------------------------- | ------------- | ---------------------------- | ---------------------------- |
| **Best For** | Direct product/collection sales | Cross-selling | Volume incentives | Pre-defined sets |
| **Discount Modes** | Amount, Percent, Fixed Price | % Off only | Amount, Percent, Fixed Price | Amount, Percent, Fixed Price |
| **Setup Complexity** | ⭐ Simple | ⭐⭐ Moderate | ⭐⭐ Moderate | ⭐⭐⭐ Complex |
| **Customer Understanding** | ⭐⭐⭐ Very Easy | ⭐⭐ Easy | ⭐⭐ Easy | ⭐ Requires explanation |
| **Margin Control** | ✅ maxQuantity | ✅ Limits | ✅ Tiered | ⚠️ Fixed bundle |
| **Inventory Management** | ✅ Excellent | ⭐⭐ Good | ⭐⭐ Good | ⭐ Limited |
| **Seasonal Sales** | ✅ Perfect | ⚠️ Not ideal | ⭐⭐ Good | ⚠️ Not ideal |
| **Flash Sales** | ✅ Excellent | ⭐⭐ Good | ⚠️ Complex | ⚠️ Not ideal |
| **AOV Increase** | ⭐ Limited | ⭐⭐⭐ Excellent | ⭐⭐⭐ Excellent | ⭐⭐⭐ Excellent |
***
## Related Resources
General guide to creating any offer type
Overview of all available offer types
How offers interact and stack
Buy More Save More promotions
Creating product bundles
GWP promotional strategies
***
## Key Takeaways
* **Product Discounts** are perfect for direct, simple promotions on specific products or collections
* Use **maxQuantity** to protect margins while still offering compelling value to customers
* **Collection Discounts** are dynamic - add products to collections and they automatically inherit the discount
* **Advanced options** give you precise control with conditions, exclusions, and purchase type restrictions
* Start with **maxQuantity = 3-5** for most products to balance customer value and margin protection
* **Monitor performance** weekly and adjust based on conversion rates, AOV, and margin impact
* Use **Single Product** for focused promotions, **Collections** for scalability and category sales
* **Exclude sale items** to prevent double-discounting and protect margins
* **Set end dates** for test offers and promotional campaigns
* **A/B test** discount depth, maxQuantity limits, and messaging to optimize performance
Ready to create your first Product Discount? Head to your [Atom Commerce Dashboard](https://admin-us-central1.atomcommerce.io) and start boosting your sales today!
# Offer Best Practices
Source: https://docs.atomcommerce.io/offers/best-practices
Strategies and recommendations for creating effective promotional offers that drive sales and enhance customer experience while protecting margins.
## Overview
This guide provides strategies and recommendations for creating effective promotional offers that drive sales and enhance customer experience.
Start with clear goals, then build offers that align with your business objectives. Test and iterate based on performance data.
## Strategic Planning
### Setting Clear Goals
Before creating any offer, establish clear objectives:
* Increase revenue
* Boost average order value
* Clear excess inventory
* Acquire new customers
* Reward loyal customers
* Encourage repeat purchases
### Timing Your Promotions
Strategic timing can significantly impact offer effectiveness:
* **Seasonal Offers**: Align with holidays and seasonal buying patterns
* **Competitive Timing**: Consider your competitors' promotional calendars
* **Customer Behavior**: Schedule based on when your customers typically shop
* **Product Lifecycle**: Time promotions with new product launches or inventory cycles
## Offer Structure Best Practices
### Buy X Get Y (BXGY) Offers
* **Value Perception**: Offering a free item often has better psychological impact than an equivalent discount
* **Complementary Products**: Pair products frequently bought together
* **New Product Introduction**: Use popular items to introduce customers to new products
### Volume Discounts
* **Tiered Thresholds**: Set realistic tier thresholds based on customer buying patterns
* **Increasing Value**: Ensure higher tiers offer noticeably better value
* **Clear Communication**: Make the tiered structure easy to understand
### Bundles
* **Logical Grouping**: Create bundles of products that naturally go together
* **Value Clarity**: Clearly show the savings compared to buying items separately
* **Flexibility**: Consider allowing some customization within bundles
### Gift With Purchase (GWP)
* **Gift Value**: Ensure the gift has perceived value to the customer
* **Relevance**: Make gifts relevant to the purchasing context
* **Exclusivity**: Use limited-edition or exclusive items as gifts for premium appeal
## Customer Targeting
* **Segmentation**: Target offers to specific customer segments for higher relevance
* **Personalization**: Use customer purchase history to personalize offers
* **First-Time vs. Repeat**: Create different strategies for new and returning customers
## Communication Strategies
* **Clear Terms**: Make offer conditions easy to understand
* **Highlight Benefits**: Focus on the value to the customer, not just the discount
* **Multiple Touchpoints**: Promote offers across channels (email, site banners, product pages)
* **Urgency**: Create a sense of urgency with limited-time offers
## Testing and Optimization
* **A/B Testing**: Test different offer structures with similar customer segments
* **Incremental Analysis**: Measure the incremental lift from promotions, not just raw sales
* **Iterative Improvement**: Use performance data to refine future offers
## Common Pitfalls to Avoid
* **Discount Dependence**: Avoid training customers to only buy when there's a sale
* **Margin Erosion**: Calculate the profitability impact of each promotion
* **Complexity**: Keep offer terms simple and straightforward
* **Brand Perception**: Ensure promotions align with your brand positioning
## Measuring Success
Key metrics to track for each promotion:
* Revenue impact
* Profit margin impact
* Average order value
* Customer acquisition cost
* Customer lifetime value
* Repeat purchase rate
## Next Steps
* Explore [Analytics & Reporting](../analytics/key-metrics.md) to measure your offer performance
* Learn about [Campaign Management](../campaigns/creating.md) to organize your promotional strategy
# Creating Offers
Source: https://docs.atomcommerce.io/offers/creating-offers
A step-by-step guide for merchants to create, schedule, and manage promotions in Atom Commerce.
This page will walk you through creating your first promotion in Atom Commerce. Just follow each section below.
## Start a New Offer
Go to your Atom Commerce dashboard and click on **Offers** in the left menu. Then, click **Create New Offer** in the top right corner.
## Pick Your Offer Type
Choose the kind of promotion you want to run. Here are your options:
Give a free or discounted product when customers buy something else.
Offer bigger discounts when customers buy more items.
Sell groups of products together at a special price.
Add a free or discounted gift to qualifying orders.
Take money off the whole order when certain conditions are met.
Reduce or remove shipping costs for your customers.
Not sure which to pick? Check out our{" "}
[Offer Types Guide](/offers/offer-types) for more details.
## Set the Basics
Give your offer a name, for most offers this will be the discount name that applies in the shopping cart.
Buy More Save More Volume discount types allow you to choose a separate
discount title for each pricing tier. "Great Deal", "Super Discount", etc...
## Schedule Your Offer
Decide when your offer should run. You can set start and optionally an end date.
Scheduling lets you plan ahead for sales, holidays, or special events. Your
offer will turn on and off automatically.
The start and end dates of your offer will follow your browser’s current
time zone. For example, if you’re in New York and schedule your offer to
begin at midnight on June 1, it will start at midnight Eastern Time.
## Choose How Customers Get the Discount
Decide if the discount should apply automatically or if customers need to enter a code at checkout. You can also set limits, like how many times a code can be used.
For large campaigns, you can generate bulk coupon codes. This is especially
useful for distributing unique codes to many customers and tracking individual
redemptions.
## Qualifiers and Targets
Offers in Atom Commerce revolve around two key roles: **qualifiers**—the items that trigger your discount—and **targets**—the items that actually receive it.
Qualifiers are the items in the cart that trigger your discount. For
example, in a "Buy any 3 items from the Boots collection, get a 10%
discount" offer, the three qualifying items are the qualifiers—they meet the
condition you set for the offer.
Targets are the items that actually receive the discount. Sometimes,
the qualifiers and targets are the same, but not always. For example, in a
"Buy 2 items, get the 3rd item for 50% off" offer, the third item is the
target—it receives the discount.
Don’t worry if this feels a bit confusing at first. The key takeaway is that qualifiers trigger the discount, and targets receive the discount. Later, when we discuss qualifier exclusions, it will be important to understand the difference between these two concepts.
## Set Conditions
Choose which products, collections, or customers the offer applies to. For example, you might want the offer to work only for certain products or for first-time buyers.
You may choose to discount any of the following, including combinations:
* All Products
* Specific Variants
* Specific Products
* Specific Collections
## Choose Condition Exclusions
If there are items you don’t want to count toward your qualifying criteria—while still allowing them to receive the discount—you can exclude any variants, products, or collections from acting as qualifiers:
* **Variants**: Exclude specific SKUs so they won’t trigger the discount condition.
* **Products**: Prevent entire products from qualifying.
* **Collections**: Omit whole collections (e.g., "Clearance") from counting toward the threshold.
Use exclusions to fine-tune your promotions. For example, you might run a
Spend \$50, Get 10% Off sale store-wide but exclude every product in the Apple
collection so those items don’t count toward the \$50 threshold.
### How Exclusions Work for Order Discounts
For **Order Discounts**, exclusions work differently from item-level discounts:
* **If all items in the cart are excluded**: The discount will **not trigger** at all.
* **If some items are excluded and some are not**: The discount **will trigger** and apply only to eligible items (those not in excluded collections).
**Cart**: Only items from "Apple" collection (excluded)
**Result**: Discount does not apply
**Cart**: Items from "Apple" collection + other items
**Result**: Discount applies to non-Apple items only
For order discounts, the discount is calculated based on the total price of all **eligible items** (items not in excluded collections). Excluded items are not included in the discount calculation.
For detailed examples and troubleshooting, see our [Order Discounts Guide](/guides/order-discounts).
## Define the Discount
Set the details of your discount—like how much off, which items are discounted, or if there's a maximum number of uses.
## Review and Save
Double-check your settings. When you're happy, click **Save Offer**. Your offer will appear in your Offers dashboard, where you can edit, duplicate, or activate it anytime.
Want to see more examples? Visit our [Offer Types](/offers/offer-types){" "}
page for inspiration.
## Define the Targets
Some discount types like Buy X get Y or Gift with Purchase allow you to specify discount targets that are different from the qualifiers. For these type sof discounts you simply choose the items that you wish to have discounted, and the quantity of those items which should be discounted.
## Choose Target Exclusions
If there are items you don’t want to count toward your qualifying criteria—while still allowing them to receive the discount—you can exclude any variants, products, or collections from acting as qualifiers:
* **Variants**: Exclude specific SKUs so they won’t trigger the discount.
* **Products**: Prevent entire products from qualifying.
* **Collections**: Omit whole collections (e.g., “Clearance”) from counting.
Excluded items will not count toward meeting the qualifying conditions, but
they can still receive the discount if you include them as targets.
For example, you might run a “Buy any two pairs of shoes, get 50% off socks”
promotion. Here, socks should receive the discount (as targets), but they
shouldn’t count toward the two qualifying pairs of shoes—so you exclude the
“Socks” collection from qualifiers.
After creating offers, you can:
View all active, scheduled, and expired offers
Edit existing offers by clicking on them
Duplicate offers to create similar promotions quickly
Activate or deactivate offers as needed
Monitor performance metrics for each offer
All of this is done from the Offers dashboard.
Learn about different [Types of Offers](/offers/offer-types) for
more promotional ideas
Understand [Scheduling Offers](/offers/scheduling) for future
promotions
Explore [Best Practices](/offers/best-practices) for effective
promotion strategies
# Managing Active Offers
Source: https://docs.atomcommerce.io/offers/managing
Learn how to effectively manage active promotional offers in Atom Commerce, including monitoring performance and making adjustments.
# Managing Active Offers
This guide covers how to effectively manage your active promotional offers in Atom Commerce.
## Active Offers Dashboard
The Active Offers dashboard provides an overview of all currently running promotions:
1. Navigate to "Offers" in the main menu
2. Select the "Active" tab to view all currently running offers
3. The dashboard displays:
* Offer name and type
* Start and end dates
* Performance metrics
* Status indicators
## Monitoring Offer Performance
For each active offer, you can monitor real-time performance:
1. Click on an offer to view its details
2. The Overview tab shows:
* Usage count
* Revenue generated
* Average order value
* Conversion rate
3. The Analytics tab provides more detailed metrics and trends
## Making Quick Adjustments
You can make several adjustments to active offers without needing to create new ones:
### Extending or Shortening Duration
1. Select the offer you want to adjust
2. Click "Edit" and navigate to the "Schedule" section
3. Modify the end date/time
4. Save your changes
### Pausing an Offer
If you need to temporarily stop an offer:
1. Find the offer in the Active Offers list
2. Click the "Pause" button or toggle
3. The offer will remain in your system but won't be applied to any orders
4. You can resume it at any time by clicking "Activate"
### Ending an Offer Early
To permanently end an offer before its scheduled end date:
1. Select the offer from the Active Offers list
2. Click "End Now" or "Deactivate"
3. Confirm your action
## Duplicating Successful Offers
When an offer performs well, you might want to duplicate it:
1. Select the offer you want to duplicate
2. Click the "Duplicate" button
3. Make any necessary adjustments to the copy
4. Save as a new offer or schedule it for future activation
## Bulk Actions
For managing multiple offers simultaneously:
1. Use the checkboxes to select multiple offers
2. Use the "Bulk Actions" dropdown to:
* Pause selected offers
* Activate selected offers
* Delete selected offers
* Export offer data
## Best Practices
* Regularly review active offers to ensure they're performing as expected
* Consider ending underperforming offers early to focus on better strategies
* Avoid having too many similar offers active simultaneously
* Use tags to organize and categorize your offers
## Next Steps
* Learn about [Best Practices](/offers/best-practices) for effective promotions
* Explore [Analytics & Reporting](/analytics/key-metrics) to measure performance
# null
Source: https://docs.atomcommerce.io/offers/offer-types
# Types of Offers
Atom Commerce offers a variety of promotion types to help you grow your business. Explore each type below to find the best fit for your goals.
Apply discounts directly to specific products or collections with quantity
control.
Reward customers with a free or discounted product when they buy something
else.
Per-item minimums,order minimums, and precise targeting for the discounted
items.
Offer bigger discounts as customers buy more items.
Sell groups of products together at a special price.
Add a free or discounted gift to qualifying orders.
Take money off the whole order when certain conditions are met.
Reduce or remove shipping costs for your customers.
## Product Discount
Product Discounts are perfect for targeted promotions, seasonal sales,
and clearing specific inventory with precise margin control.
Product Discounts allow you to apply discounts directly to specific products
or entire collections. Unlike BXGY offers, these apply immediately without
requiring purchase of qualifying items. Use the **maxQuantity** feature to control
how many items can be discounted per order, protecting margins while offering value.
Single Product Discount: Apply discounts to specific individual
products. For example, "Get 20% off Premium Headphones."
Collection Discount: Discount all products in a collection. For
example, "Save 15% on all Winter Coats."
Advanced Single Product: Single product with conditions like
exclusions or purchase type restrictions (one-time vs subscription).
Advanced Collection: Collection discounts with advanced rules,
exclusions, purchase type restrictions, and maxQuantity control for margin protection.
### Capabilities
* **Product Selection** – Choose *Specific Products* or *Specific Collections*
* **Discount Modes** – **Amount Off**, **Percent Off**, or **Fixed Price**
* **maxQuantity Control** – Set unlimited (-1) or limit discounted items per order\
Example: maxQuantity = 3 means only the first 3 qualifying items get discounted
* **Conditions** (Advanced only):
* **Exclude** specific products or collections
* **Purchase Type**: One-time, Subscription, or Both
* **Sale item handling** – Allow or block additional discounting on already-on-sale items
* **Discount strategy** – Apply to *Highest priced items first* or *Lowest priced items first*
* **Limits** – Cap the **maximum discount per order** and choose whether to **allow multiple uses per order**
* **Method** – Automatic, single discount code, or coupon batch distribution
* **Scheduling** – Start date/time with optional end date/time
***
### Example 1: Simple Collection Discount with maxQuantity
**Goal**: Promote Winter Collection with 25% off, limit 3 items per customer
to protect margins
#### How to set this up
1. **Name** your offer "Winter Sale 25% Off"
2. **Method**: Select **Automatic**
3. **Type**: Choose **Collection Discount**
4. **Select Collections**: Choose "Winter Collection"
5. **Discount Mode**: Select **Percent Off** and enter **25**
6. **maxQuantity**: Enter **3** (only first 3 items discounted per order)
7. **On-Sale Item Discounts**: Choose based on your strategy (recommend "Do not discount")
8. **Discount Strategy**: Pick *Highest priced items first* to maximize perceived value
9. Save and activate
#### Behavior notes
* Customers adding 5 winter items: first 3 get 25% off, last 2 are full price
* Discount applies automatically at checkout
* No minimum purchase required (unless added in Advanced version)
* maxQuantity protects margins on bulk orders
**Example Cart**:
* Item 1 (USD 150): USD 112.50 after 25% off
* Item 2 (USD 120): USD 90 after 25% off
* Item 3 (USD 100): USD 75 after 25% off
* Item 4 (USD 80): USD 80 full price (maxQuantity reached)
* Item 5 (USD 60): USD 60 full price (maxQuantity reached)
**Total**: USD 417.50 instead of USD 382.50 if all discounted
**Your margin protected by**: USD 35
***
### Example 2: Advanced Single Product - Subscription Discount
**Goal**: USD 50 off "Premium Headphones" for subscription purchases only
#### How to set this up
1. **Name** your offer "Premium Headphones Subscription Deal"
2. **Method**: Select **Automatic**
3. **Type**: Choose **Advanced Single Product Discount**
4. **Select Product**: "Premium Headphones"
5. **Conditions**:
* **Purchase Type**: **Subscription Only**
6. **Discount Mode**: **Amount Off** → **50**
7. **maxQuantity**: **-1** (unlimited)
8. **On-Sale Item Discounts**: Select "Do not discount on-sale items"
9. Save and activate
#### Behavior notes
* Discount only applies to subscription purchases of Premium Headphones
* One-time purchases do not receive the discount
* Great for encouraging recurring revenue through subscriptions
* Helps build customer loyalty and predictable revenue stream
***
### Example 3: Collection Discount with Exclusions
**Goal**: 20% off "Accessories" collection but exclude already-on-sale items
and specific premium products
#### How to set this up
1. **Type**: Choose **Advanced Collection Discount**
2. **Select Collection**: "Accessories"
3. **Discount Mode**: **Percent Off** → **20**
4. **maxQuantity**: **5**
5. **Exclusions**:
* Select specific premium products to exclude
* Or exclude entire "Premium Accessories" collection
6. **On-Sale Item Discounts**: Select **"Do not discount on-sale items"**
7. **Discount Strategy**: *Highest priced items first*
#### Behavior notes
* Only non-sale accessories (excluding premium ones) get the discount
* Maximum 5 items discounted per order
* Highest priced eligible items discounted first
* Prevents double-discounting and protects premium product margins
***
### Example 4: Collection Discount with Fixed Price
**Goal**: Flash sale on "Premium T-Shirts" collection - all items USD 29.99 each
#### How to set this up
1. **Type**: Choose **Collection Discount**
2. **Select Collection**: "Premium T-Shirts"
3. **Discount Mode**: **Fixed Price** → **29.99**
4. **maxQuantity**: **5**
5. **On-Sale Item Discounts**: Select **"Do not discount on-sale items"**
6. **Discount Strategy**: *Highest priced items first*
#### Behavior notes
* All premium t-shirts (originally USD 45-65) now USD 29.99 each
* Items priced below USD 29.99 are automatically excluded
* Maximum 5 items get the fixed price per order
* Clear value: "All Premium T-Shirts USD 29.99!" is more compelling than "40-55% off"
* Great for flash sales and psychological pricing
**Example Cart**:
* Item 1 (originally USD 65): USD 29.99 (saves USD 35.01)
* Item 2 (originally USD 55): USD 29.99 (saves USD 25.01)
* Item 3 (originally USD 45): USD 29.99 (saves USD 15.01)
* Item 4 (originally USD 25): USD 25 (no discount - fixed price is higher)
* Item 5 (originally USD 50): USD 29.99 (saves USD 20.01)
**Total Savings**: USD 95.04 on 4 discounted items
**Fixed Price Strategy**: Perfect for creating urgency with clear pricing like "Everything USD 29.99!"
Works best for premium products and flash sales where the psychological impact of the price point
matters more than the percentage discount.
***
Use **Simple** versions (Product or Collection) for straightforward sales.
Use **Advanced** versions when you need conditions, exclusions, per-product
minimums, or sophisticated targeting.
**When to use maxQuantity**: Set limits on medium to low margin products
(maxQuantity = 3-5). Use unlimited (-1) only for high-margin items or
aggressive clearance sales.
**For complete setup guides, examples, and best practices, see our**\
**[Product Discounts Guide](/guides/product-discounts)**
***
## Buy X Get Y
When a customer buys a certain product or quantity, they get another product
for free or at a discount.
Buy One Get One Free (BOGO): Buy any sweater, get a scarf free.
Buy X, Get Y at a Discount: Buy a laptop, get 20% off any laptop
bag.
Buy X, Get Y at a Fixed Price: Buy a camera, get a tripod for
\$19.99.
Set clear purchase requirements.
Use limited-time offers to create urgency.
Communicate the value clearly to your customers.
***
## Advanced Buy X Get Y
Use Advanced BXGY to combine product/collection qualifiers, per-item minimums,
order minimums, and precise targeting for the discounted items.
### Capabilities
* **Qualifiers (X)** – Choose *Specific Products* or *Specific Collections*.\
Supports:
* **Minimum quantity of items** or **Minimum spend on items**
* **Specify quantities individually** for each product in the qualifier set
* **Exclude** specific products or collections from qualifying
* **Require minimum order total** (order-level threshold)
* **Purchase requirement options**
* Apply to *Any product* in the qualifier set or *All products*
* Limit by:
* **One-time purchase**
* **Subscription**
* **Both**
* **Targets (Y)** – Discount *Specific Products* or *Specific Collections*\
Modes: **Amount Off**, **Percent Off**, **Fixed Price**, or **Free**
* **Sale item handling** – Allow or block additional discounting on already on-sale items
* **Discount strategy** – Apply to *Highest priced items first* or *Lowest priced items first*\
Optional:
* **Discount only the highest priced item**
* **Only items that meet minimum requirements** (limit the Y discount to lines that satisfy X)
* **Limits** – Cap the **maximum discount per order** and choose whether to **allow multiple uses per order**
* **Method** – Automatic, single discount code, or coupon batch distribution
* **Scheduling** – Start date/time with optional end date/time
{" "}
Combine order minimums with per-item minimums, then turn on **Only items that
meet minimum requirements** to ensure the discount applies only to qualifying
lines.
***
### Example 1: Wholesale tier with order minimum & per-item minimum (Percent Off)
**Goal**: Orders of **\$3,500 or more** receive **40% off the regular price**
on items where the shopper buys **10 or more units of the same product**.
Smaller-quantity items can be in the cart but are not discounted. **Coupon
code**: `BULK40`
#### How to set this up
1. **Name** your offer and (optionally) add badge text.
2. **Method**: Select **Discount Code** and enter `BULK40`.
3. **Dates**: Set your start date/time (and end date/time if needed).
**Customer Purchases (Qualifiers)**
* Choose **Specific Products** or **Specific Collections** that qualify.
* Under **Conditions**, enable **Minimum quantity of items**.
* Enable **Specify quantities individually** and set the minimum **10** for each product.
* Turn on **Require minimum order total** and set it to **\$3,500**.
* **Purchase Requirement Options**: Use *Any product* (best for mix-and-match across your wholesale catalog).
* **Purchase Type**: Choose *One-Time*, *Subscription*, or *Both*.
**Customer Receives Discount On (Targets)**
* Choose the same **Specific Products** or **Specific Collections** you want discounted.
* **Discount Mode**: Select **Percent Off** and set to **40%**.
* **On-Sale Item Discounts**: Choose whether to allow additional discounting on already on-sale items.
* **Discount Strategy**: Pick *Highest priced items first* (or *Lowest*).
* **Target Options**: Enable **Only items that meet minimum requirements** to restrict discounts to 10+ unit lines.
* (Optional) Leave **Discount only the highest priced item** off to discount all qualifying lines.
**Discount Limits**
* (Optional) Set a **maximum discount per order**.
* (Optional) **Allow multiple uses per order** if you want the rule to scale across many qualifying lines.
4. Save and test: Add several products at **10+ units** each plus some single-unit products.\
The 40% discount should apply only to the 10+ unit lines once the cart total reaches **\$3,500 or more** and `BULK40` is applied.
#### Behavior notes
* Smaller-quantity lines (fewer than 10 units) are not discounted.
* Only the portion of the order that meets the per-product minimum *and* overall order minimum is discounted.
***
### Example 2: Seasonal special with fixed-price reward
**Goal**: Buy 5 or more from the *Winter Collection* and get \*\*any matching
hat for $10** *(regularly $25)\*. Applies automatically — no coupon code
needed.
#### How to set this up
1. **Name** your offer and (optionally) add badge text like *“Hat for \$10”*.
2. **Method**: Select **Automatic**.
**Customer Purchases (Qualifiers)**
* Choose the **Winter Collection** as the qualifier.
* Under **Conditions**, enable **Minimum quantity of items** and set to **5**.
* Leave **Specify quantities individually** disabled unless each product needs its own minimum.
* **Require minimum order total**: *Not needed* for this example.
* **Purchase Requirement Options**: Use *Any product*.
* **Purchase Type**: Choose *One-Time*.
**Customer Receives Discount On (Targets)**
* Choose **Specific Products**: select the matching hats you want discounted.
* **Discount Mode**: Select **Fixed Price** and set it to **\$10**.
* **On-Sale Item Discounts**: Allow or block depending on your sale policy.
* **Discount Strategy**: Pick *Lowest priced items first* if multiple hat styles are available.
* **Target Options**: Keep **Only items that meet minimum requirements** enabled to ensure the discount only applies when the cart has 5+ qualifying items.
**Discount Limits**
* Set a **maximum discount per order** if you want to limit hats per purchase (e.g., max \$30 off).
* Keep **Allow multiple uses per order** off to prevent customers from repeating the discount in a single cart.
3. Save and test: Add 5 qualifying Winter Collection items and a hat.\
The hat should price at $10 automatically, even if its original price is $25.
#### Behavior notes
* The discount only applies to hats listed as target products.
* If fewer than 5 qualifying items are in the cart, the hat remains full price.
For **Budgets**, **Sales Channels**, and **Priority**, see the overview and related sections in your documentation.
***
## Buy More Save More
Buy More Save More (BMSM) promotions create a compelling incentive for customers
to increase their purchase quantity or spending amount by offering progressive
discounts. These offers tap into the psychology of value perception, where customers
feel they're getting a better deal as they add more to their cart, driving higher
average order values and increased revenue.
Volume Discount: Reward customers for purchasing multiple units
with the same discount for all items. For example, "Buy 3+ t-shirts, save
10% on all" or "Buy 5+ items, pay USD 29.99 each."
Tiered Discount: Create multiple spending or quantity thresholds
with progressively better discounts at each level. For example, "Buy 2
items, save 5%; Buy 3 items, save 10%; Buy 4+ items, save 15%" or
"1st item USD 49.99, 2nd item USD 39.99, 3+ items USD 29.99 each."
Advanced BMSM: Provide customizable rules and conditions to
create precisely targeted promotions. For example, combine spending
thresholds with product category requirements.
### Discount Modes
BMSM offers support three discount modes:
* **Amount Off**: Fixed dollar discount per item (e.g., USD 5 off each)
* **Percent Off**: Percentage discount per item (e.g., 15% off each)
* **Fixed Price**: Set specific price per item (e.g., USD 49.99 each)
**Fixed Price Example**: "Buy 1 for USD 59.99, Buy 3+ for USD 49.99 each"
Customer adds 3 premium shirts (USD 79.95 each):
* All 3 shirts: USD 49.99 each
* Total: USD 149.97 instead of USD 239.85
* Saves: USD 89.88 (37% off)
**"Pay USD 49.99 each" is often more compelling than "37% off"!**
Use **Fixed Price** for premium products where "USD 99 each" creates more
impact than "30% off". Perfect for psychological pricing, wholesale scenarios,
and creating clear value propositions.
Display progress toward the next threshold during the shopping
experience.
Balance discount depth with your margin requirements.
Consider fixed pricing for clear value propositions on premium items.
**For complete BMSM setup guide with fixed pricing examples, see our**\
**[Buy More Save More Guide](/guides/buy-more-save-more)**
***
## Bundles
Bundle promotions allow you to group complementary products together and offer
them at a special price or discount when purchased as a set. This strategy increases
average order value, introduces customers to new products, and provides a convenient
shopping experience by presenting logical product combinations. Bundles also
simplify the decision-making process by offering pre-selected product groups
that work well together.
Percentage or Amount Bundle: Offer a discount when customers
purchase a specific combination of products. For example, "Purchase
these 3 skincare products together and save 15%."
Fixed Price Bundle: Set a specific price for a collection of
products when purchased together, typically lower than the sum of their
individual prices. For example, "Complete home gym set: $299 (normally
$450)."
Advanced Bundle: Provide customizable rules and conditions. For
example, create conditional product combinations with variable discount
structures.
Consider offering different bundle configurations for different customer
segments.
Create bundles of various price points to appeal to different customer
budgets.
***
## Gift With Purchase
Gift With Purchase (GWP) promotions reward customers with free or heavily discounted
items when they make qualifying purchases. This strategy creates a strong perceived
value, encourages customers to reach specific spending thresholds, and provides
an opportunity to introduce them to new products they might not have tried otherwise.
GWP offers combine the psychological appeal of "free" with strategic product
sampling, making them particularly effective for boosting customer satisfaction
and average order value.
Spend X Get Free Gift: This classic GWP format offers a free item
when customers reach a specified order value. For example, "Spend \$100,
get a free tote bag."
Buy X Get Free Gift: Rather than focusing on order value, this
GWP type rewards customers for purchasing specific products or
categories. For example, "Buy any foundation, get a free makeup sample."
Spend X Get Discounted Gift: Offer premium items at a
significantly reduced price when customers reach a spending threshold.
For example, "Spend \$75, get this \$50 diffuser for just \$20."
Buy X Get Discounted Gift: Similar to the above, but triggered by
the purchase of specific products rather than spending amount. For
example, "Buy any dress, get this \$40 necklace for \$15."
Advanced GWP: For sophisticated marketing strategies, allow for
customizable rules and tiered gifts. For example, multiple gift tiers
based on spending levels.
Select gifts that complement the qualifying purchases.
Use premium or exclusive gifts for higher spending thresholds.
Consider seasonal or limited-edition gifts to create urgency.
Rotate GWP offers to keep the promotion fresh and engaging.
***
## Order Discount
Order discounts apply to the entire purchase rather than specific products, offering
customers savings on their total cart value when they meet defined conditions.
These promotions are particularly effective for driving overall sales volume,
encouraging customers to reach specific spending thresholds, and creating straightforward,
easy-to-understand value propositions. Order discounts provide flexibility in
promotional strategy while being simple for customers to understand and redeem.
Spend X Get Amount Off: This straightforward discount offers a
fixed dollar amount reduction when the cart reaches a specified
threshold. For example, "\$10 off when you spend \$50."
Spend X Get Percentage Off: Percentage-based order discounts
offer a proportion of the total purchase as a discount when customers
reach a spending threshold. For example, "15% off when you spend \$100."
Buy X Get Order Discount: This hybrid approach applies an
order-level discount when customers purchase specific products,
connecting product-specific promotions with total order benefits. For
example, "Buy any jeans, get 10% off your entire order."
Advanced Order Discount: For complex promotional strategies,
provide customizable rules and conditions. For example, multi-tiered
spending thresholds with progressive benefits.
### Exclusions for Order Discounts
Order discounts support exclusions to prevent specific collections from receiving the discount. The exclusion behavior is important to understand:
If all items in the cart are from excluded collections, the discount will not trigger at all.
If some items are excluded and some are not, the discount will trigger and apply only to eligible items.
Example: "Buy 1 get 10% off your order" with "New Snowboards" collection excluded.
* Cart with only excluded items: Discount doesn't apply
* Cart with excluded + eligible items: Discount applies to eligible items only (10% of eligible items total)
The discount is calculated based on the total price of all eligible items (items not in excluded collections). Excluded items are not included in the discount calculation.
Consider progressive tiers to encourage even higher spending.
Use limited-time offers to create urgency.
Use exclusions to protect margins on premium collections while still offering value.
For complete setup guides and detailed examples, see our [Order Discounts Guide](/guides/order-discounts).
***
## Shipping Discount
Shipping discounts reduce or eliminate delivery costs for qualifying orders,
addressing one of the most common causes of cart abandonment in e-commerce. By
offsetting or removing shipping fees, these promotions can significantly improve
conversion rates, increase average order value, and enhance customer satisfaction.
Shipping discounts create a powerful incentive for customers to complete their
purchase while also encouraging them to add more items to their cart to qualify
for better shipping rates.
Free Shipping: The most popular shipping promotion removes
delivery costs entirely when orders meet specific conditions. For
example, "Free shipping on orders over \$75."
Discounted Shipping: This approach offers a percentage reduction
on delivery fees when qualifying conditions are met. For example, "50%
off shipping when you spend \$75."
Fixed Shipping: This promotion sets a flat shipping rate
regardless of order size, weight, or destination (within defined
parameters). For example, "\$5 flat-rate shipping on all orders."
Advanced Shipping Discount: For sophisticated logistics
strategies, provide customizable rules and conditions. For example,
destination-based shipping promotions.
Clearly communicate shipping offer terms, including any geographic
limitations.
Consider time-limited shipping promotions to create urgency.
Test different shipping discount structures to find what resonates best
with your customers.
Ensure your margins can support the shipping promotion without eroding
profitability.
## Next Steps
* Understand [Scheduling Offers](/offers/scheduling) for future promotions
* Explore [Best Practices](/offers/best-practices) for effective promotion strategies
* Learn how [Offer Priority and Stacking](/offers/priority-and-stacking) affects which discounts apply
# Offer Priority and Stacking
Source: https://docs.atomcommerce.io/offers/priority-and-stacking
How Atom evaluates discounts by class (item, order, shipping), then by priority within each class.
Evaluation order: Item → Order → Shipping. Within each class,
higher priority runs first.
Ties (same class + same priority): Older offer evaluates first.
Prefer unique priorities for critical offers.
Qualifier consumption: Item offers can use up qualifiers before
order offers run; avoid sharing the same qualifier.
Spend thresholds: Higher priorities see the original order total;
lower priorities see the current total.
## How Offer Priority Works
Offers are evaluated by class in this order:{" "}
Item → Order → Shipping. Within each class,{" "}
higher priority numbers are applied first.
One discount per product line. Within item discounts, higher priority applies first.
**Item discounts include**: Product Discounts, BXGY, BMSM, and Bundles
Applied after item discounts to the current order total. Within order
discounts, higher priority applies first.
Within shipping discounts, higher priority applies first.
### Key Terms
* **Order Total**: The original cart value before any discounts are applied (also called "cart total")
* **Current order total**: The cart value at the time an offer is evaluated (after earlier discounts in the sequence)
* **Final total**: The cart value after all applicable discounts have been applied
* **Minimum Order Value**: The minimum cart value required for an offer to be eligible (evaluated against order total or subtotal depending on priority)
* **Discount Class**: A category of discount that determines evaluation order (item, order, or shipping)
* **Item Discounts**: Discounts that apply to specific product lines (Product Discounts, BXGY, BMSM, Bundles). Only one item discount can apply per product line.
* **maxQuantity**: Feature in Product Discounts that limits how many items can receive a discount per order, protecting margins on bulk purchases
## Conflict Resolution
When multiple offers target the same line or total, Atom resolves conflicts using this sequence:
1. **Eligibility** – Only eligible offers are considered
2. **Class, then Priority** – Apply by discount class (item → order → shipping); within each class, apply higher-priority offers first
3. **Tie handling** – If two offers in the same class share the same priority, the older offer is evaluated first.
4. **Budget/Cap Checks** – If an offer hits a per-order cap or budget limit, the engine may proceed to the next eligible offer in that class
### Tie-Breaking Logic
When multiple offers have the same class and priority:
* **Current behavior**: If two offers have the same priority and the same class, the older offer is evaluated first.
* **What this means for you**: Do not rely on implicit tie-breaking for critical scenarios.
* **If you need a guaranteed tie-breaker**: Assign unique priorities to critical offers. If your team later configures an explicit tie-break rule (for example, newer first), that rule will control the order for equal-priority offers.
For critical offers, avoid relying on implicit tie-breaking when priorities
are the same. Prefer assigning unique priorities within each discount class to
guarantee evaluation order.
#### Examples
1. Two item discounts, both Priority 5:
* Result: The older item discount is evaluated first.
2. One item discount (Priority 5) and one order discount (Priority 5):
* Result: The item discount is evaluated first because item discounts run before order discounts. Having the same priority does not change the class order.
## Setting Offer Priority
To set the priority for an offer in the Atom admin interface:
1. Navigate to the offer you want to configure
2. On the right side of the offer page, locate the **Priority** card
3. Check the **"Set an offer priority"** checkbox to enable priority settings
4. Enter your desired priority value in the input field (higher numbers = higher priority)
5. Use the up/down arrow buttons to increment or decrement the value
Offers start with a default priority of 0 if none is specified. Discounts with
higher priority (higher numbers) will be applied first when multiple offers
are eligible for the same cart. Priority values range from 0-100.
## Offer Priority and Minimum Order Value
When an offer has a minimum order value (spend threshold), it applies only if the cart meets or exceeds that threshold. Priority determines which cart value the rule uses at evaluation time.
### How priority affects spend-based offers
Offers are evaluated in priority order (higher number = evaluated earlier). For spend thresholds, each offer reads the cart value at the moment it runs:
* **Higher-priority offers** evaluate against the original **order total** (pre-discount)
* **Lower-priority offers** evaluate against the **current order total** after higher-priority discounts have been applied
### Example: Priority Impact on Minimum Order Value
Let's say you have two offers:
1. **Spend USD 120, Get a Free Gift** (Priority 3 - higher priority)
2. **Buy More Save More: 30 percent off all items** (Priority 1 - lower priority)
**Customer's cart:** USD 150 worth of items
#### Scenario A: Current Priority Setup (Gift offer has higher priority)
1. **Gift offer evaluates first** -> Sees USD 150 **order total** -> **Qualifies** (at least USD 120) -> Free gift applied
2. **BMSM offer evaluates second** -> Sees USD 150 **order total** -> **Qualifies** -> 30 percent discount applied
**Result:** Customer gets both the free gift AND the 30 percent discount
#### Scenario B: Reversed Priorities (BMSM has higher priority)
1. **BMSM offer evaluates first** -> Sees USD 150 **order total** -> **Qualifies** -> 30 percent discount applied -> New **current order total**: USD 105
2. **Gift offer evaluates second** -> Sees USD 105 **current order total** -> **Does NOT qualify** (less than USD 120) -> No free gift
**Result:** Customer gets only the 30 percent discount, no free gift
### Strategic Priority Planning
**Use higher priorities (larger numbers) for offers you want to:**
* Apply to the original **order total**
* Ensure customers qualify for before other discounts reduce the total
* Maximize customer value (like free gifts or shipping)
**Use lower priorities (lower numbers) for offers that:**
* Can work with **order subtotals** (after higher-priority discounts)
* Are percentage-based discounts
* You want to apply after other promotions
### Quick Reference
| Priority Level | Spend threshold evaluated against | Best For |
| ---------------------------- | ------------------------------------------------- | ----------------------------------------------- |
| **Higher Priority (90-100)** | **Order total (original, pre-discount)** | Minimum spend offers, free gifts, free shipping |
| **Lower Priority (0-89)** | **Current order total (after earlier discounts)** | Percentage discounts, volume discounts |
## Qualifier Consumption Across Classes
Some offers use products in the cart as “qualifiers” to trigger a discount. When an item is used as a qualifier by an earlier-evaluated class, it may not be available to qualify another offer that runs later. Because Atom evaluates by class in this order — Item → Order → Shipping — item-level offers can consume qualifiers before order-level offers are evaluated.
### Scenario: BXGY item discount and an order discount share the same qualifier
* Setup:
* Item discount (BXGY): “Buy 1 Tan Shirt, get Jeans 50% off.”
* Order discount: “Buy a Tan Shirt, get 10% off your order.”
* Both are automatic and have the same priority.
* What happens:
* Item discounts run before order discounts. The Tan Shirt is used as a qualifier for the BXGY offer.
* When the order discount evaluates, the Tan Shirt has already been used as a qualifier, so the order discount does not apply.
* Guidance:
* If you want both to apply, avoid competing for the same qualifier. Options include using different qualifying conditions, adjusting priorities, or adding exclusions so each offer uses different qualifiers.
While the example above uses a Buy X Get Y offer, the same qualifier
consumption behavior applies to any item-level discount type.
## Discount Combinations
For code-based offers, you can configure which types of discounts can be combined together. This allows customers to benefit from the best possible total discount based on their cart.
### Setting Discount Combinations
To configure discount combinations for a code offer:
1. Navigate to the offer you want to configure
2. On the right side of the offer page, locate the **Combinations** card
3. Check the boxes for the discount classes you want this offer to combine with:
* **Product discounts** - Apply to specific items or collections
* **Order discounts** - Apply to cart subtotals
* **Shipping discounts** - Modify shipping costs
### Types of Valid Combinations
There are five types of discount combinations:
1. **Order discounts with shipping discounts**
2. **Product discounts with shipping discounts**
3. **Product discounts with other product discounts**
4. **Product discounts with order discounts**
5. **Order discounts with other order discounts**
### How Combinations Work
* **Multiple discounts can apply** to the same order when combinations are enabled
* **Order discounts are applied** on the current order total after product discounts have been applied
* **Automatic discounts** always allow combinations
* **Code discounts** require explicit combination configuration
> **Related**: See [Priority and Order Value Calculation](/offers/priority-and-stacking#offer-priority-and-minimum-order-value) to understand how priority affects which order total each discount sees during evaluation.
### Customer Experience
When customers enter multiple discount codes during checkout:
* **Compatible codes**: The best discount or combination of discounts automatically applies
* **Incompatible codes**: The message "Discount couldn't be used with your existing discounts" displays
Discount combinations can only be selected for code discounts. Automatic
discounts allow discount combinations by default.
## Stacking Rules
**Advanced Stacking Rules Coming Soon**
Atom supports sophisticated stacking controls to protect margins and avoid double-discounting. While the basic stacking behavior is already working, advanced stacking rules will be available in the admin UI soon.
### Current Stacking Behavior
* A product line receives **at most one item-level discount** (see [Priority Resolution](#conflict-resolution) for how conflicts are resolved)
* **Order-level and shipping discounts may stack** with one item-level discount when allowed by configuration
* **Priority determines evaluation order** within each discount class (see [How Offer Priority Works](#how-offer-priority-works))
### Coming Soon: Advanced Stacking Rules
When this feature launches, you'll be able to:
* **Create stacking rule groups** to control which discounts can be combined
* **Set exclusive discounts** that prevent other discounts from applying
* **Configure combination rules** between different discount types
* **Define stacking hierarchies** to ensure the most valuable discounts are prioritized
This will give you fine-grained control over how discounts interact, helping you maximize customer value while protecting your margins.
### Examples
1. Buy X Get Y (item-level) + Free Shipping (shipping):
* Result: Both may apply if the cart qualifies for each rule
* **Cross-reference**: See [Discount Combinations](/offers/priority-and-stacking#discount-combinations) for configuration details
2. Two item-level discounts target the same SKU:
* Result: The higher priority offer applies; the other is skipped on that line
* **Cross-reference**: See [Conflict Resolution](/offers/priority-and-stacking#conflict-resolution) for priority resolution logic
3. Order-level percent-off plus item-level percent-off:
* Result: Item-level applies to discounted lines; order-level applies to the remaining **current order total**
* **Cross-reference**: See [Priority and Order Value Calculation](/offers/priority-and-stacking#offer-priority-and-minimum-order-value) for evaluation order
## Practical Guidance
### Recommended Priority Strategy
TL;DR (set priorities fast and safely):
* Item discounts: Use higher numbers for mission-critical offers; only one item discount applies per line. Avoid sharing qualifiers with order discounts.
* Order discounts: Thresholds evaluate after item discounts. If relying on a product as a qualifier, don’t compete with item discounts for the same product.
* Shipping: Runs last; use priority to pick the single shipping incentive if multiples qualify.
* Ties: Same class + same priority → older offer evaluates first. Prefer unique priorities for critical offers; don’t rely on implicit tie-breaks.
## FAQs
**Can two BXGY offers apply to the same cart line?**
No. A line receives at most one item-level discount. If multiple are eligible, the highest priority number (highest priority) applies.
**How do budgets affect priority?**
Budgets and per-order caps are enforced after selection. If a cap is hit, the engine can fall back to the next eligible offer based on priority.
## See Also
* [Types of Offers](/offers/offer-types)
* [Creating Offers](/offers/creating-offers)
* [Scheduling](/offers/scheduling)
# Scheduling Offers
Source: https://docs.atomcommerce.io/offers/scheduling
Learn how to schedule promotional offers to run at specific times and dates, including best practices for offer scheduling.
# Scheduling Offers
This guide explains how to schedule your promotional offers to run at specific times and dates.
## Understanding Offer Scheduling
Scheduling allows you to create offers in advance and have them automatically activate and deactivate at specific times. This is useful for:
* Seasonal promotions
* Holiday sales
* Limited-time offers
* Flash sales
* Special event promotions
## Setting Up Offer Schedules
### Basic Date Scheduling
1. During offer creation or editing, locate the "Active Dates" section
2. Configure the following settings:
* **Start Date**: When the offer will automatically activate (required)
* **End Date**: When the offer will automatically deactivate (optional - leave empty for an offer with no end date)
* **Time Zone**: Select the appropriate time zone for your business
## Viewing Scheduled Offers
After creating scheduled offers, you can manage and monitor them in several ways:
### Offers Dashboard
1. Navigate to the Offers section in your admin panel
2. View the status column to see which offers are:
* **Active**: Currently running
* **Scheduled**: Set to start in the future
* **Expired**: End date has passed
* **Inactive**: Manually deactivated
### Filtering Offers by Status
You can filter the offers list to focus on specific types:
1. Use the Status filter dropdown
2. Select "Scheduled" to see all future offers
3. Select "Active" to see currently running offers
## Editing Scheduled Offers
You can modify the schedule of an existing offer at any time:
1. Find the offer in your offers list
2. Click on it to open the editing view
3. Navigate to the Active Dates section
4. Update the start date, end date, or time restrictions
5. Save your changes
## Best Practices for Offer Scheduling
* **Plan ahead**: Schedule offers at least 24 hours in advance to ensure proper setup
* **Avoid overlaps**: Be careful with overlapping offers that target similar products
* **Consider time zones**: If you serve customers globally, choose the time zone that makes the most sense for your primary audience
* **Use date restrictions strategically**: Combine date and time restrictions for highly targeted promotions such as "Weekend Morning Specials"
* **Review regularly**: Periodically check your scheduled offers to ensure they align with your current marketing strategy
## Next Steps
* Learn about [Managing Active Offers](/offers/managing)
* Explore [Best Practices](/offers/best-practices) for effective promotions
# Contextual Bandits for Personalization
Source: https://docs.atomcommerce.io/optimizations/contextual-bandits
Learn how Atom Commerce uses contextual bandits to personalize discount offers for individual customers, moving beyond traditional A/B testing.
# Contextual Bandits for Personalization
Atom Commerce leverages contextual bandits—a type of reinforcement learning—to optimize promotions by personalizing discount offers for individual customers. This approach moves beyond traditional A/B testing to deliver true 1:1 personalization.
## Understanding Contextual Bandits
Contextual bandits extend the classic multi-armed bandit framework by incorporating customer-specific features when making decisions. They consist of two main components:
### Promotion Performance Predictor
Our Promotion Performance Predictor forecasts how well each discount or promotion option is likely to work by looking at key customer data:
* **Purchase history**
* **Average spend**
* **Engagement level** (e.g. email opens, clicks)
* **Browsing behavior**
* **Current cart contents**
* **Other behavioral signals**
By using these insights, Atom Commerce can estimate which discount will drive the best results for each shopper—so you can deliver smarter, more effective promotions without any guesswork.
### Exploration Strategy
Alongside exploitation (choosing the current best-known discount), the bandit occasionally explores other options to discover potentially better strategies. This exploration is balanced against exploitation to continually refine the system's choices.
## How Atom Commerce Applies Contextual Bandits
### Personalized Discount Optimization
Atom Commerce uses contextual bandits to evaluate a range of discount options and select the one most likely to be effective for each individual customer. By leveraging rich customer data, the system can predict how an individual will respond to a specific discount offer, leading to a tailored promotion strategy instead of a uniform discount applied across the board.
### Dynamic Learning from Customer Behavior
Every interaction with a discount offer—whether accepted or not—provides immediate feedback. The model uses this data to update its predictions continuously, ensuring that the promotion strategy adapts in real time. As a result, the system refines its choices and consistently prioritizes the best-performing offers.
### Efficient Handling of a Large Decision Space
Marketing promotions can vary along multiple dimensions, such as discount amount, type, timing, and delivery channel. Traditional A/B testing struggles as the number of combinations grows exponentially. In contrast, contextual bandits efficiently navigate this complex landscape by making one-to-one decisions for each customer rather than relying on aggregated group-level comparisons.
## Advantages Over Traditional A/B Testing
### Accelerated Learning
Traditional A/B testing splits traffic evenly among a few static variants and requires a long period to gather enough data for statistically significant results. In contrast, contextual bandits learn from every individual interaction in real time, requiring less data and time to converge on an optimal strategy.
### Individual-Level Customization
A/B testing generates aggregate data that may overlook important behavioral differences among customer segments. Contextual bandits make decisions at the individual level, ensuring that each customer receives the discount most likely to maximize their conversion or engagement.
### Scalability for Complex Marketing Campaigns
When multiple promotion dimensions are involved—such as discount type, messaging, timing, and channel—the total number of possible combinations becomes unmanageable with A/B testing. Contextual bandits efficiently manage this multi-dimensional decision space, scaling gracefully as complexity increases.
### Resource Efficiency
Faster convergence toward effective strategies reduces the risk and cost associated with prolonged experimentation. Marketers achieve better outcomes sooner, translating into improved conversion rates and higher overall return on investment.
## Using Offer Optimizations in Atom Commerce
To leverage contextual bandits for your promotions:
1. Create multiple offer variants (e.g., different discount amounts or types)
2. Navigate to "Offer Optimizations" in the main menu
3. Create a new optimization group containing your offer variants
4. Activate the optimization group
5. The system will automatically show the most appropriate offer to each shopper based on their profile and behavior
## Monitoring Performance
Track how your personalized offers are performing:
1. Go to the "Offer Optimizations" dashboard
2. View real-time performance metrics for your optimization groups
3. See how different offers perform across various customer segments
4. Monitor overall lift compared to standard, non-personalized offers
## Best Practices
* Include diverse offer variants in your optimization groups
* Allow enough time for the system to gather sufficient data
* Use meaningful offer differences (e.g., 10% vs. 20% off rather than 19% vs. 20%)
* Review performance regularly but avoid making premature conclusions
* Consider seasonal factors that might influence customer behavior
# Optimization Overview
Source: https://docs.atomcommerce.io/optimizations/overview
Learn how Atom Commerce Offer Optimizations maximize promotional effectiveness through AI-driven personalization and advanced testing capabilities.
# Optimization Overview
Atom Commerce's Offer Optimizations help you maximize the effectiveness of your promotional strategy through AI-driven personalization, data-driven insights, and advanced testing capabilities.
## What Are Offer Optimizations?
Offer Optimizations are tools and features that help you:
* Deliver personalized offers to individual shoppers based on their behavior
* Identify which promotions generate the best results for different customer segments
* Test different discount approaches against each other
* Refine your promotional strategy based on performance data
* Automate optimization for continuous improvement
* Make data-driven decisions about your discount strategy
## Key Optimization Features
### Personalized Offer Delivery
Our advanced [Contextual Bandits](/optimizations/contextual-bandits) system provides true 1:1 personalization:
* **Individual-Level Decisions**: Each shopper receives the offer most likely to convert based on their specific profile
* **Continuous Learning**: The system automatically improves over time as it learns from customer interactions
* **Dynamic Adaptation**: Offer selection adapts to changing customer behavior patterns
* **Multi-Variant Testing**: Test multiple offer variations simultaneously with efficient resource allocation
### Performance Analytics
Get insights into how your offers are performing:
* **Conversion Rate Analysis**: See which offers drive the most conversions
* **Revenue Impact Assessment**: Measure how offers affect your bottom line
* **Customer Behavior Tracking**: Understand how shoppers interact with offers
* **Trend Identification**: Spot patterns in offer performance over time
### Optimization Groups
Create groups of related offers for intelligent distribution:
* **Multiple Offer Variants**: Group similar offers with different parameters
* **Automated Distribution**: Let the system determine which offer to show each customer
* **Performance Tracking**: Compare how offers perform across different customer segments
* **Easy Management**: Control multiple offers as a single optimization unit
## Optimization Dashboard
The central hub for all your optimization activities:
* **Performance Overview**: Quick view of key optimization metrics
* **Active Optimizations**: Status of current optimization groups
* **Improvement Tracking**: Measure optimization impact over time
## Getting Started with Optimizations
### 1. Baseline Analysis
Before optimizing, establish your current performance:
1. Navigate to the Optimizations section
2. View the "Performance Baseline" dashboard
3. Note your current conversion rates, AOV, and revenue
4. Identify offers with potential for improvement
### 2. Creating Your First Optimization Group
Start personalizing your offers:
1. Create multiple offer variants (e.g., different discount amounts)
2. Go to "Offer Optimizations" in the left menu
3. Click "Create New Optimization Group"
4. Select your offers to include in the group
5. Configure the optimization settings
6. Activate your optimization group
### 3. Analyzing Results
Understand and apply your findings:
1. Monitor optimization progress in the Results dashboard
2. Review performance across different customer segments
3. Identify which offers perform best for specific customer types
4. Use these insights to refine your promotional strategy
5. Create additional optimization groups based on your learnings
## Optimization Best Practices
* **Include Diverse Offers**: Create meaningful variations between offers in an optimization group
* **Allow Learning Time**: Give the system enough time to gather sufficient data
* **Consider Multiple Metrics**: Look beyond just conversion rate to revenue impact and AOV
* **Seasonal Adjustments**: Account for seasonal variations in behavior
* **Continuous Improvement**: Use insights from one optimization to inform the next
## Advanced Optimization Capabilities
### Automatic Customer Segmentation
Unlike traditional approaches that require predefined customer segments, our contextual bandits algorithm:
* **Discovers Natural Segments**: Automatically identifies patterns in customer behavior without manual segmentation
* **Personalizes at Scale**: Delivers the right offer to each customer based on their unique characteristics
* **Reduces Manual Setup**: Eliminates the need to create and maintain customer segments
* **Finds Unexpected Patterns**: Discovers relationships between customer attributes and offer preferences that might not be obvious
### Adaptive Learning Over Time
Our bandit algorithms continually adapt to changing customer preferences:
* **Responds to Seasonal Changes**: Automatically adjusts to shifts in buying behavior during different seasons
* **Adapts to Trends**: Quickly identifies and responds to emerging trends and changing preferences
* **Balances Exploration and Exploitation**: Continuously tests new approaches while leveraging what's already working
* **Eliminates Outdated Assumptions**: Never gets stuck in outdated patterns as preferences evolve
This automatic adaptation is particularly valuable as consumer trends can change rapidly (consider how quickly TikTok trends come and go), ensuring your promotional strategy stays current without manual intervention.
# Performance Analysis
Source: https://docs.atomcommerce.io/optimizations/performance
Learn how Performance Analysis in Atom Commerce provides insights into promotional offer performance to optimize discount strategy.
# Performance Analysis
Performance Analysis in Atom Commerce provides deep insights into how your promotional offers are performing, helping you optimize your discount strategy for maximum results.
## Understanding Offer Performance
Effective performance analysis helps you:
* Identify your most successful discount strategies
* Understand which offers drive the most revenue
* Determine the true ROI of your promotional activities
* Spot trends and patterns in customer response
* Make data-driven decisions about future promotions
## Performance Analysis Dashboard
### Accessing the Dashboard
1. Go to "Offer Optimizations" in the left navigation menu
2. Select "Performance Analysis"
3. View the main performance dashboard
### Key Dashboard Components
The dashboard provides several important views:
* **Performance Overview**: Summary metrics of all active offers
* **Offer Comparison**: Side-by-side analysis of different offer types
* **Trend Analysis**: Performance changes over time
* **Top Performers**: Your most successful offers by key metrics
* **Opportunity Analysis**: Areas for potential improvement
## Key Performance Metrics
### Revenue Impact Metrics
* **Total Revenue**: Overall sales generated from offers
* **Incremental Revenue**: Additional revenue attributed to offers
* **Average Order Value (AOV)**: Average purchase amount with offers
* **AOV Lift**: Increase in average order value compared to non-offer purchases
### Conversion Metrics
* **Offer Conversion Rate**: Percentage of offer views resulting in purchases
* **Cart Conversion**: Percentage of offers added to cart that convert to sales
* **Add-to-Cart Rate**: Frequency of offers being added to shopping carts
* **Browsing-to-Purchase**: Conversion from product browsing to completed purchase
### Discount Efficiency Metrics
* **Discount Percentage**: Average discount provided across offers
* **Return on Discount Investment (RODI)**: Revenue generated per dollar discounted
* **Discount Depth Analysis**: Performance by discount percentage tiers
* **Margin Impact**: Effect of discounts on product margins
### Customer Behavior Metrics
* **New vs. Returning Customers**: How different customer types respond
* **Repurchase Rate**: Frequency of repeat purchases after offer redemption
* **Cart Size**: Number of items in carts with offers
* **Browse Time**: Time spent shopping with active offers
## Performance Analysis Tools
### Offer Performance Comparison
Compare different offers side-by-side:
1. Go to "Performance Analysis" > "Offer Comparison"
2. Select the offers you want to compare
3. Choose metrics for comparison
4. View the comparative performance chart
5. Export results if needed
### Time-Based Analysis
Track performance changes over time:
1. Navigate to "Performance Analysis" > "Trend Analysis"
2. Select offers to analyze
3. Choose your time period and granularity (daily, weekly, monthly)
4. View performance trends with trend lines and moving averages
5. Identify seasonal patterns or performance shifts
### Discount Type Analysis
Compare performance across different discount structures:
1. Go to "Performance Analysis" > "Discount Type Performance"
2. View aggregated performance by discount type (percentage, fixed, BXGY, etc.)
3. Compare conversion rates, AOV, and revenue across types
4. Identify which discount structures work best for your store
### Product Performance
See how offers affect specific product performance:
1. Navigate to "Performance Analysis" > "Product Impact"
2. Select products or collections to analyze
3. View how different offers affect product sales
4. Identify which products respond best to promotions
## Creating Custom Analysis Reports
Build tailored reports for your specific needs:
1. Go to "Performance Analysis" > "Custom Reports"
2. Click "Create New Report"
3. Select metrics and dimensions to include
4. Choose visualization types (charts, tables, heat maps)
5. Save your custom report for future reference
6. Schedule automated delivery if desired
## Performance Insights
### Automated Insights
Atom Commerce automatically identifies important patterns:
* **Key Findings**: Automatically highlighted significant trends
* **Anomaly Detection**: Identification of unusual performance patterns
* **Opportunity Alerts**: Notification of potential optimization opportunities
* **Predictive Insights**: Projections based on current performance
### Viewing Insights
Access system-generated insights:
1. Go to "Performance Analysis" > "Insights Feed"
2. View the latest generated insights
3. Filter insights by category or importance
4. Take recommended actions based on insights
## Exporting Analysis Data
Share performance data with your team:
1. From any analysis view, click the "Export" button
2. Select your preferred format (CSV, Excel, PDF)
3. Choose which metrics and charts to include
4. Add optional notes or explanations
5. Download or email the export
## Setting Performance Goals
Establish benchmarks to measure success:
1. Navigate to "Performance Analysis" > "Goals"
2. Click "Create New Goal"
3. Select the metric to track (conversion rate, revenue, etc.)
4. Set your target value
5. Define the timeframe
6. Save your goal
## Performance Analysis Best Practices
* **Compare Similar Time Periods**: Account for seasonal variations
* **Look Beyond Conversion Rate**: Consider revenue and profit metrics
* **Segment Your Analysis**: Break down performance by customer type, device, etc.
* **Consider External Factors**: Account for market conditions, competitors, etc.
* **Focus on Trends**: Pay attention to directional changes over time
* **Use Multiple Metrics**: Don't rely on a single measurement
## Performance Optimization Workflow
Implement a continuous improvement process:
1. **Analyze Current Performance**: Identify strengths and weaknesses
2. **Develop Hypotheses**: Form theories about potential improvements
3. **Test Changes**: Implement changes based on your hypotheses using optimization groups
4. **Measure Results**: Analyze outcomes
5. **Implement Improvements**: Apply successful changes
6. **Repeat the Process**: Continue refining your approach
# Atom Commerce – Smart Discount & Promotion Engine for Shopify
Source: https://docs.atomcommerce.io/overview
Atom Commerce is a smart offer engine built for Shopify merchants and API-first platforms. Build, manage, and optimize promotions (BOGO, bundles, volume pricing, gift with purchase), while letting the system choose the best discount per customer to maximize revenue and maintain margins.
## Introduction
Atom Commerce is a smart **offer & promotion engine** for Shopify merchants. Move beyond static discounts — with a flexible rule builder, real-time decision logic, robust analytics, and seamless Shopify integration, you can run smarter promotions (BOGO, bundles, tiered/volume pricing, gift with purchase) that adapt per customer rather than using one-size-fits-all deals.
## What Atom Commerce Does
Atom Commerce transforms how you create and manage promotions on Shopify. Instead of static, one-size-fits-all discounts, you get a powerful system that:
Create BOGO, bundles, volume discounts, gift with purchase, and more with an intuitive interface
Automatically applies the best discount per customer to maximize revenue while protecting margins
Track performance, measure ROI, and optimize offers based on actual data
Works directly with Shopify - no coding required, automatic discount application
## Key Features
### Offer Management
Create and manage multiple promotion types:
* **Product Discounts**: Direct discounts on products or collections with margin protection
* **Buy X Get Y (BXGY)**: Reward customers with free or discounted products
* **Buy More Save More (BMSM)**: Progressive discounts that encourage larger orders
* **Bundles**: Group complementary products at special prices
* **Gift With Purchase (GWP)**: Add free or discounted gifts to qualifying orders
* **Order Discounts**: Cart-level discounts based on spending thresholds
* **Shipping Discounts**: Reduce or eliminate shipping costs
### Advanced Capabilities
Control how multiple offers interact:
* Set offer priorities to determine evaluation order
* Configure discount stacking rules
* Protect margins with intelligent conflict resolution
* Understand how item, order, and shipping discounts work together
Learn more about [Offer Priority and Stacking](/offers/priority-and-stacking)
Fine-tune discount behavior:
* Control multiple uses per order
* Manage qualifier reuse across offers
* Set maximum discount amounts
* Protect margins with quantity limits
Explore [Discount Limits](/discount-limits/overview) for detailed controls
Maximize performance:
* AI-powered contextual bandits for offer selection
* Performance analytics and reporting
* A/B testing capabilities
* Revenue optimization strategies
See [Optimization Overview](/optimizations/overview) for advanced features
## Getting Started
Install the Atom Commerce app from the Shopify App Store and complete the quick setup process.
See our [First-Time Setup Guide](/getting-started/setup) for detailed instructions.
Start with a simple product discount or collection sale to get familiar with the system.
Follow our [Quickstart Guide](/quickstart) for a step-by-step walkthrough.
Learn about different promotion types and when to use each one.
Check out [Types of Offers](/offers/offer-types) for comprehensive information.
Use analytics to measure performance and create more sophisticated promotions.
Review [Best Practices](/offers/best-practices) for proven strategies.
## Popular Use Cases
Run category-wide promotions for holidays, end-of-season clearance, or special events. Use collection discounts with scheduling to automate your seasonal campaigns.
Clear overstocked items with targeted product discounts. Use maxQuantity limits to protect margins while moving inventory.
Create compelling first-time buyer offers using order discounts or gift with purchase promotions to attract new customers.
Increase cart size with Buy More Save More offers, bundles, or volume discounts that reward customers for purchasing more.
Generate buzz for new products with limited-time discounts, BOGO offers, or introductory pricing strategies.
## Resources
Get up and running in minutes
Step-by-step guide to creating promotions
Explore all available promotion types
Detailed guides for specific offer types
Strategies for effective promotions
Track and measure performance
## Support
Need help? We're here for you:
* **AI Assistant**: Built-in chat in your dashboard for instant answers
* **Email Support**: [support@atomcommerce.io](mailto:support@atomcommerce.io)
* **Documentation**: Browse our complete guides and references
Ready to get started? Head to your [Atom Commerce Dashboard](https://admin-us-central1.atomcommerce.io) or follow our [Quickstart Guide](/quickstart) to create your first offer.
# POS Setup
Source: https://docs.atomcommerce.io/pos/setup
Learn how to configure Atom Commerce discounts for Point of Sale (POS) devices in Shopify
# POS Setup
This guide shows you how to set up Atom Commerce discounts on your Shopify Point of Sale (POS) devices for the first time. After you finish, your staff can use Atom Commerce discounts right from the POS device.
## Prerequisites
Before you start, make sure you have:
* An active Atom Commerce account
* Shopify POS installed and set up on your device (supports both POS PRO and POS LITE)
* You can log into your Shopify store as an admin
* You have your POS device with you
## Shopify Admin Configuration
First, you need to turn on the Atom Commerce Discounts app in your Shopify POS settings.
### Step 1: Navigate to POS Settings
1. In your Shopify admin, go to **Sales channels** > **Point of Sale**
2. Click **Settings** in the left sidebar
### Step 2: Access POS Apps
1. In the **General** section, click **POS apps**
2. You'll see a list of installed POS applications
### Step 3: Configure Atom Commerce Discounts
1. Find **Atom Commerce Discounts** in the app list
2. Click on **Atom Commerce Discounts** to open its settings
3. In the **Customize this app** section, check that **Smart grid tile** shows **Added** with a green checkmark
4. If it shows **Remove** instead, click the **Add** button to turn on the smart grid tile
The smart grid tile adds a button on your POS device. Your staff can tap this button to use Atom Commerce discounts.
## POS Device Configuration
After you turn on the smart grid tile in Shopify admin, you need to check and set up the settings on your POS device.
### Step 1: Find the Atom Commerce Tile
1. On your POS device, open the smart grid (the main screen with buttons)
2. Look for the **Atom Commerce Ready** tile (it shows the Atom Commerce logo with circles)
3. You should see this tile on your smart grid screen with your other POS buttons
### Step 2: Open Atom POS Configuration
1. Tap the **Atom Commerce Ready** tile
2. This opens the **Atom POS Configuration** screen
### Step 3: Verify POS Mode
1. In the **Atom Commerce Connector** section, find **POS Mode**
2. Confirm that the displayed mode matches your Shopify POS subscription:
* If you have **POS PRO**, it should show **PRO**
* If you have **POS LITE**, it should show **LITE**
3. If the wrong mode is displayed, switch to the correct mode:
* Scroll down to the **Mode & Discount Management** section
* Click the **Switch to PRO** button (if you need PRO mode)
* Or click the **Switch to LITE** button (if you need LITE mode)
* Wait a few seconds for it to update
If you're having trouble setting the correct mode, contact [support@atomcommerce.io](mailto:support@atomcommerce.io) for assistance.
### Step 4: Clear Atom Session (If Needed)
If you just switched modes or something isn't working:
1. Scroll to the bottom of the **Atom POS Configuration** screen
2. Click **Clear Atom Session**
3. This refreshes the connection between your POS device and Atom Commerce
## Verification
After you finish the setup, check that everything is working:
1. **Shopify Admin**: Make sure the Smart grid tile is set to "Added" for Atom Commerce Discounts
2. **POS Device**: Check that the "Atom Commerce Ready" tile shows up in your smart grid
3. **POS Mode**: Verify that POS Mode shows the correct mode (PRO or LITE) matching your Shopify POS subscription
4. **Test a Discount**: Try using an Atom Commerce discount on a test sale on your POS device
## Troubleshooting
### Smart Grid Tile Not Appearing
If the "Atom Commerce Ready" tile doesn't show up on your POS device:
* Check that the Smart grid tile is set to "Added" in Shopify admin POS settings
* Refresh your POS device or close and reopen the POS app
* Make sure you have the latest version of the Atom Commerce Connector installed
### POS Mode Not Correct
If POS Mode doesn't match your Shopify POS subscription:
* Click **Switch to PRO** or **Switch to LITE** in the POS configuration screen to match your subscription
* Click **Clear Atom Session** to refresh the connection
* If you're unable to set the correct mode, contact [support@atomcommerce.io](mailto:support@atomcommerce.io) for assistance
### Discounts Not Applying
If discounts aren't working on POS sales:
* Make sure POS Mode matches your Shopify POS subscription (PRO or LITE)
* Check that your offers are set up to work with POS channels
* Make sure your offers are active and the dates are correct
* See the [Managing Channels](/channels/managing) guide for help with channel settings
## Next Steps
Now that POS is set up, you can:
* Learn about [Managing Channels](/channels/managing) to set up offers for POS
* Check out [Creating Offers](/offers/creating-offers) to make discounts that work with POS
* Read the [Channel Overview](/channels/overview) to learn how channels work in Atom Commerce
# Quickstart Guide
Source: https://docs.atomcommerce.io/quickstart
Get started with Atom Commerce in minutes. Learn how to create your first promotion and start driving sales.
## Welcome to Atom Commerce
Atom Commerce is a smart offer engine that helps Shopify merchants create, manage, and optimize promotions. This quickstart guide will help you create your first offer in just a few steps.
* How to connect your Shopify store
* How to create your first offer
* Basic offer types and when to use them
* Setup: 5-10 minutes
* First offer: 5 minutes
* Total: \~15 minutes
## Step 1: Connect Your Shopify Store
Before creating offers, you need to connect Atom Commerce to your Shopify store.
Go to the [Atom Commerce Connector on Shopify App Store](https://apps.shopify.com/atom-commerce-connector) and click **Add app**.
After installation, you'll be directed to a short survey and getting started page. You can use our built-in AI chat system if you need help.
This is the most important step! Enabling the App Embed allows our discount engine to apply discounts to your store. Follow the prompts on the getting started page to turn this on.
Once installed, Atom Commerce will always be available under the **Apps** menu in your Shopify Admin. Click **Atom Commerce Connector** to open your dashboard.
For detailed setup instructions, see our [First-Time Setup Guide](/getting-started/setup).
## Step 2: Create Your First Offer
Now that your store is connected, let's create a simple product discount to get you started.
1. Open your Atom Commerce Dashboard
2. Click **Offers** in the left menu
3. Click **Create New Offer** in the top right corner
For your first offer, we recommend starting with a **Product Discount**:
* **Simple**: Easy to understand and set up
* **Flexible**: Works with single products or entire collections
* **Effective**: Direct discounts drive immediate sales
Select **Product Discount** or **Collection Discount** from the offer type options.
* **Name**: Give your offer a clear name (e.g., "Summer Sale - 20% Off")
* **Method**: Choose **Automatic** (applies automatically) or **Discount Code** (requires code entry)
* **Discount**: Set your discount amount (e.g., 20% off or \$10 off)
* For **Product Discount**: Select specific products
* For **Collection Discount**: Select one or more Shopify collections
* **Start Date**: When the offer begins
* **End Date**: When the offer expires (optional)
1. Review your offer settings
2. Click **Save Offer**
3. Toggle **Activate** to launch your offer
Your offer is now live! Customers will see the discount automatically applied at checkout (if using automatic method) or can enter your discount code.
## What's Next?
Now that you've created your first offer, explore these resources to get the most out of Atom Commerce:
Discover all the different promotion types available
Learn about qualifiers, targets, exclusions, and more
Strategies for creating effective promotions
Understand how multiple offers work together
Track your offer performance
Step-by-step guides for specific offer types
## Common First Offers
Here are some popular first offers to try:
**Type**: Collection Discount\
**Discount**: 20% off\
**Collection**: Choose a seasonal collection (e.g., "Summer Apparel")\
**Why**: Easy to set up, works immediately, great for seasonal promotions
**Type**: Product Discount\
**Discount**: \$50 off\
**Product**: Select a featured or new product\
**Schedule**: 24-48 hours\
**Why**: Creates urgency, drives quick sales, perfect for testing
**Type**: Buy More Save More (BMSM)\
**Tiers**: Buy 2 items, save 10%; Buy 3+ items, save 15%\
**Why**: Encourages larger orders, increases average order value
## Need Help?
* **AI Assistant**: Use the built-in AI chat in your dashboard for instant help
* **Support**: Email us at [support@atomcommerce.io](mailto:support@atomcommerce.io)
* **Documentation**: Browse our [complete documentation](/overview) for detailed guides
Ready to create more advanced offers? Check out our [Creating Offers Guide](/offers/creating-offers) for detailed step-by-step instructions.
# First-Time Setup
Source: https://docs.atomcommerce.io/setup
Complete guide to setting up your Atom Commerce account, connecting your Shopify store, and configuring initial settings.
# First-Time Setup
This guide will walk you through the initial setup process for your Atom Commerce account.
## Accessing Your Dashboard
After signing up for Atom Commerce, you'll receive an email with your login credentials and a link to access your dashboard.
## Connecting Your Shopify Store
The first step is connecting your Shopify store to Atom Commerce:
1. From your dashboard, click on "Settings" in the main navigation
2. Select "Shopify Integration"
3. Click "Connect Store"
4. Follow the prompts to authorize Atom Commerce with your Shopify store
## Initial Configuration
After connecting your store, you'll need to configure some basic settings:
1. **Store Information**: Verify your store details are correct
2. **User Preferences**: Set your timezone and notification preferences
3. **Team Access**: Invite team members if needed
## Next Steps
Once your store is connected and basic settings are configured, you're ready to:
* Explore your [Dashboard Overview](/getting-started/dashboard)
* Learn about [Navigating the Interface](/getting-started/navigation)
* Start [Creating Offers](/offers/creating-offers)
# Connecting Your Shopify Store
Source: https://docs.atomcommerce.io/shopify/connecting
Learn how to connect your Shopify store to Atom Commerce and understand what data is synchronized between platforms.
# Connecting Your Shopify Store
Atom Commerce integrates seamlessly with your Shopify store. This guide explains how to connect your store and what data is synchronized.
## Connection Process
1. From your Atom Commerce dashboard, navigate to "Settings"
2. Select "Shopify Integration" from the menu
3. Click the "Connect Store" button
4. You'll be redirected to Shopify's authorization page
5. Review the permissions requested and click "Allow"
6. You'll be returned to Atom Commerce with your store connected
## Required Permissions
When connecting your Shopify store, Atom Commerce will request access to:
* Products and inventory
* Orders and customers
* Discounts and price rules
* Themes and assets (for frontend integration)
These permissions are necessary for the full functionality of the platform.
## Data Synchronization
After connecting your store, Atom Commerce will automatically sync:
* Your product catalog (products, variants, collections)
* Customer information
* Order history
* Store settings and configuration
This initial sync may take a few minutes depending on the size of your store.
## Connection Status
You can check your connection status at any time:
1. Go to "Settings" > "Shopify Integration"
2. View the "Connection Status" section
3. If needed, you can disconnect and reconnect your store
## Troubleshooting Connection Issues
If you encounter problems connecting your store:
* Ensure you're logged into your Shopify admin account
* Check that you have administrative privileges in Shopify
* Verify that your Shopify plan supports third-party app installations
* Try disconnecting and reconnecting your store
If problems persist, contact our support team via the help icon in the application.
## Next Steps
After connecting your Shopify store:
* Learn about [Product Synchronization](/shopify/products)
* Begin [Creating Offers](/offers/creating-offers) for your products
# Product Synchronization
Source: https://docs.atomcommerce.io/shopify/products
Learn how Atom Commerce synchronizes with your Shopify product catalog and how to manage product integration.
# Product Synchronization
This guide explains how Atom Commerce synchronizes with your Shopify product catalog and how you can manage this integration.
## Product Synchronization Overview
Atom Commerce maintains a synchronized copy of your Shopify product catalog to:
* Enable you to create offers for specific products
* Provide accurate product information in your dashboard
* Allow for advanced targeting and segmentation
* Keep your promotional offers up-to-date with your inventory
## Initial Synchronization
When you first connect your Shopify store, Atom Commerce performs an initial synchronization:
1. All products, variants, collections, and inventory data are imported
2. Product images and details are synchronized
3. Product relationships and categorizations are established
4. This process may take a few minutes to complete, depending on catalog size
## Viewing Synchronized Products
To view your synchronized products:
1. Navigate to "Products" in the main menu
2. Browse your complete product catalog
3. Use filters and search to find specific products
4. Click on any product to view its details and variants
## Automatic Updates
Atom Commerce automatically stays in sync with your Shopify catalog:
* **Real-time Updates**: When you make changes in Shopify, they are reflected in Atom Commerce
* **Inventory Tracking**: Stock levels are updated to prevent offers on out-of-stock items
* **New Products**: Newly added products in Shopify are automatically imported
* **Product Changes**: Updates to product details are synchronized
## Manual Synchronization
If you need to force a synchronization:
1. Go to "Settings" in the main menu
2. Select "Shopify Integration"
3. Click "Synchronize Products"
4. Wait for the synchronization to complete
## Synchronization Status
You can check the status of your product synchronization:
1. Navigate to "Settings" > "Shopify Integration"
2. View the "Product Synchronization" panel
3. See the last successful sync time
4. Check for any synchronization errors or warnings
## Using Products in Offers
Synchronized products can be used in your promotional offers:
1. When creating an offer, navigate to the product selection section
2. Browse or search for products from your catalog
3. Select individual products, variants, or entire collections
4. Set offer conditions based on product attributes
## Product Attributes
Atom Commerce synchronizes several product attributes that can be used in offers:
* Product title and description
* Price and compare-at price
* SKU and barcode
* Variants (size, color, material, etc.)
* Product type and vendor
* Tags and collections
* Weight and dimensions
* Inventory status
## Collections Synchronization
In addition to individual products, Atom Commerce synchronizes Shopify collections:
* Both manual and automatic collections are imported
* Collection memberships are kept up-to-date
* Collection-based offers automatically include the right products
## Troubleshooting Synchronization Issues
If you encounter product synchronization problems:
1. Check your connection status in "Settings" > "Shopify Integration"
2. Verify your Shopify API access is still valid
3. Look for specific error messages in the synchronization logs
4. Try a manual synchronization
5. Contact support if issues persist
## Next Steps
* Explore [Creating Offers](../offers/creating-offers.md) using your product catalog
# Common Issues and Troubleshooting
Source: https://docs.atomcommerce.io/troubleshooting/common-issues
Find solutions to frequently encountered issues in Atom Commerce, including offer creation, Shopify integration, and reporting problems.
# Common Issues
This guide addresses frequently encountered issues in Atom Commerce and provides step-by-step solutions.
## Offer Creation Issues
### Offers Not Applying to Orders
If your offers aren't being applied to customer orders:
1. **Check Offer Status**: Ensure the offer is active in the Offers dashboard
2. **Verify Dates**: Confirm the offer's start date has passed and end date hasn't occurred
3. **Review Conditions**: Make sure all offer conditions are correctly configured
4. **Check Product Availability**: Confirm the products in the offer are in stock
5. **Test with Different Scenarios**: Try different cart configurations to test the offer
### Can't Save an Offer
If you're unable to save a new offer or changes to an existing offer:
1. **Look for Validation Errors**: Red error messages should indicate the problem
2. **Check Required Fields**: Ensure all required fields are completed
3. **Verify Product Selection**: Make sure products or collections are properly selected
4. **Check Discount Values**: Ensure discount amounts or percentages are valid
5. **Review Date Settings**: Confirm start and end dates are set correctly
## Shopify Integration Issues
### Connection Problems
If your Shopify store disconnects or shows integration errors:
1. **Check Connection Status**: Go to Settings > Shopify Integration to verify status
2. **Verify API Access**: Ensure API permissions haven't been revoked in Shopify
3. **Reconnect the Store**: Try disconnecting and reconnecting your store
4. **Check for Shopify Outages**: Verify Shopify's system status
5. **Contact Support**: If problems persist, contact Atom Commerce support
### Product Synchronization Issues
If products aren't syncing correctly:
1. **Check Last Sync Time**: Verify when the last successful sync occurred
2. **Force Manual Sync**: Try a manual synchronization from Settings
3. **Look for Specific Errors**: Check for error messages in the sync logs
4. **Verify Product Status**: Ensure products are published in Shopify
5. **Check for Large Catalog Issues**: Very large catalogs may take longer to sync
## Reporting and Analytics Issues
### Missing or Incomplete Data
If reports or analytics appear incomplete:
1. **Verify Date Range**: Ensure you've selected the correct date range
2. **Check Data Processing**: Recent data may still be processing
3. **Look for Filtering Issues**: Remove filters that might be excluding data
4. **Verify Offer Tagging**: Make sure offers are properly tagged for reporting
5. **Clear Cache**: Try refreshing the page or clearing your browser cache
### Export Problems
If you're having trouble exporting reports:
1. **Check File Size**: Very large exports may time out
2. **Try Different Format**: Switch between CSV, Excel, or PDF formats
3. **Reduce Data Size**: Export a smaller date range or fewer metrics
4. **Check Browser Downloads**: Ensure downloads aren't being blocked
5. **Try Again Later**: System load may temporarily affect export capabilities
## Account and Access Issues
### Login Problems
If you're unable to log in to your account:
1. **Verify Credentials**: Ensure your email and password are correct
2. **Check Account Status**: Verify your account is active
3. **Reset Password**: Use the "Forgot Password" option
4. **Clear Browser Cache**: Try clearing cookies and cache
5. **Use a Different Browser**: Switch browsers to eliminate browser-specific issues
### Permission Issues
If you're unable to access certain features:
1. **Check User Role**: Verify your assigned role has the necessary permissions
2. **Contact Account Admin**: Ask your account administrator to modify permissions
3. **Verify Subscription Level**: Certain features may require a higher subscription tier
4. **Check for Temporary Restrictions**: Some features may be temporarily unavailable
## Performance Issues
### Slow Loading Times
If the application is loading slowly:
1. **Check Internet Connection**: Verify your internet speed
2. **Clear Browser Cache**: Clear cookies and cached data
3. **Close Unused Tabs**: Too many open tabs can slow performance
4. **Check for Large Data Sets**: Filtering to smaller data sets may improve speed
5. **Try a Different Browser**: Some browsers may perform better than others
## Testing Your Offers
If you need to verify that your offers are working correctly before they go live, Atom Commerce provides a testing tool to help you validate discount behavior.
### Using the Offer Testing Tool
1. **Access the Testing Tool**: Navigate to [https://admin-us-central1.atomcommerce.io/testOffers](https://admin-us-central1.atomcommerce.io/testOffers)
2. **Select Your Discount**: Use the dropdown at the top of the screen to choose the discount you want to test
3. **Test Your Discount**: You have two options:
* **Manual Testing**: Add specific products manually to a test cart to see how the discount applies
* **AI Agent Testing**: Click **Test with Agent** to open a copilot tool that will automatically add items to a test cart and help you test the discount
The AI Agent testing feature can help you quickly test different scenarios and cart configurations without manually building test carts.
### When to Use the Testing Tool
Use the offer testing tool when:
* You've created a new offer and want to verify it works as expected
* An offer isn't applying correctly and you need to debug the issue
* You want to test different cart configurations to understand discount behavior
* You need to validate complex discount rules before going live
## Getting Additional Help
If you've tried the troubleshooting steps and still need assistance:
1. **Check Documentation**: Review other documentation sections for guidance
2. **Use the Testing Tool**: Test your offers using the [offer testing tool](https://admin-us-central1.atomcommerce.io/testOffers) to identify issues
3. **Contact Support**: Reach out to Atom Commerce support via the help icon in the application
4. **Provide Details**: Include specific error messages and steps to reproduce issues
5. **Share Screenshots**: Visual documentation can help identify problems
# Discount Upsell Capabilities
Source: https://docs.atomcommerce.io/upsells/overview
# Discount Upsells: Turn "Almost" Into "Yes!"
Atom Commerce helps you maximize your store’s revenue by automatically showing customers what they need to do to unlock your best promotions. Our Discount Upsell system detects when a shopper is close to qualifying for a discount and displays a friendly, actionable message—right in the cart or as a store banner.
## What Are Discount Upsells?
Discount Upsells are smart notifications that:
* Tell shoppers how close they are to a reward (like a discount or free shipping)
* Suggest exactly what to add or spend to qualify
* Highlight relevant products to help them reach the goal
This turns missed opportunities into extra sales, and helps your customers feel rewarded for buying more.
***
## How It Works
Every promotion you create in Atom Commerce can be configured to show upsell messages when a customer is close to qualifying. These messages are tailored to the type of promotion:
### 1. Product Discounts (Buy X, Get Y, Volume, etc.)
When a shopper is just short of a product-based deal, they’ll see a message like:
> **Add 1 more to save \$X!**
**Example:**
* Promotion: “Buy 3, get 1 free” on light bulbs
* Cart: Customer has 2 boxes
* Upsell: “Buy one more box of light bulbs and get the next one free!”
If the promotion targets specific products or brands, the upsell can highlight those items (e.g., “Add 1 more Brand X windbreaker to save 20%!”).
### 2. Order Discounts (Spend Thresholds)
For order-wide discounts, Atom Commerce will show:
> **Spend \$25 more to get 10% off your order**
**Example:**
* Promotion: “10% off orders over \$100”
* Cart: \$75 subtotal
* Upsell: “Spend \$25 more to qualify for 10% off your order!”
### 3. Shipping Upsells (Free Shipping Bars)
For free shipping promotions, you can display a dynamic bar or message:
> **Spend \$100 more for FREE DELIVERY**
**Example:**
* Promotion: “Free shipping on orders over \$2500”
* Cart: \$2400 subtotal
* Upsell: “Spend another \$100 to qualify for free shipping. Check out our Brand X windbreakers!”
You can even suggest specific products that would help the customer reach the threshold.
***
## Why Use Discount Upsells?
* **Increase Average Order Value:** Shoppers are more likely to add items when they see a clear, achievable reward.
* **Reduce Cart Abandonment:** Customers know exactly what’s needed to unlock a deal, so they’re less likely to leave.
* **Personalized Experience:** Upsell messages are tailored to each shopper’s cart and your active promotions.
* **No Coding Required:** All logic is handled by Atom Commerce—just configure your promotions and enable upsells.
***
## How to Enable Upsells
1. **Create or Edit a Promotion** in Atom Commerce.
2. **Enable Discount Upsells** (closeness qualifiers) for that promotion.
3. **Customize Your Message** (optional):
* Use default messages, or
* Add your own text and product suggestions
4. **Publish and Go Live!**
Atom Commerce will automatically detect when a customer is close to qualifying and show the right upsell message at the right time.
***
## Real-World Examples
* **Buy X Get Y:** “Add 1 more box of gloves to get the next one free!”
* **Order Discount:** “Spend \$50 more to unlock 20% off your order.”
* **Free Shipping:** “Spend $100 more for free delivery. See our $100+ jackets!”
***
## Frequently Asked Questions
**Q: Which products are suggested in the upsell?**
A: If the shopper has not yet qualified for your offer, the products you chose as your condition will be suggested. For example, in a "Buy 2, get the 3rd item free" offer, if the shopper already has two items, the upsell product will be the third item. However, if your discount is different—such as "Buy 2 pairs of shorts, get 50% off a belt"—then when 2 pairs of shorts are already in the cart, the belt will be the suggested upsell.
**Q: Will customers see multiple upsell messages?**
A: If a customer is close to qualifying for more than one promotion, Atom Commerce will prioritize and show the most relevant upsell(s) based on your settings.
**Q: Is this compatible with Shopify’s checkout and cart?**
A: Yes, Atom Commerce is designed for seamless integration with Shopify stores.
***
## Get Started
Discount Upsells are available for all Atom Commerce merchants. To start using them, just enable upsells on your next promotion and watch your average order value grow!
For more details, see our [Offers Setup Guide](/offers/creating-offers).
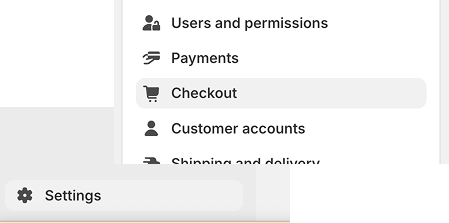
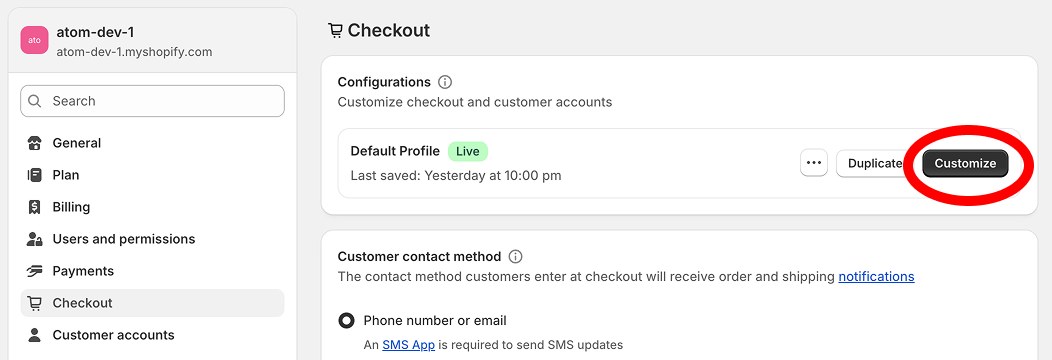


 ### Step 1: Navigate to Coupon Batches
1. Click "Coupon Batches" in the main navigation
2. Select "Create New Batch"
### Step 2: Configure Basic Settings
Fill in the batch details:
1. **Batch Name**: Choose a descriptive name (e.g., "Summer Sale 2023")
2. **Number of Codes**: Specify how many unique codes to generate
3. **Code Format**: Select a format (e.g., alphanumeric, custom prefix)
4. **Code Length**: Choose how long each code should be
### Step 3: Link to an Offer
Connect the coupon batch to a specific offer:
1. Select an existing offer from the dropdown menu
2. Or create a new offer specifically for this coupon batch
### Step 4: Set Distribution Rules
Configure how the coupons can be used:
1. **Usage Limit**: Set how many times each code can be redeemed
2. **Batch Limit**: Set a total redemption limit for the entire batch
3. **Customer Limit**: Restrict to one-per-customer or allow multiple uses
4. **Expiration Date**: Set when the coupons will expire
### Step 5: Generate Codes
1. Review your settings
2. Click "Generate Codes"
3. Wait for the system to create your unique coupon codes
## Coupon Batch Management
After creating your coupon batch:
1. View the list of generated codes
2. Export codes for distribution (CSV or Excel format)
3. Monitor usage statistics
4. Adjust settings if needed
# Coupon Distribution Strategies
Source: https://docs.atomcommerce.io/coupons/distribution
Learn effective ways to distribute coupon codes across email, social media, and in-store channels to maximize impact.
# Distribution Strategies
This guide covers effective ways to distribute your coupon codes to maximize their impact.
## Exporting Coupon Codes
Before distribution, you need to export your coupon codes:
1. Navigate to "Coupon Batches" in the main menu
2. Select the batch you want to distribute
3. Click "Export Codes"
4. Choose your preferred format (CSV or Excel)
5. Download the file containing your codes
## Email Distribution
Send coupon codes directly to customers via email:
### Manual Email Export
1. Export your coupon codes as described above
2. Import the codes into your email marketing platform
3. Create an email campaign with personalized coupon codes
4. Schedule and send the campaign
### Best Practices for Email Distribution
* Craft a compelling subject line mentioning the discount
* Create a sense of urgency with clear expiration dates
* Include simple redemption instructions
* Design a mobile-friendly email template
* Test your emails before sending to your full list
## Social Media Distribution
Share coupon codes on social platforms:
1. Create engaging social media posts highlighting your offer
2. Include redemption instructions
3. Consider using unique tracking codes for each platform
4. Schedule posts at optimal times for your audience
## In-Store Distribution
For businesses with physical locations:
1. Create printed cards or flyers with coupon codes
2. Train staff to distribute codes to customers
3. Include codes on receipts for future purchases
4. Use QR codes that customers can scan
## Strategic Distribution Timing
Maximize impact with strategic timing:
* **Welcome Offers**: Send codes to new subscribers or customers
* **Abandoned Cart Recovery**: Send codes to customers who didn't complete checkout
* **Win-Back Campaigns**: Send codes to previously active customers who haven't purchased recently
* **Holiday Promotions**: Distribute codes before major shopping holidays
* **Birthday Offers**: Send personalized codes on customer birthdays
## Measuring Distribution Success
Track the effectiveness of your distribution channels:
1. Create unique coupon batches for each distribution channel
2. Monitor redemption rates by channel
3. Compare performance metrics
4. Adjust your strategy based on the data
# Managing Coupon Batches
Source: https://docs.atomcommerce.io/coupons/managing
Learn how to effectively manage coupon batches in Atom Commerce, including editing, activating, and tracking redemption history.
# Managing Coupons
This guide explains how to effectively manage your coupon batches in Atom Commerce.
## Coupon Batch Dashboard
The Coupon Batches dashboard provides an overview of all your coupon batches:
1. Navigate to "Coupon Batches" in the main menu
2. View all your coupon batches in one place
3. Sort by name, creation date, or status
4. Filter by active, expired, or pending batches
## Viewing Coupon Details
To view detailed information about a specific batch:
1. Click on the batch name from the dashboard
2. View the batch details page with:
* Usage statistics
* Individual coupon codes
* Distribution history
* Performance metrics
## Editing Coupon Batches
To modify an existing coupon batch:
1. Navigate to the batch details page
2. Click "Edit Batch"
3. Update the available settings:
* Batch name
* Usage limits
* Expiration date
* Linked offer
4. Save your changes
Note: Some settings cannot be changed after coupon codes have been generated.
## Activating and Deactivating Batches
Control whether coupon batches are usable:
1. From the Coupon Batches dashboard, find the batch
2. Toggle the "Active" switch
3. Confirm your action
Deactivated batches will have all codes temporarily disabled until reactivated.
## Extending Expiration Dates
To extend the validity of coupons:
1. Navigate to the batch details page
2. Click "Edit Batch"
3. Update the expiration date
4. Save your changes
## Viewing Redemption History
Track how your coupons are being used:
1. Go to the batch details page
2. View the "Redemption History" tab
3. See detailed information on each code:
* When it was used
* Customer who used it
* Order value
* Applied discount
## Deleting Coupon Batches
To permanently remove a coupon batch:
1. Navigate to the batch details page
2. Click "Delete Batch"
3. Confirm your action
Warning: This action cannot be undone and will invalidate all codes in the batch.
# Customer Data Overview
Source: https://docs.atomcommerce.io/customers/overview
Introduction to customer data management in Atom Commerce and how to leverage customer information for better marketing decisions.
# Customer Data Overview
This guide provides an introduction to customer data management in Atom Commerce and how to leverage this information for better marketing decisions.
## Customer Data Dashboard
The Customer Data dashboard gives you a comprehensive view of your customer base:
1. Navigate to "Customers" in the main menu
2. The overview page displays:
* Total customer count
* New customers (last 30 days)
* Average customer lifetime value
* Customer retention rate
* Customer acquisition trends
## Customer Profile Information
For each customer, Atom Commerce stores and displays:
* Basic information (name, email, phone)
* Order history and value
* Product preferences
* Campaign and offer engagement
* Communication preferences
* Segment memberships
## Viewing Individual Customer Profiles
To access detailed information about a specific customer:
1. Go to the "Customers" section
2. Use the search function to find a customer by name or email
3. Click on a customer to view their complete profile
4. Navigate between tabs to see different aspects of their data:
* **Overview**: Key customer metrics and summary
* **Orders**: Complete order history
* **Engagement**: Offer usage and campaign interaction
* **Preferences**: Product interests and communication settings
## Customer Insights
Atom Commerce automatically generates insights about your customers:
* **Purchasing Patterns**: Frequency, average value, and timing
* **Product Affinities**: Categories and products frequently purchased
* **Offer Response**: Which types of promotions drive purchases
* **Churn Risk**: Identification of at-risk customers
## Data Privacy Compliance
Atom Commerce helps you maintain compliance with privacy regulations:
* Customer data is securely stored
* Privacy preferences are tracked and honored
* Data export and deletion requests can be processed
* Consent management is built into the platform
## Data Integration
Customer data is synchronized from various sources:
* Shopify customer profiles
* Order history
* Marketing campaign interaction
* Website behavior (if tracking is enabled)
## Data Export
You can export customer data for external analysis:
1. Go to the "Customers" section
2. Click "Export" in the top right
3. Select the data fields to include
4. Choose your export format (CSV, Excel)
5. Export the data file
## Next Steps
* Learn about [Customer Segmentation](/customers/segmentation) to target specific groups
* Explore how to [Target Offers](/customers/targeting) to different customer segments
# Customer Segmentation
Source: https://docs.atomcommerce.io/customers/segmentation
Learn how to effectively segment your customer base in Atom Commerce to create targeted marketing campaigns and offers.
# Customer Segmentation
This guide explains how to effectively segment your customer base in Atom Commerce to create targeted marketing campaigns and offers.
## Understanding Customer Segmentation
Customer segmentation is the process of dividing your customers into groups based on common characteristics. This allows you to:
* Create more relevant marketing messages
* Design targeted promotions
* Improve customer experience
* Allocate marketing resources more efficiently
* Increase conversion rates and ROI
## Pre-Built Segments
Atom Commerce provides several pre-built customer segments:
* **New Customers**: Customers who made their first purchase within the last 30 days
* **VIP Customers**: High-value customers based on total spend
* **At-Risk Customers**: Previously active customers who haven't purchased recently
* **One-Time Buyers**: Customers who have made only one purchase
* **Frequent Shoppers**: Customers who purchase regularly
* **Discount-Driven**: Customers who primarily purchase during promotions
## Creating Custom Segments
To create your own customer segments:
1. Navigate to "Customers" in the main menu
2. Select the "Segments" tab
3. Click "Create New Segment"
4. Define your segment criteria using the following options:
### Available Segmentation Criteria
* **Purchase Behavior**:
* Order count
* Total spend
* Average order value
* Last order date
* First order date
* **Product Preferences**:
* Product categories purchased
* Specific products purchased
* Brand preferences
* **Demographics** (if available):
* Location
* Age range
* Gender
* **Marketing Engagement**:
* Offer usage
* Campaign interaction
* Email engagement
## Segment Building Interface
The segment builder allows you to:
1. Combine multiple criteria using AND/OR logic
2. Set specific threshold values
3. Create exclusion rules
4. Preview the segment size as you build
5. Save and name your segment for future use
## Analyzing Segments
Once created, you can analyze each segment:
1. Select a segment from the Segments list
2. View the "Segment Analytics" dashboard
3. Compare key metrics between segments
4. Track segment growth or decline over time
## Using Segments for Marketing
Customer segments can be used in several ways:
* **Targeted Offers**: Create promotions for specific segments
* **Marketing Campaigns**: Tailor campaign messaging to different segments
* **Personalized Content**: Customize the shopping experience
* **Customer Journey**: Design segment-specific customer journeys
## Best Practices
* Start with a clear business objective for each segment
* Keep segment definitions clear and actionable
* Regularly review and update segments as customer behavior changes
* Test marketing approaches with different segments
* Use data-driven insights to refine your segmentation strategy
## Next Steps
* Learn how to [Target Offers](/customers/targeting) to your customer segments
* Explore [Campaign Management](/campaigns/creating) to create segment-specific campaigns
# Targeting Offers to Customer Segments
Source: https://docs.atomcommerce.io/customers/targeting
Learn how to create targeted offers for specific customer segments in Atom Commerce to make promotions more relevant and effective.
# Targeting Offers
This guide explains how to create targeted offers for specific customer segments in Atom Commerce, making your promotions more relevant and effective.
## Benefits of Targeted Offers
Targeting specific customer segments with tailored offers provides several advantages:
* Higher conversion rates
* Improved customer loyalty
* More efficient marketing spend
* Better customer experience
* Increased average order value
* Stronger relationships with different customer types
## Types of Targeted Offers
Atom Commerce supports several targeting approaches:
### Segment-Based Targeting
Apply offers to specific customer segments, such as:
* VIP customers
* First-time buyers
* At-risk customers
* Frequent shoppers
* Location-based segments
### Behavior-Based Targeting
Create offers based on customer behavior patterns:
* Cart abandonment
* Browse history
* Previous purchase categories
* Average order value
* Purchase frequency
### Personalized Offers
Provide individualized offers based on:
* Purchase history
* Product preferences
* Past offer engagement
* Customer lifetime value
## Creating a Targeted Offer
To create an offer targeted to specific customers:
1. Start creating a new offer following the standard process
2. In the "Targeting" section, select "Specific Customers"
3. Choose your targeting method:
* **Segment Selection**: Choose from your saved customer segments
* **Customer List**: Upload or select specific customers
* **Targeting Rules**: Build custom targeting criteria
## Setting Targeting Rules
When creating custom targeting rules:
1. Select the criteria for your target audience
2. Combine multiple conditions using AND/OR logic
3. Set exclusion rules if needed
4. Preview the estimated audience size
5. Save your targeting configuration
## Testing Targeted Offers
Before fully launching a targeted offer:
1. Create a test version with a limited audience
2. Monitor initial performance metrics
3. Gather feedback from the target segment
4. Adjust offer parameters based on early results
5. Scale up to the full target audience
## Measuring Target Offer Performance
To evaluate the effectiveness of your targeted offers:
1. Compare conversion rates to non-targeted offers
2. Analyze segment-specific engagement
3. Track incremental sales generated
4. Measure impact on customer lifetime value
5. Monitor changes in customer behavior
## Best Practices
* Start with well-defined customer segments
* Ensure offers are relevant to each segment's needs and preferences
* Create clear, personalized messaging that resonates with each group
* Set appropriate offer values based on segment value
* A/B test different offers for the same segment
* Continuously refine targeting criteria based on performance data
## Next Steps
* Explore [Analytics & Reporting](../analytics/key-metrics.md) to measure your targeted offers
* Learn about [Campaign Management](../campaigns/creating.md) to organize multiple targeted offers
# Allow Multiple Users Per Order
Source: https://docs.atomcommerce.io/discount-limits/multiple-users-per-order
Control whether the same discount can be applied multiple times within a single order
### Step 1: Navigate to Coupon Batches
1. Click "Coupon Batches" in the main navigation
2. Select "Create New Batch"
### Step 2: Configure Basic Settings
Fill in the batch details:
1. **Batch Name**: Choose a descriptive name (e.g., "Summer Sale 2023")
2. **Number of Codes**: Specify how many unique codes to generate
3. **Code Format**: Select a format (e.g., alphanumeric, custom prefix)
4. **Code Length**: Choose how long each code should be
### Step 3: Link to an Offer
Connect the coupon batch to a specific offer:
1. Select an existing offer from the dropdown menu
2. Or create a new offer specifically for this coupon batch
### Step 4: Set Distribution Rules
Configure how the coupons can be used:
1. **Usage Limit**: Set how many times each code can be redeemed
2. **Batch Limit**: Set a total redemption limit for the entire batch
3. **Customer Limit**: Restrict to one-per-customer or allow multiple uses
4. **Expiration Date**: Set when the coupons will expire
### Step 5: Generate Codes
1. Review your settings
2. Click "Generate Codes"
3. Wait for the system to create your unique coupon codes
## Coupon Batch Management
After creating your coupon batch:
1. View the list of generated codes
2. Export codes for distribution (CSV or Excel format)
3. Monitor usage statistics
4. Adjust settings if needed
# Coupon Distribution Strategies
Source: https://docs.atomcommerce.io/coupons/distribution
Learn effective ways to distribute coupon codes across email, social media, and in-store channels to maximize impact.
# Distribution Strategies
This guide covers effective ways to distribute your coupon codes to maximize their impact.
## Exporting Coupon Codes
Before distribution, you need to export your coupon codes:
1. Navigate to "Coupon Batches" in the main menu
2. Select the batch you want to distribute
3. Click "Export Codes"
4. Choose your preferred format (CSV or Excel)
5. Download the file containing your codes
## Email Distribution
Send coupon codes directly to customers via email:
### Manual Email Export
1. Export your coupon codes as described above
2. Import the codes into your email marketing platform
3. Create an email campaign with personalized coupon codes
4. Schedule and send the campaign
### Best Practices for Email Distribution
* Craft a compelling subject line mentioning the discount
* Create a sense of urgency with clear expiration dates
* Include simple redemption instructions
* Design a mobile-friendly email template
* Test your emails before sending to your full list
## Social Media Distribution
Share coupon codes on social platforms:
1. Create engaging social media posts highlighting your offer
2. Include redemption instructions
3. Consider using unique tracking codes for each platform
4. Schedule posts at optimal times for your audience
## In-Store Distribution
For businesses with physical locations:
1. Create printed cards or flyers with coupon codes
2. Train staff to distribute codes to customers
3. Include codes on receipts for future purchases
4. Use QR codes that customers can scan
## Strategic Distribution Timing
Maximize impact with strategic timing:
* **Welcome Offers**: Send codes to new subscribers or customers
* **Abandoned Cart Recovery**: Send codes to customers who didn't complete checkout
* **Win-Back Campaigns**: Send codes to previously active customers who haven't purchased recently
* **Holiday Promotions**: Distribute codes before major shopping holidays
* **Birthday Offers**: Send personalized codes on customer birthdays
## Measuring Distribution Success
Track the effectiveness of your distribution channels:
1. Create unique coupon batches for each distribution channel
2. Monitor redemption rates by channel
3. Compare performance metrics
4. Adjust your strategy based on the data
# Managing Coupon Batches
Source: https://docs.atomcommerce.io/coupons/managing
Learn how to effectively manage coupon batches in Atom Commerce, including editing, activating, and tracking redemption history.
# Managing Coupons
This guide explains how to effectively manage your coupon batches in Atom Commerce.
## Coupon Batch Dashboard
The Coupon Batches dashboard provides an overview of all your coupon batches:
1. Navigate to "Coupon Batches" in the main menu
2. View all your coupon batches in one place
3. Sort by name, creation date, or status
4. Filter by active, expired, or pending batches
## Viewing Coupon Details
To view detailed information about a specific batch:
1. Click on the batch name from the dashboard
2. View the batch details page with:
* Usage statistics
* Individual coupon codes
* Distribution history
* Performance metrics
## Editing Coupon Batches
To modify an existing coupon batch:
1. Navigate to the batch details page
2. Click "Edit Batch"
3. Update the available settings:
* Batch name
* Usage limits
* Expiration date
* Linked offer
4. Save your changes
Note: Some settings cannot be changed after coupon codes have been generated.
## Activating and Deactivating Batches
Control whether coupon batches are usable:
1. From the Coupon Batches dashboard, find the batch
2. Toggle the "Active" switch
3. Confirm your action
Deactivated batches will have all codes temporarily disabled until reactivated.
## Extending Expiration Dates
To extend the validity of coupons:
1. Navigate to the batch details page
2. Click "Edit Batch"
3. Update the expiration date
4. Save your changes
## Viewing Redemption History
Track how your coupons are being used:
1. Go to the batch details page
2. View the "Redemption History" tab
3. See detailed information on each code:
* When it was used
* Customer who used it
* Order value
* Applied discount
## Deleting Coupon Batches
To permanently remove a coupon batch:
1. Navigate to the batch details page
2. Click "Delete Batch"
3. Confirm your action
Warning: This action cannot be undone and will invalidate all codes in the batch.
# Customer Data Overview
Source: https://docs.atomcommerce.io/customers/overview
Introduction to customer data management in Atom Commerce and how to leverage customer information for better marketing decisions.
# Customer Data Overview
This guide provides an introduction to customer data management in Atom Commerce and how to leverage this information for better marketing decisions.
## Customer Data Dashboard
The Customer Data dashboard gives you a comprehensive view of your customer base:
1. Navigate to "Customers" in the main menu
2. The overview page displays:
* Total customer count
* New customers (last 30 days)
* Average customer lifetime value
* Customer retention rate
* Customer acquisition trends
## Customer Profile Information
For each customer, Atom Commerce stores and displays:
* Basic information (name, email, phone)
* Order history and value
* Product preferences
* Campaign and offer engagement
* Communication preferences
* Segment memberships
## Viewing Individual Customer Profiles
To access detailed information about a specific customer:
1. Go to the "Customers" section
2. Use the search function to find a customer by name or email
3. Click on a customer to view their complete profile
4. Navigate between tabs to see different aspects of their data:
* **Overview**: Key customer metrics and summary
* **Orders**: Complete order history
* **Engagement**: Offer usage and campaign interaction
* **Preferences**: Product interests and communication settings
## Customer Insights
Atom Commerce automatically generates insights about your customers:
* **Purchasing Patterns**: Frequency, average value, and timing
* **Product Affinities**: Categories and products frequently purchased
* **Offer Response**: Which types of promotions drive purchases
* **Churn Risk**: Identification of at-risk customers
## Data Privacy Compliance
Atom Commerce helps you maintain compliance with privacy regulations:
* Customer data is securely stored
* Privacy preferences are tracked and honored
* Data export and deletion requests can be processed
* Consent management is built into the platform
## Data Integration
Customer data is synchronized from various sources:
* Shopify customer profiles
* Order history
* Marketing campaign interaction
* Website behavior (if tracking is enabled)
## Data Export
You can export customer data for external analysis:
1. Go to the "Customers" section
2. Click "Export" in the top right
3. Select the data fields to include
4. Choose your export format (CSV, Excel)
5. Export the data file
## Next Steps
* Learn about [Customer Segmentation](/customers/segmentation) to target specific groups
* Explore how to [Target Offers](/customers/targeting) to different customer segments
# Customer Segmentation
Source: https://docs.atomcommerce.io/customers/segmentation
Learn how to effectively segment your customer base in Atom Commerce to create targeted marketing campaigns and offers.
# Customer Segmentation
This guide explains how to effectively segment your customer base in Atom Commerce to create targeted marketing campaigns and offers.
## Understanding Customer Segmentation
Customer segmentation is the process of dividing your customers into groups based on common characteristics. This allows you to:
* Create more relevant marketing messages
* Design targeted promotions
* Improve customer experience
* Allocate marketing resources more efficiently
* Increase conversion rates and ROI
## Pre-Built Segments
Atom Commerce provides several pre-built customer segments:
* **New Customers**: Customers who made their first purchase within the last 30 days
* **VIP Customers**: High-value customers based on total spend
* **At-Risk Customers**: Previously active customers who haven't purchased recently
* **One-Time Buyers**: Customers who have made only one purchase
* **Frequent Shoppers**: Customers who purchase regularly
* **Discount-Driven**: Customers who primarily purchase during promotions
## Creating Custom Segments
To create your own customer segments:
1. Navigate to "Customers" in the main menu
2. Select the "Segments" tab
3. Click "Create New Segment"
4. Define your segment criteria using the following options:
### Available Segmentation Criteria
* **Purchase Behavior**:
* Order count
* Total spend
* Average order value
* Last order date
* First order date
* **Product Preferences**:
* Product categories purchased
* Specific products purchased
* Brand preferences
* **Demographics** (if available):
* Location
* Age range
* Gender
* **Marketing Engagement**:
* Offer usage
* Campaign interaction
* Email engagement
## Segment Building Interface
The segment builder allows you to:
1. Combine multiple criteria using AND/OR logic
2. Set specific threshold values
3. Create exclusion rules
4. Preview the segment size as you build
5. Save and name your segment for future use
## Analyzing Segments
Once created, you can analyze each segment:
1. Select a segment from the Segments list
2. View the "Segment Analytics" dashboard
3. Compare key metrics between segments
4. Track segment growth or decline over time
## Using Segments for Marketing
Customer segments can be used in several ways:
* **Targeted Offers**: Create promotions for specific segments
* **Marketing Campaigns**: Tailor campaign messaging to different segments
* **Personalized Content**: Customize the shopping experience
* **Customer Journey**: Design segment-specific customer journeys
## Best Practices
* Start with a clear business objective for each segment
* Keep segment definitions clear and actionable
* Regularly review and update segments as customer behavior changes
* Test marketing approaches with different segments
* Use data-driven insights to refine your segmentation strategy
## Next Steps
* Learn how to [Target Offers](/customers/targeting) to your customer segments
* Explore [Campaign Management](/campaigns/creating) to create segment-specific campaigns
# Targeting Offers to Customer Segments
Source: https://docs.atomcommerce.io/customers/targeting
Learn how to create targeted offers for specific customer segments in Atom Commerce to make promotions more relevant and effective.
# Targeting Offers
This guide explains how to create targeted offers for specific customer segments in Atom Commerce, making your promotions more relevant and effective.
## Benefits of Targeted Offers
Targeting specific customer segments with tailored offers provides several advantages:
* Higher conversion rates
* Improved customer loyalty
* More efficient marketing spend
* Better customer experience
* Increased average order value
* Stronger relationships with different customer types
## Types of Targeted Offers
Atom Commerce supports several targeting approaches:
### Segment-Based Targeting
Apply offers to specific customer segments, such as:
* VIP customers
* First-time buyers
* At-risk customers
* Frequent shoppers
* Location-based segments
### Behavior-Based Targeting
Create offers based on customer behavior patterns:
* Cart abandonment
* Browse history
* Previous purchase categories
* Average order value
* Purchase frequency
### Personalized Offers
Provide individualized offers based on:
* Purchase history
* Product preferences
* Past offer engagement
* Customer lifetime value
## Creating a Targeted Offer
To create an offer targeted to specific customers:
1. Start creating a new offer following the standard process
2. In the "Targeting" section, select "Specific Customers"
3. Choose your targeting method:
* **Segment Selection**: Choose from your saved customer segments
* **Customer List**: Upload or select specific customers
* **Targeting Rules**: Build custom targeting criteria
## Setting Targeting Rules
When creating custom targeting rules:
1. Select the criteria for your target audience
2. Combine multiple conditions using AND/OR logic
3. Set exclusion rules if needed
4. Preview the estimated audience size
5. Save your targeting configuration
## Testing Targeted Offers
Before fully launching a targeted offer:
1. Create a test version with a limited audience
2. Monitor initial performance metrics
3. Gather feedback from the target segment
4. Adjust offer parameters based on early results
5. Scale up to the full target audience
## Measuring Target Offer Performance
To evaluate the effectiveness of your targeted offers:
1. Compare conversion rates to non-targeted offers
2. Analyze segment-specific engagement
3. Track incremental sales generated
4. Measure impact on customer lifetime value
5. Monitor changes in customer behavior
## Best Practices
* Start with well-defined customer segments
* Ensure offers are relevant to each segment's needs and preferences
* Create clear, personalized messaging that resonates with each group
* Set appropriate offer values based on segment value
* A/B test different offers for the same segment
* Continuously refine targeting criteria based on performance data
## Next Steps
* Explore [Analytics & Reporting](../analytics/key-metrics.md) to measure your targeted offers
* Learn about [Campaign Management](../campaigns/creating.md) to organize multiple targeted offers
# Allow Multiple Users Per Order
Source: https://docs.atomcommerce.io/discount-limits/multiple-users-per-order
Control whether the same discount can be applied multiple times within a single order
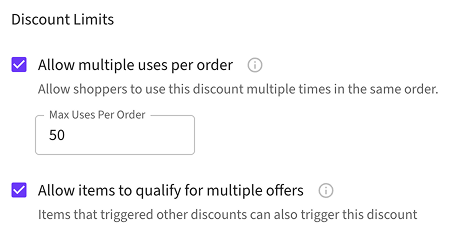 ### Step 3: Configure the Setting
1. **Check the box** to enable multiple uses per order
2. **Leave unchecked** to limit to one use per order (default)
3. Save your changes
### Step 3: Configure the Setting
1. **Check the box** to enable multiple uses per order
2. **Leave unchecked** to limit to one use per order (default)
3. Save your changes
 ## Image
### Using Markdown
The [markdown syntax](https://www.markdownguide.org/basic-syntax/#images) lets you add images using the following code
```md theme={null}

```
Note that the image file size must be less than 5MB. Otherwise, we recommend hosting on a service like [Cloudinary](https://cloudinary.com/) or [S3](https://aws.amazon.com/s3/). You can then use that URL and embed.
### Using Embeds
To get more customizability with images, you can also use embeds to add images
```html theme={null}
## Image
### Using Markdown
The [markdown syntax](https://www.markdownguide.org/basic-syntax/#images) lets you add images using the following code
```md theme={null}

```
Note that the image file size must be less than 5MB. Otherwise, we recommend hosting on a service like [Cloudinary](https://cloudinary.com/) or [S3](https://aws.amazon.com/s3/). You can then use that URL and embed.
### Using Embeds
To get more customizability with images, you can also use embeds to add images
```html theme={null}
 ```
## Embeds and HTML elements
```
## Embeds and HTML elements
 3. Check the **"Set an offer priority"** checkbox to enable priority settings
4. Enter your desired priority value in the input field (higher numbers = higher priority)
5. Use the up/down arrow buttons to increment or decrement the value
3. Check the **"Set an offer priority"** checkbox to enable priority settings
4. Enter your desired priority value in the input field (higher numbers = higher priority)
5. Use the up/down arrow buttons to increment or decrement the value

 ## Viewing Scheduled Offers
After creating scheduled offers, you can manage and monitor them in several ways:
### Offers Dashboard
1. Navigate to the Offers section in your admin panel
2. View the status column to see which offers are:
* **Active**: Currently running
* **Scheduled**: Set to start in the future
* **Expired**: End date has passed
* **Inactive**: Manually deactivated
### Filtering Offers by Status
You can filter the offers list to focus on specific types:
1. Use the Status filter dropdown
2. Select "Scheduled" to see all future offers
3. Select "Active" to see currently running offers
## Editing Scheduled Offers
You can modify the schedule of an existing offer at any time:
1. Find the offer in your offers list
2. Click on it to open the editing view
3. Navigate to the Active Dates section
4. Update the start date, end date, or time restrictions
5. Save your changes
## Best Practices for Offer Scheduling
* **Plan ahead**: Schedule offers at least 24 hours in advance to ensure proper setup
* **Avoid overlaps**: Be careful with overlapping offers that target similar products
* **Consider time zones**: If you serve customers globally, choose the time zone that makes the most sense for your primary audience
* **Use date restrictions strategically**: Combine date and time restrictions for highly targeted promotions such as "Weekend Morning Specials"
* **Review regularly**: Periodically check your scheduled offers to ensure they align with your current marketing strategy
## Next Steps
* Learn about [Managing Active Offers](/offers/managing)
* Explore [Best Practices](/offers/best-practices) for effective promotions
# Contextual Bandits for Personalization
Source: https://docs.atomcommerce.io/optimizations/contextual-bandits
Learn how Atom Commerce uses contextual bandits to personalize discount offers for individual customers, moving beyond traditional A/B testing.
# Contextual Bandits for Personalization
Atom Commerce leverages contextual bandits—a type of reinforcement learning—to optimize promotions by personalizing discount offers for individual customers. This approach moves beyond traditional A/B testing to deliver true 1:1 personalization.
## Understanding Contextual Bandits
Contextual bandits extend the classic multi-armed bandit framework by incorporating customer-specific features when making decisions. They consist of two main components:
### Promotion Performance Predictor
Our Promotion Performance Predictor forecasts how well each discount or promotion option is likely to work by looking at key customer data:
* **Purchase history**
* **Average spend**
* **Engagement level** (e.g. email opens, clicks)
* **Browsing behavior**
* **Current cart contents**
* **Other behavioral signals**
By using these insights, Atom Commerce can estimate which discount will drive the best results for each shopper—so you can deliver smarter, more effective promotions without any guesswork.
### Exploration Strategy
Alongside exploitation (choosing the current best-known discount), the bandit occasionally explores other options to discover potentially better strategies. This exploration is balanced against exploitation to continually refine the system's choices.
## How Atom Commerce Applies Contextual Bandits
### Personalized Discount Optimization
Atom Commerce uses contextual bandits to evaluate a range of discount options and select the one most likely to be effective for each individual customer. By leveraging rich customer data, the system can predict how an individual will respond to a specific discount offer, leading to a tailored promotion strategy instead of a uniform discount applied across the board.
### Dynamic Learning from Customer Behavior
Every interaction with a discount offer—whether accepted or not—provides immediate feedback. The model uses this data to update its predictions continuously, ensuring that the promotion strategy adapts in real time. As a result, the system refines its choices and consistently prioritizes the best-performing offers.
### Efficient Handling of a Large Decision Space
Marketing promotions can vary along multiple dimensions, such as discount amount, type, timing, and delivery channel. Traditional A/B testing struggles as the number of combinations grows exponentially. In contrast, contextual bandits efficiently navigate this complex landscape by making one-to-one decisions for each customer rather than relying on aggregated group-level comparisons.
## Advantages Over Traditional A/B Testing
### Accelerated Learning
Traditional A/B testing splits traffic evenly among a few static variants and requires a long period to gather enough data for statistically significant results. In contrast, contextual bandits learn from every individual interaction in real time, requiring less data and time to converge on an optimal strategy.
### Individual-Level Customization
A/B testing generates aggregate data that may overlook important behavioral differences among customer segments. Contextual bandits make decisions at the individual level, ensuring that each customer receives the discount most likely to maximize their conversion or engagement.
### Scalability for Complex Marketing Campaigns
When multiple promotion dimensions are involved—such as discount type, messaging, timing, and channel—the total number of possible combinations becomes unmanageable with A/B testing. Contextual bandits efficiently manage this multi-dimensional decision space, scaling gracefully as complexity increases.
### Resource Efficiency
Faster convergence toward effective strategies reduces the risk and cost associated with prolonged experimentation. Marketers achieve better outcomes sooner, translating into improved conversion rates and higher overall return on investment.
## Using Offer Optimizations in Atom Commerce
To leverage contextual bandits for your promotions:
1. Create multiple offer variants (e.g., different discount amounts or types)
2. Navigate to "Offer Optimizations" in the main menu
3. Create a new optimization group containing your offer variants
4. Activate the optimization group
5. The system will automatically show the most appropriate offer to each shopper based on their profile and behavior
## Monitoring Performance
Track how your personalized offers are performing:
1. Go to the "Offer Optimizations" dashboard
2. View real-time performance metrics for your optimization groups
3. See how different offers perform across various customer segments
4. Monitor overall lift compared to standard, non-personalized offers
## Best Practices
* Include diverse offer variants in your optimization groups
* Allow enough time for the system to gather sufficient data
* Use meaningful offer differences (e.g., 10% vs. 20% off rather than 19% vs. 20%)
* Review performance regularly but avoid making premature conclusions
* Consider seasonal factors that might influence customer behavior
# Optimization Overview
Source: https://docs.atomcommerce.io/optimizations/overview
Learn how Atom Commerce Offer Optimizations maximize promotional effectiveness through AI-driven personalization and advanced testing capabilities.
# Optimization Overview
Atom Commerce's Offer Optimizations help you maximize the effectiveness of your promotional strategy through AI-driven personalization, data-driven insights, and advanced testing capabilities.
## What Are Offer Optimizations?
Offer Optimizations are tools and features that help you:
* Deliver personalized offers to individual shoppers based on their behavior
* Identify which promotions generate the best results for different customer segments
* Test different discount approaches against each other
* Refine your promotional strategy based on performance data
* Automate optimization for continuous improvement
* Make data-driven decisions about your discount strategy
## Key Optimization Features
### Personalized Offer Delivery
Our advanced [Contextual Bandits](/optimizations/contextual-bandits) system provides true 1:1 personalization:
* **Individual-Level Decisions**: Each shopper receives the offer most likely to convert based on their specific profile
* **Continuous Learning**: The system automatically improves over time as it learns from customer interactions
* **Dynamic Adaptation**: Offer selection adapts to changing customer behavior patterns
* **Multi-Variant Testing**: Test multiple offer variations simultaneously with efficient resource allocation
### Performance Analytics
Get insights into how your offers are performing:
* **Conversion Rate Analysis**: See which offers drive the most conversions
* **Revenue Impact Assessment**: Measure how offers affect your bottom line
* **Customer Behavior Tracking**: Understand how shoppers interact with offers
* **Trend Identification**: Spot patterns in offer performance over time
### Optimization Groups
Create groups of related offers for intelligent distribution:
* **Multiple Offer Variants**: Group similar offers with different parameters
* **Automated Distribution**: Let the system determine which offer to show each customer
* **Performance Tracking**: Compare how offers perform across different customer segments
* **Easy Management**: Control multiple offers as a single optimization unit
## Optimization Dashboard
The central hub for all your optimization activities:
* **Performance Overview**: Quick view of key optimization metrics
* **Active Optimizations**: Status of current optimization groups
* **Improvement Tracking**: Measure optimization impact over time
## Getting Started with Optimizations
### 1. Baseline Analysis
Before optimizing, establish your current performance:
1. Navigate to the Optimizations section
2. View the "Performance Baseline" dashboard
3. Note your current conversion rates, AOV, and revenue
4. Identify offers with potential for improvement
### 2. Creating Your First Optimization Group
Start personalizing your offers:
1. Create multiple offer variants (e.g., different discount amounts)
2. Go to "Offer Optimizations" in the left menu
3. Click "Create New Optimization Group"
4. Select your offers to include in the group
5. Configure the optimization settings
6. Activate your optimization group
### 3. Analyzing Results
Understand and apply your findings:
1. Monitor optimization progress in the Results dashboard
2. Review performance across different customer segments
3. Identify which offers perform best for specific customer types
4. Use these insights to refine your promotional strategy
5. Create additional optimization groups based on your learnings
## Optimization Best Practices
* **Include Diverse Offers**: Create meaningful variations between offers in an optimization group
* **Allow Learning Time**: Give the system enough time to gather sufficient data
* **Consider Multiple Metrics**: Look beyond just conversion rate to revenue impact and AOV
* **Seasonal Adjustments**: Account for seasonal variations in behavior
* **Continuous Improvement**: Use insights from one optimization to inform the next
## Advanced Optimization Capabilities
### Automatic Customer Segmentation
Unlike traditional approaches that require predefined customer segments, our contextual bandits algorithm:
* **Discovers Natural Segments**: Automatically identifies patterns in customer behavior without manual segmentation
* **Personalizes at Scale**: Delivers the right offer to each customer based on their unique characteristics
* **Reduces Manual Setup**: Eliminates the need to create and maintain customer segments
* **Finds Unexpected Patterns**: Discovers relationships between customer attributes and offer preferences that might not be obvious
### Adaptive Learning Over Time
Our bandit algorithms continually adapt to changing customer preferences:
* **Responds to Seasonal Changes**: Automatically adjusts to shifts in buying behavior during different seasons
* **Adapts to Trends**: Quickly identifies and responds to emerging trends and changing preferences
* **Balances Exploration and Exploitation**: Continuously tests new approaches while leveraging what's already working
* **Eliminates Outdated Assumptions**: Never gets stuck in outdated patterns as preferences evolve
This automatic adaptation is particularly valuable as consumer trends can change rapidly (consider how quickly TikTok trends come and go), ensuring your promotional strategy stays current without manual intervention.
# Performance Analysis
Source: https://docs.atomcommerce.io/optimizations/performance
Learn how Performance Analysis in Atom Commerce provides insights into promotional offer performance to optimize discount strategy.
# Performance Analysis
Performance Analysis in Atom Commerce provides deep insights into how your promotional offers are performing, helping you optimize your discount strategy for maximum results.
## Understanding Offer Performance
Effective performance analysis helps you:
* Identify your most successful discount strategies
* Understand which offers drive the most revenue
* Determine the true ROI of your promotional activities
* Spot trends and patterns in customer response
* Make data-driven decisions about future promotions
## Performance Analysis Dashboard
### Accessing the Dashboard
1. Go to "Offer Optimizations" in the left navigation menu
2. Select "Performance Analysis"
3. View the main performance dashboard
### Key Dashboard Components
The dashboard provides several important views:
* **Performance Overview**: Summary metrics of all active offers
* **Offer Comparison**: Side-by-side analysis of different offer types
* **Trend Analysis**: Performance changes over time
* **Top Performers**: Your most successful offers by key metrics
* **Opportunity Analysis**: Areas for potential improvement
## Key Performance Metrics
### Revenue Impact Metrics
* **Total Revenue**: Overall sales generated from offers
* **Incremental Revenue**: Additional revenue attributed to offers
* **Average Order Value (AOV)**: Average purchase amount with offers
* **AOV Lift**: Increase in average order value compared to non-offer purchases
### Conversion Metrics
* **Offer Conversion Rate**: Percentage of offer views resulting in purchases
* **Cart Conversion**: Percentage of offers added to cart that convert to sales
* **Add-to-Cart Rate**: Frequency of offers being added to shopping carts
* **Browsing-to-Purchase**: Conversion from product browsing to completed purchase
### Discount Efficiency Metrics
* **Discount Percentage**: Average discount provided across offers
* **Return on Discount Investment (RODI)**: Revenue generated per dollar discounted
* **Discount Depth Analysis**: Performance by discount percentage tiers
* **Margin Impact**: Effect of discounts on product margins
### Customer Behavior Metrics
* **New vs. Returning Customers**: How different customer types respond
* **Repurchase Rate**: Frequency of repeat purchases after offer redemption
* **Cart Size**: Number of items in carts with offers
* **Browse Time**: Time spent shopping with active offers
## Performance Analysis Tools
### Offer Performance Comparison
Compare different offers side-by-side:
1. Go to "Performance Analysis" > "Offer Comparison"
2. Select the offers you want to compare
3. Choose metrics for comparison
4. View the comparative performance chart
5. Export results if needed
### Time-Based Analysis
Track performance changes over time:
1. Navigate to "Performance Analysis" > "Trend Analysis"
2. Select offers to analyze
3. Choose your time period and granularity (daily, weekly, monthly)
4. View performance trends with trend lines and moving averages
5. Identify seasonal patterns or performance shifts
### Discount Type Analysis
Compare performance across different discount structures:
1. Go to "Performance Analysis" > "Discount Type Performance"
2. View aggregated performance by discount type (percentage, fixed, BXGY, etc.)
3. Compare conversion rates, AOV, and revenue across types
4. Identify which discount structures work best for your store
### Product Performance
See how offers affect specific product performance:
1. Navigate to "Performance Analysis" > "Product Impact"
2. Select products or collections to analyze
3. View how different offers affect product sales
4. Identify which products respond best to promotions
## Creating Custom Analysis Reports
Build tailored reports for your specific needs:
1. Go to "Performance Analysis" > "Custom Reports"
2. Click "Create New Report"
3. Select metrics and dimensions to include
4. Choose visualization types (charts, tables, heat maps)
5. Save your custom report for future reference
6. Schedule automated delivery if desired
## Performance Insights
### Automated Insights
Atom Commerce automatically identifies important patterns:
* **Key Findings**: Automatically highlighted significant trends
* **Anomaly Detection**: Identification of unusual performance patterns
* **Opportunity Alerts**: Notification of potential optimization opportunities
* **Predictive Insights**: Projections based on current performance
### Viewing Insights
Access system-generated insights:
1. Go to "Performance Analysis" > "Insights Feed"
2. View the latest generated insights
3. Filter insights by category or importance
4. Take recommended actions based on insights
## Exporting Analysis Data
Share performance data with your team:
1. From any analysis view, click the "Export" button
2. Select your preferred format (CSV, Excel, PDF)
3. Choose which metrics and charts to include
4. Add optional notes or explanations
5. Download or email the export
## Setting Performance Goals
Establish benchmarks to measure success:
1. Navigate to "Performance Analysis" > "Goals"
2. Click "Create New Goal"
3. Select the metric to track (conversion rate, revenue, etc.)
4. Set your target value
5. Define the timeframe
6. Save your goal
## Performance Analysis Best Practices
* **Compare Similar Time Periods**: Account for seasonal variations
* **Look Beyond Conversion Rate**: Consider revenue and profit metrics
* **Segment Your Analysis**: Break down performance by customer type, device, etc.
* **Consider External Factors**: Account for market conditions, competitors, etc.
* **Focus on Trends**: Pay attention to directional changes over time
* **Use Multiple Metrics**: Don't rely on a single measurement
## Performance Optimization Workflow
Implement a continuous improvement process:
1. **Analyze Current Performance**: Identify strengths and weaknesses
2. **Develop Hypotheses**: Form theories about potential improvements
3. **Test Changes**: Implement changes based on your hypotheses using optimization groups
4. **Measure Results**: Analyze outcomes
5. **Implement Improvements**: Apply successful changes
6. **Repeat the Process**: Continue refining your approach
# Atom Commerce – Smart Discount & Promotion Engine for Shopify
Source: https://docs.atomcommerce.io/overview
Atom Commerce is a smart offer engine built for Shopify merchants and API-first platforms. Build, manage, and optimize promotions (BOGO, bundles, volume pricing, gift with purchase), while letting the system choose the best discount per customer to maximize revenue and maintain margins.
## Introduction
Atom Commerce is a smart **offer & promotion engine** for Shopify merchants. Move beyond static discounts — with a flexible rule builder, real-time decision logic, robust analytics, and seamless Shopify integration, you can run smarter promotions (BOGO, bundles, tiered/volume pricing, gift with purchase) that adapt per customer rather than using one-size-fits-all deals.
## What Atom Commerce Does
Atom Commerce transforms how you create and manage promotions on Shopify. Instead of static, one-size-fits-all discounts, you get a powerful system that:
## Viewing Scheduled Offers
After creating scheduled offers, you can manage and monitor them in several ways:
### Offers Dashboard
1. Navigate to the Offers section in your admin panel
2. View the status column to see which offers are:
* **Active**: Currently running
* **Scheduled**: Set to start in the future
* **Expired**: End date has passed
* **Inactive**: Manually deactivated
### Filtering Offers by Status
You can filter the offers list to focus on specific types:
1. Use the Status filter dropdown
2. Select "Scheduled" to see all future offers
3. Select "Active" to see currently running offers
## Editing Scheduled Offers
You can modify the schedule of an existing offer at any time:
1. Find the offer in your offers list
2. Click on it to open the editing view
3. Navigate to the Active Dates section
4. Update the start date, end date, or time restrictions
5. Save your changes
## Best Practices for Offer Scheduling
* **Plan ahead**: Schedule offers at least 24 hours in advance to ensure proper setup
* **Avoid overlaps**: Be careful with overlapping offers that target similar products
* **Consider time zones**: If you serve customers globally, choose the time zone that makes the most sense for your primary audience
* **Use date restrictions strategically**: Combine date and time restrictions for highly targeted promotions such as "Weekend Morning Specials"
* **Review regularly**: Periodically check your scheduled offers to ensure they align with your current marketing strategy
## Next Steps
* Learn about [Managing Active Offers](/offers/managing)
* Explore [Best Practices](/offers/best-practices) for effective promotions
# Contextual Bandits for Personalization
Source: https://docs.atomcommerce.io/optimizations/contextual-bandits
Learn how Atom Commerce uses contextual bandits to personalize discount offers for individual customers, moving beyond traditional A/B testing.
# Contextual Bandits for Personalization
Atom Commerce leverages contextual bandits—a type of reinforcement learning—to optimize promotions by personalizing discount offers for individual customers. This approach moves beyond traditional A/B testing to deliver true 1:1 personalization.
## Understanding Contextual Bandits
Contextual bandits extend the classic multi-armed bandit framework by incorporating customer-specific features when making decisions. They consist of two main components:
### Promotion Performance Predictor
Our Promotion Performance Predictor forecasts how well each discount or promotion option is likely to work by looking at key customer data:
* **Purchase history**
* **Average spend**
* **Engagement level** (e.g. email opens, clicks)
* **Browsing behavior**
* **Current cart contents**
* **Other behavioral signals**
By using these insights, Atom Commerce can estimate which discount will drive the best results for each shopper—so you can deliver smarter, more effective promotions without any guesswork.
### Exploration Strategy
Alongside exploitation (choosing the current best-known discount), the bandit occasionally explores other options to discover potentially better strategies. This exploration is balanced against exploitation to continually refine the system's choices.
## How Atom Commerce Applies Contextual Bandits
### Personalized Discount Optimization
Atom Commerce uses contextual bandits to evaluate a range of discount options and select the one most likely to be effective for each individual customer. By leveraging rich customer data, the system can predict how an individual will respond to a specific discount offer, leading to a tailored promotion strategy instead of a uniform discount applied across the board.
### Dynamic Learning from Customer Behavior
Every interaction with a discount offer—whether accepted or not—provides immediate feedback. The model uses this data to update its predictions continuously, ensuring that the promotion strategy adapts in real time. As a result, the system refines its choices and consistently prioritizes the best-performing offers.
### Efficient Handling of a Large Decision Space
Marketing promotions can vary along multiple dimensions, such as discount amount, type, timing, and delivery channel. Traditional A/B testing struggles as the number of combinations grows exponentially. In contrast, contextual bandits efficiently navigate this complex landscape by making one-to-one decisions for each customer rather than relying on aggregated group-level comparisons.
## Advantages Over Traditional A/B Testing
### Accelerated Learning
Traditional A/B testing splits traffic evenly among a few static variants and requires a long period to gather enough data for statistically significant results. In contrast, contextual bandits learn from every individual interaction in real time, requiring less data and time to converge on an optimal strategy.
### Individual-Level Customization
A/B testing generates aggregate data that may overlook important behavioral differences among customer segments. Contextual bandits make decisions at the individual level, ensuring that each customer receives the discount most likely to maximize their conversion or engagement.
### Scalability for Complex Marketing Campaigns
When multiple promotion dimensions are involved—such as discount type, messaging, timing, and channel—the total number of possible combinations becomes unmanageable with A/B testing. Contextual bandits efficiently manage this multi-dimensional decision space, scaling gracefully as complexity increases.
### Resource Efficiency
Faster convergence toward effective strategies reduces the risk and cost associated with prolonged experimentation. Marketers achieve better outcomes sooner, translating into improved conversion rates and higher overall return on investment.
## Using Offer Optimizations in Atom Commerce
To leverage contextual bandits for your promotions:
1. Create multiple offer variants (e.g., different discount amounts or types)
2. Navigate to "Offer Optimizations" in the main menu
3. Create a new optimization group containing your offer variants
4. Activate the optimization group
5. The system will automatically show the most appropriate offer to each shopper based on their profile and behavior
## Monitoring Performance
Track how your personalized offers are performing:
1. Go to the "Offer Optimizations" dashboard
2. View real-time performance metrics for your optimization groups
3. See how different offers perform across various customer segments
4. Monitor overall lift compared to standard, non-personalized offers
## Best Practices
* Include diverse offer variants in your optimization groups
* Allow enough time for the system to gather sufficient data
* Use meaningful offer differences (e.g., 10% vs. 20% off rather than 19% vs. 20%)
* Review performance regularly but avoid making premature conclusions
* Consider seasonal factors that might influence customer behavior
# Optimization Overview
Source: https://docs.atomcommerce.io/optimizations/overview
Learn how Atom Commerce Offer Optimizations maximize promotional effectiveness through AI-driven personalization and advanced testing capabilities.
# Optimization Overview
Atom Commerce's Offer Optimizations help you maximize the effectiveness of your promotional strategy through AI-driven personalization, data-driven insights, and advanced testing capabilities.
## What Are Offer Optimizations?
Offer Optimizations are tools and features that help you:
* Deliver personalized offers to individual shoppers based on their behavior
* Identify which promotions generate the best results for different customer segments
* Test different discount approaches against each other
* Refine your promotional strategy based on performance data
* Automate optimization for continuous improvement
* Make data-driven decisions about your discount strategy
## Key Optimization Features
### Personalized Offer Delivery
Our advanced [Contextual Bandits](/optimizations/contextual-bandits) system provides true 1:1 personalization:
* **Individual-Level Decisions**: Each shopper receives the offer most likely to convert based on their specific profile
* **Continuous Learning**: The system automatically improves over time as it learns from customer interactions
* **Dynamic Adaptation**: Offer selection adapts to changing customer behavior patterns
* **Multi-Variant Testing**: Test multiple offer variations simultaneously with efficient resource allocation
### Performance Analytics
Get insights into how your offers are performing:
* **Conversion Rate Analysis**: See which offers drive the most conversions
* **Revenue Impact Assessment**: Measure how offers affect your bottom line
* **Customer Behavior Tracking**: Understand how shoppers interact with offers
* **Trend Identification**: Spot patterns in offer performance over time
### Optimization Groups
Create groups of related offers for intelligent distribution:
* **Multiple Offer Variants**: Group similar offers with different parameters
* **Automated Distribution**: Let the system determine which offer to show each customer
* **Performance Tracking**: Compare how offers perform across different customer segments
* **Easy Management**: Control multiple offers as a single optimization unit
## Optimization Dashboard
The central hub for all your optimization activities:
* **Performance Overview**: Quick view of key optimization metrics
* **Active Optimizations**: Status of current optimization groups
* **Improvement Tracking**: Measure optimization impact over time
## Getting Started with Optimizations
### 1. Baseline Analysis
Before optimizing, establish your current performance:
1. Navigate to the Optimizations section
2. View the "Performance Baseline" dashboard
3. Note your current conversion rates, AOV, and revenue
4. Identify offers with potential for improvement
### 2. Creating Your First Optimization Group
Start personalizing your offers:
1. Create multiple offer variants (e.g., different discount amounts)
2. Go to "Offer Optimizations" in the left menu
3. Click "Create New Optimization Group"
4. Select your offers to include in the group
5. Configure the optimization settings
6. Activate your optimization group
### 3. Analyzing Results
Understand and apply your findings:
1. Monitor optimization progress in the Results dashboard
2. Review performance across different customer segments
3. Identify which offers perform best for specific customer types
4. Use these insights to refine your promotional strategy
5. Create additional optimization groups based on your learnings
## Optimization Best Practices
* **Include Diverse Offers**: Create meaningful variations between offers in an optimization group
* **Allow Learning Time**: Give the system enough time to gather sufficient data
* **Consider Multiple Metrics**: Look beyond just conversion rate to revenue impact and AOV
* **Seasonal Adjustments**: Account for seasonal variations in behavior
* **Continuous Improvement**: Use insights from one optimization to inform the next
## Advanced Optimization Capabilities
### Automatic Customer Segmentation
Unlike traditional approaches that require predefined customer segments, our contextual bandits algorithm:
* **Discovers Natural Segments**: Automatically identifies patterns in customer behavior without manual segmentation
* **Personalizes at Scale**: Delivers the right offer to each customer based on their unique characteristics
* **Reduces Manual Setup**: Eliminates the need to create and maintain customer segments
* **Finds Unexpected Patterns**: Discovers relationships between customer attributes and offer preferences that might not be obvious
### Adaptive Learning Over Time
Our bandit algorithms continually adapt to changing customer preferences:
* **Responds to Seasonal Changes**: Automatically adjusts to shifts in buying behavior during different seasons
* **Adapts to Trends**: Quickly identifies and responds to emerging trends and changing preferences
* **Balances Exploration and Exploitation**: Continuously tests new approaches while leveraging what's already working
* **Eliminates Outdated Assumptions**: Never gets stuck in outdated patterns as preferences evolve
This automatic adaptation is particularly valuable as consumer trends can change rapidly (consider how quickly TikTok trends come and go), ensuring your promotional strategy stays current without manual intervention.
# Performance Analysis
Source: https://docs.atomcommerce.io/optimizations/performance
Learn how Performance Analysis in Atom Commerce provides insights into promotional offer performance to optimize discount strategy.
# Performance Analysis
Performance Analysis in Atom Commerce provides deep insights into how your promotional offers are performing, helping you optimize your discount strategy for maximum results.
## Understanding Offer Performance
Effective performance analysis helps you:
* Identify your most successful discount strategies
* Understand which offers drive the most revenue
* Determine the true ROI of your promotional activities
* Spot trends and patterns in customer response
* Make data-driven decisions about future promotions
## Performance Analysis Dashboard
### Accessing the Dashboard
1. Go to "Offer Optimizations" in the left navigation menu
2. Select "Performance Analysis"
3. View the main performance dashboard
### Key Dashboard Components
The dashboard provides several important views:
* **Performance Overview**: Summary metrics of all active offers
* **Offer Comparison**: Side-by-side analysis of different offer types
* **Trend Analysis**: Performance changes over time
* **Top Performers**: Your most successful offers by key metrics
* **Opportunity Analysis**: Areas for potential improvement
## Key Performance Metrics
### Revenue Impact Metrics
* **Total Revenue**: Overall sales generated from offers
* **Incremental Revenue**: Additional revenue attributed to offers
* **Average Order Value (AOV)**: Average purchase amount with offers
* **AOV Lift**: Increase in average order value compared to non-offer purchases
### Conversion Metrics
* **Offer Conversion Rate**: Percentage of offer views resulting in purchases
* **Cart Conversion**: Percentage of offers added to cart that convert to sales
* **Add-to-Cart Rate**: Frequency of offers being added to shopping carts
* **Browsing-to-Purchase**: Conversion from product browsing to completed purchase
### Discount Efficiency Metrics
* **Discount Percentage**: Average discount provided across offers
* **Return on Discount Investment (RODI)**: Revenue generated per dollar discounted
* **Discount Depth Analysis**: Performance by discount percentage tiers
* **Margin Impact**: Effect of discounts on product margins
### Customer Behavior Metrics
* **New vs. Returning Customers**: How different customer types respond
* **Repurchase Rate**: Frequency of repeat purchases after offer redemption
* **Cart Size**: Number of items in carts with offers
* **Browse Time**: Time spent shopping with active offers
## Performance Analysis Tools
### Offer Performance Comparison
Compare different offers side-by-side:
1. Go to "Performance Analysis" > "Offer Comparison"
2. Select the offers you want to compare
3. Choose metrics for comparison
4. View the comparative performance chart
5. Export results if needed
### Time-Based Analysis
Track performance changes over time:
1. Navigate to "Performance Analysis" > "Trend Analysis"
2. Select offers to analyze
3. Choose your time period and granularity (daily, weekly, monthly)
4. View performance trends with trend lines and moving averages
5. Identify seasonal patterns or performance shifts
### Discount Type Analysis
Compare performance across different discount structures:
1. Go to "Performance Analysis" > "Discount Type Performance"
2. View aggregated performance by discount type (percentage, fixed, BXGY, etc.)
3. Compare conversion rates, AOV, and revenue across types
4. Identify which discount structures work best for your store
### Product Performance
See how offers affect specific product performance:
1. Navigate to "Performance Analysis" > "Product Impact"
2. Select products or collections to analyze
3. View how different offers affect product sales
4. Identify which products respond best to promotions
## Creating Custom Analysis Reports
Build tailored reports for your specific needs:
1. Go to "Performance Analysis" > "Custom Reports"
2. Click "Create New Report"
3. Select metrics and dimensions to include
4. Choose visualization types (charts, tables, heat maps)
5. Save your custom report for future reference
6. Schedule automated delivery if desired
## Performance Insights
### Automated Insights
Atom Commerce automatically identifies important patterns:
* **Key Findings**: Automatically highlighted significant trends
* **Anomaly Detection**: Identification of unusual performance patterns
* **Opportunity Alerts**: Notification of potential optimization opportunities
* **Predictive Insights**: Projections based on current performance
### Viewing Insights
Access system-generated insights:
1. Go to "Performance Analysis" > "Insights Feed"
2. View the latest generated insights
3. Filter insights by category or importance
4. Take recommended actions based on insights
## Exporting Analysis Data
Share performance data with your team:
1. From any analysis view, click the "Export" button
2. Select your preferred format (CSV, Excel, PDF)
3. Choose which metrics and charts to include
4. Add optional notes or explanations
5. Download or email the export
## Setting Performance Goals
Establish benchmarks to measure success:
1. Navigate to "Performance Analysis" > "Goals"
2. Click "Create New Goal"
3. Select the metric to track (conversion rate, revenue, etc.)
4. Set your target value
5. Define the timeframe
6. Save your goal
## Performance Analysis Best Practices
* **Compare Similar Time Periods**: Account for seasonal variations
* **Look Beyond Conversion Rate**: Consider revenue and profit metrics
* **Segment Your Analysis**: Break down performance by customer type, device, etc.
* **Consider External Factors**: Account for market conditions, competitors, etc.
* **Focus on Trends**: Pay attention to directional changes over time
* **Use Multiple Metrics**: Don't rely on a single measurement
## Performance Optimization Workflow
Implement a continuous improvement process:
1. **Analyze Current Performance**: Identify strengths and weaknesses
2. **Develop Hypotheses**: Form theories about potential improvements
3. **Test Changes**: Implement changes based on your hypotheses using optimization groups
4. **Measure Results**: Analyze outcomes
5. **Implement Improvements**: Apply successful changes
6. **Repeat the Process**: Continue refining your approach
# Atom Commerce – Smart Discount & Promotion Engine for Shopify
Source: https://docs.atomcommerce.io/overview
Atom Commerce is a smart offer engine built for Shopify merchants and API-first platforms. Build, manage, and optimize promotions (BOGO, bundles, volume pricing, gift with purchase), while letting the system choose the best discount per customer to maximize revenue and maintain margins.
## Introduction
Atom Commerce is a smart **offer & promotion engine** for Shopify merchants. Move beyond static discounts — with a flexible rule builder, real-time decision logic, robust analytics, and seamless Shopify integration, you can run smarter promotions (BOGO, bundles, tiered/volume pricing, gift with purchase) that adapt per customer rather than using one-size-fits-all deals.
## What Atom Commerce Does
Atom Commerce transforms how you create and manage promotions on Shopify. Instead of static, one-size-fits-all discounts, you get a powerful system that:
 ## POS Device Configuration
After you turn on the smart grid tile in Shopify admin, you need to check and set up the settings on your POS device.
### Step 1: Find the Atom Commerce Tile
1. On your POS device, open the smart grid (the main screen with buttons)
2. Look for the **Atom Commerce Ready** tile (it shows the Atom Commerce logo with circles)
3. You should see this tile on your smart grid screen with your other POS buttons
## POS Device Configuration
After you turn on the smart grid tile in Shopify admin, you need to check and set up the settings on your POS device.
### Step 1: Find the Atom Commerce Tile
1. On your POS device, open the smart grid (the main screen with buttons)
2. Look for the **Atom Commerce Ready** tile (it shows the Atom Commerce logo with circles)
3. You should see this tile on your smart grid screen with your other POS buttons
 ### Step 2: Open Atom POS Configuration
1. Tap the **Atom Commerce Ready** tile
2. This opens the **Atom POS Configuration** screen
### Step 3: Verify POS Mode
1. In the **Atom Commerce Connector** section, find **POS Mode**
2. Confirm that the displayed mode matches your Shopify POS subscription:
* If you have **POS PRO**, it should show **PRO**
* If you have **POS LITE**, it should show **LITE**
3. If the wrong mode is displayed, switch to the correct mode:
* Scroll down to the **Mode & Discount Management** section
* Click the **Switch to PRO** button (if you need PRO mode)
* Or click the **Switch to LITE** button (if you need LITE mode)
* Wait a few seconds for it to update
### Step 2: Open Atom POS Configuration
1. Tap the **Atom Commerce Ready** tile
2. This opens the **Atom POS Configuration** screen
### Step 3: Verify POS Mode
1. In the **Atom Commerce Connector** section, find **POS Mode**
2. Confirm that the displayed mode matches your Shopify POS subscription:
* If you have **POS PRO**, it should show **PRO**
* If you have **POS LITE**, it should show **LITE**
3. If the wrong mode is displayed, switch to the correct mode:
* Scroll down to the **Mode & Discount Management** section
* Click the **Switch to PRO** button (if you need PRO mode)
* Or click the **Switch to LITE** button (if you need LITE mode)
* Wait a few seconds for it to update
 ## Verification
After you finish the setup, check that everything is working:
1. **Shopify Admin**: Make sure the Smart grid tile is set to "Added" for Atom Commerce Discounts
2. **POS Device**: Check that the "Atom Commerce Ready" tile shows up in your smart grid
3. **POS Mode**: Verify that POS Mode shows the correct mode (PRO or LITE) matching your Shopify POS subscription
4. **Test a Discount**: Try using an Atom Commerce discount on a test sale on your POS device
## Troubleshooting
### Smart Grid Tile Not Appearing
If the "Atom Commerce Ready" tile doesn't show up on your POS device:
* Check that the Smart grid tile is set to "Added" in Shopify admin POS settings
* Refresh your POS device or close and reopen the POS app
* Make sure you have the latest version of the Atom Commerce Connector installed
### POS Mode Not Correct
If POS Mode doesn't match your Shopify POS subscription:
* Click **Switch to PRO** or **Switch to LITE** in the POS configuration screen to match your subscription
* Click **Clear Atom Session** to refresh the connection
* If you're unable to set the correct mode, contact [support@atomcommerce.io](mailto:support@atomcommerce.io) for assistance
### Discounts Not Applying
If discounts aren't working on POS sales:
* Make sure POS Mode matches your Shopify POS subscription (PRO or LITE)
* Check that your offers are set up to work with POS channels
* Make sure your offers are active and the dates are correct
* See the [Managing Channels](/channels/managing) guide for help with channel settings
## Next Steps
Now that POS is set up, you can:
* Learn about [Managing Channels](/channels/managing) to set up offers for POS
* Check out [Creating Offers](/offers/creating-offers) to make discounts that work with POS
* Read the [Channel Overview](/channels/overview) to learn how channels work in Atom Commerce
# Quickstart Guide
Source: https://docs.atomcommerce.io/quickstart
Get started with Atom Commerce in minutes. Learn how to create your first promotion and start driving sales.
## Welcome to Atom Commerce
Atom Commerce is a smart offer engine that helps Shopify merchants create, manage, and optimize promotions. This quickstart guide will help you create your first offer in just a few steps.
## Verification
After you finish the setup, check that everything is working:
1. **Shopify Admin**: Make sure the Smart grid tile is set to "Added" for Atom Commerce Discounts
2. **POS Device**: Check that the "Atom Commerce Ready" tile shows up in your smart grid
3. **POS Mode**: Verify that POS Mode shows the correct mode (PRO or LITE) matching your Shopify POS subscription
4. **Test a Discount**: Try using an Atom Commerce discount on a test sale on your POS device
## Troubleshooting
### Smart Grid Tile Not Appearing
If the "Atom Commerce Ready" tile doesn't show up on your POS device:
* Check that the Smart grid tile is set to "Added" in Shopify admin POS settings
* Refresh your POS device or close and reopen the POS app
* Make sure you have the latest version of the Atom Commerce Connector installed
### POS Mode Not Correct
If POS Mode doesn't match your Shopify POS subscription:
* Click **Switch to PRO** or **Switch to LITE** in the POS configuration screen to match your subscription
* Click **Clear Atom Session** to refresh the connection
* If you're unable to set the correct mode, contact [support@atomcommerce.io](mailto:support@atomcommerce.io) for assistance
### Discounts Not Applying
If discounts aren't working on POS sales:
* Make sure POS Mode matches your Shopify POS subscription (PRO or LITE)
* Check that your offers are set up to work with POS channels
* Make sure your offers are active and the dates are correct
* See the [Managing Channels](/channels/managing) guide for help with channel settings
## Next Steps
Now that POS is set up, you can:
* Learn about [Managing Channels](/channels/managing) to set up offers for POS
* Check out [Creating Offers](/offers/creating-offers) to make discounts that work with POS
* Read the [Channel Overview](/channels/overview) to learn how channels work in Atom Commerce
# Quickstart Guide
Source: https://docs.atomcommerce.io/quickstart
Get started with Atom Commerce in minutes. Learn how to create your first promotion and start driving sales.
## Welcome to Atom Commerce
Atom Commerce is a smart offer engine that helps Shopify merchants create, manage, and optimize promotions. This quickstart guide will help you create your first offer in just a few steps.